- Exabeam Data Lake Agent Log Collectors
- Prerequisites for Installing Log Collector Agent
- Install Exabeam Data Lake Log Collectors
- Configure Exabeam Data Lake Log Collectors
- Upgrade Exabeam Data Lake Log Collectors
- Uninstall Exabeam Data Lake Log Collectors
- Uninstall Exabeam Windows Log Collectors via PowerShell
- Uninstall All Exabeam Windows Log Collectors via MSI Package
- Uninstalling Exabeam Data Lake Log Collectors on Windows via MSI Silent Mode
- Uninstall Exabeam Data Lake Log Collectors on Linux & Ubuntu
- Remove an Uninstalled Collector from the Collector Management Page
- Exabeam Data Lake Database Log Collector
- Cisco eStreamer Log Collector in Exabeam Data Lake
- Debug an Exabeam Data Lake Log Collector Agent
Cisco eStreamer Log Collector in Exabeam Data Lake
Data Lake provides the ability for organizations to collect data from their Cisco FireSight systems. Unlike FileBeats and WIndowsBeats collectors, the eStreamer collector is a service that runs on the Data Lake host and connects to the remote servers communicating over the Cisco eStreamer protocol.
In a multi-node cluster, note that the eStreamer collector runs on the Data Lake master node exclusively. To connect to the eStreamer server, Data Lake uses eNcore version 3.7.4 service library.
Prerequisites for Setting Up Cisco eStreamer Collector
Port 8302 is opened for inbound and outbound traffic on the customer's firewall. This is the default port on which the eStreamer server runs.
client.pkcs12file (this file is generated in the section Configure eStreamer Client)Public IP address of the Data Lake master node
Network route between Data Lake master node and eStreamer client (such that endpoints respond to pings and allow bi-directional traffic).
Configure eStreamer Client for Data Lake
This first section generates the public-private key pair needed to run eNcore. This key pair is delivered in a pkcs12 file.
Log into eStreamer Server.

Navigate to the eStreamer integration page under System > Integration > eStreamer
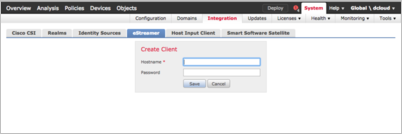
Select Create Client at the top right.

You will be asked for a Hostname (required) and Password (optional).
If you choose to enter a password, then you will be required to enter the same password later in the setup process while configuring the eNcore for parsing the certificate on the client side. Please make note of this password and that it is not the login credential password.

Use IP of the Exabeam Site Collector (with OpenVPN configured) returned from the following command:
curl -s ipinfo.io/ip
If no IP is returned, use the IP of the site collector (with OpenVPN configured) which appears in Data Lake Collector Management menu. Navigate to Settings > Collector Management for a listing of collectors..
Ensure the following port forwarding rule is added to the site collector host:
sudo firewall-cmd --add-forward-port=port=8302:proto=tcp:toport=8302:toaddr=<eStreamer IP >  --permanent
sudo firewall-cmd --reload
sudo firewall-cmd --list-all
Note
The above firewall
add-forwardrule will allow traffic to masquerade as the public IP of the site collector to the eStreamer server as if the VPN tunnel is not there. Double check this masquerade setting in the output of thelist-allcommand.
Download the client certificate by clicking the download icon to the right of the Hostname.
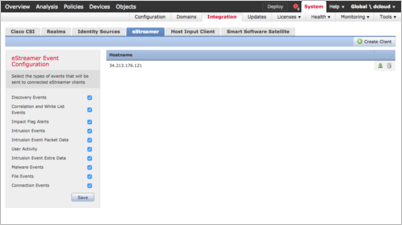
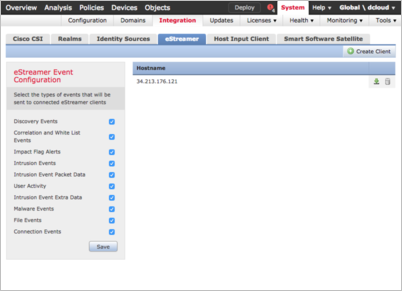
On the left side of this same page select all of the event types that will be collected by the eStreamer clients and click Save.

Run eStreamer Client for Exabeam Data Lake Log Collecting
Start eStreamer Collector
Copy the certificate file that was downloaded in the section Configure eStreamer Client. In the below example, replace path with the path to where the certificate was saved.
scp /path/client.pkcs12 user@host:/opt/exabeam/data/lms/estreamer/client.pkcs12
Configure the collector and enable the
estreamer.conffile. located in the/opt/exabeam/data/lms/estreamer/directory. In the server block, edit using the proper site collector IP address (internal tunnel adapter IP) and certificate filename. (Leave thepkcs12Filepathfield alone ifclient.pkcs12will be overwritten.)"servers": [ { "host": "<site_collector_ip>", "pkcs12Filepath": "[client.pkcs12]", "port": 8302, "tls@comment": "Valid values are 1.0 and 1.2", "tlsVersion": 1.2 } ]You will be asked to enter the eStreamer service host (the public IP Address of the host box) as well as the password (the same certificate password you created in Step 4: of Configure eStreamer Client).
cd /opt/exabeam/bin/lms/
bash /opt/exabeam/bin/shell-environment.bash
./lms-estreamer-install
Start the eStreamer collector
cd /opt/exabeam/bin/lms
./lms-estreamer-start
Note
By default eStreamer will begin collecting logs from 30 days before installation. See Configure Start Time for more information on this parameter.
Stop eStreamer Collector
This stops eStreamer but does not uninstall the client.
./lms-estreamer-stop
Verify eStreamer Client Status for Exabeam Data Lake Log Collecting
Verify Health of eStreamer Collector
There is a health check for eStreamer Collector through the Health Status page in the UI. However, if the collector is NOT enabled, the Health Status page will show the client as 'Healthy'.
You can also check estreamer.log and the logs will give more detailed information about the status of the client. For example, if there are fetching errors, etc.
Verify Status of eStreamer Collector
To check the status of the service from the CLI:
./lms-estreamer-status
Uninstall Exabeam Data Lake eStreamer Log Collector
This script stops the service, disables, and removes it. You will lose all of the current states. However, this does NOT remove the certificate; if mistakes are made during install you can run this script multiple times and restart.
./lms-estreamer-uninstall
Additionally, remove the hostname and password from the eStreamer Server console.
Log into eStreamer Server.

Navigate to the eStreamer integration page under System > Integration > eStreamer.
Select the applicable eStreamer client.

Remove the Hostname and password record.
