Deploy in Amazon Web Services (AWS)
Instantiate each virtual machine in your cluster.
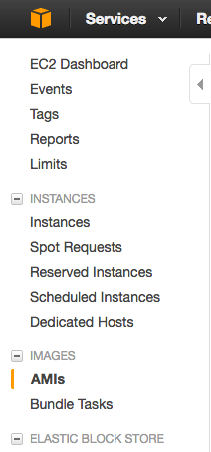
In the EC2 Console select Images > AMI from the menu on the left.

Select Private Images from the drop-down menu to the left of the search field, then enter your AMI ID in the search field.

In the search results, select the AMI you want to launch by ticking the box to the left. Click Launch at the upper left.

The Choose an Instance Type window will open.
Using the virtual machine specifications guidelines at the beginning of this document, choose an instance that meets your requirements. For example, if your are instantiating a master node, select the EX-4000 instance for Advanced Analytics. For example, if your are instantiating a master node, select the EX-3000 instance for Data Lake.

Select Next: Configure Instance Details.
For Configure Instance Details use the default settings unless there is a need to change the Network and Subnet.
Select Security Group.
At the Configure Security Group page, select Inbound Rules, and then click Add Rule to create a rule with:
Type -
All trafficSource - Set to your Security Group ID for your pool of peer hosts. (Security group ID is an alpha-numeric string; for example,
sg-asd9867asdf8768.)

Select Next: Add Storage. Accept the default configuration.

Select Next: Add Tag.
At the Add Tags screen, select the Add Tag button and give your instance a name. A tag is a label that you assign to an AWS resource. Each tag consists of a key and an optional value, both of which you define. Tags enable you to categorize your AWS resources in different ways, for example, by purpose, owner, or environment. This is useful when you have many resources of the same type—you can quickly identify a specific resource based on the tags you've assigned to it
Accept the default values in the remainder fields and select Review and Launch.
After reviewing your settings, click Launch.
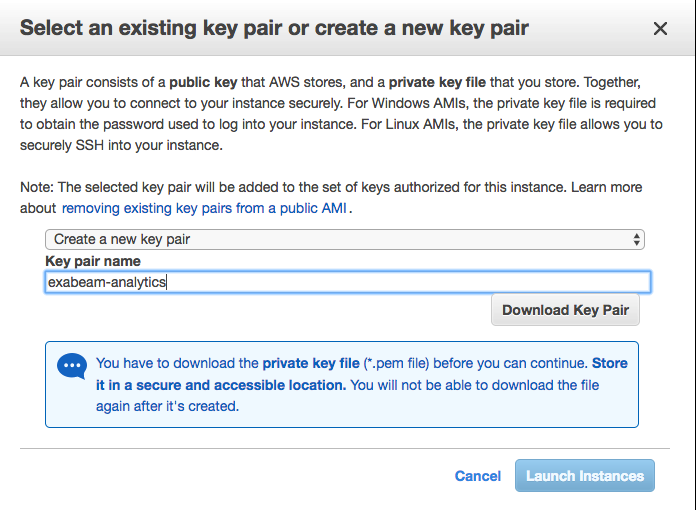
When prompted to select an existing key pair or create a new key pair, select Create a new key pair and name it.
Note
If you saved the key to a *nix system, the key must have 400 permission.

Select Launch Instance.
The instance will take some time to initialize. To check on the status, find the instance in the Running Instances page.
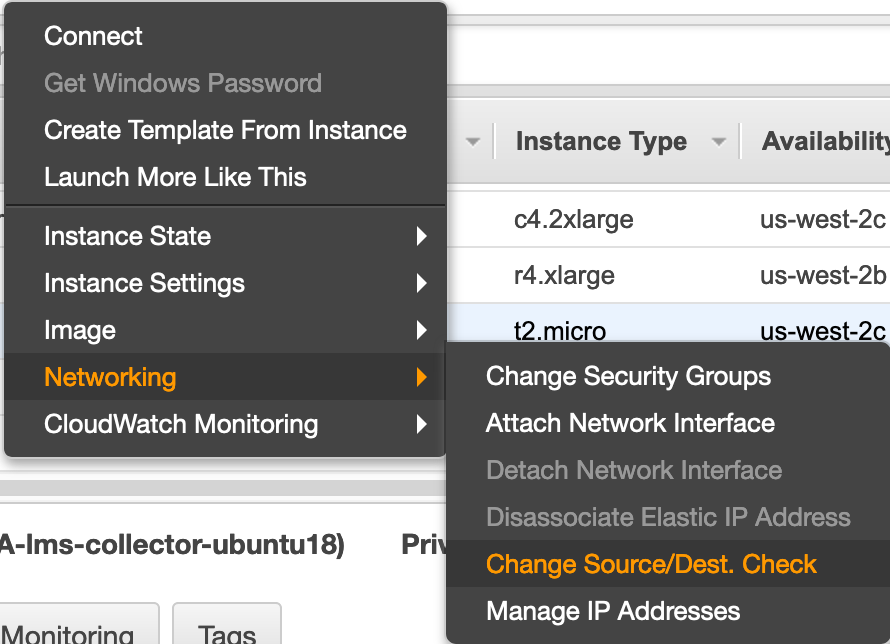
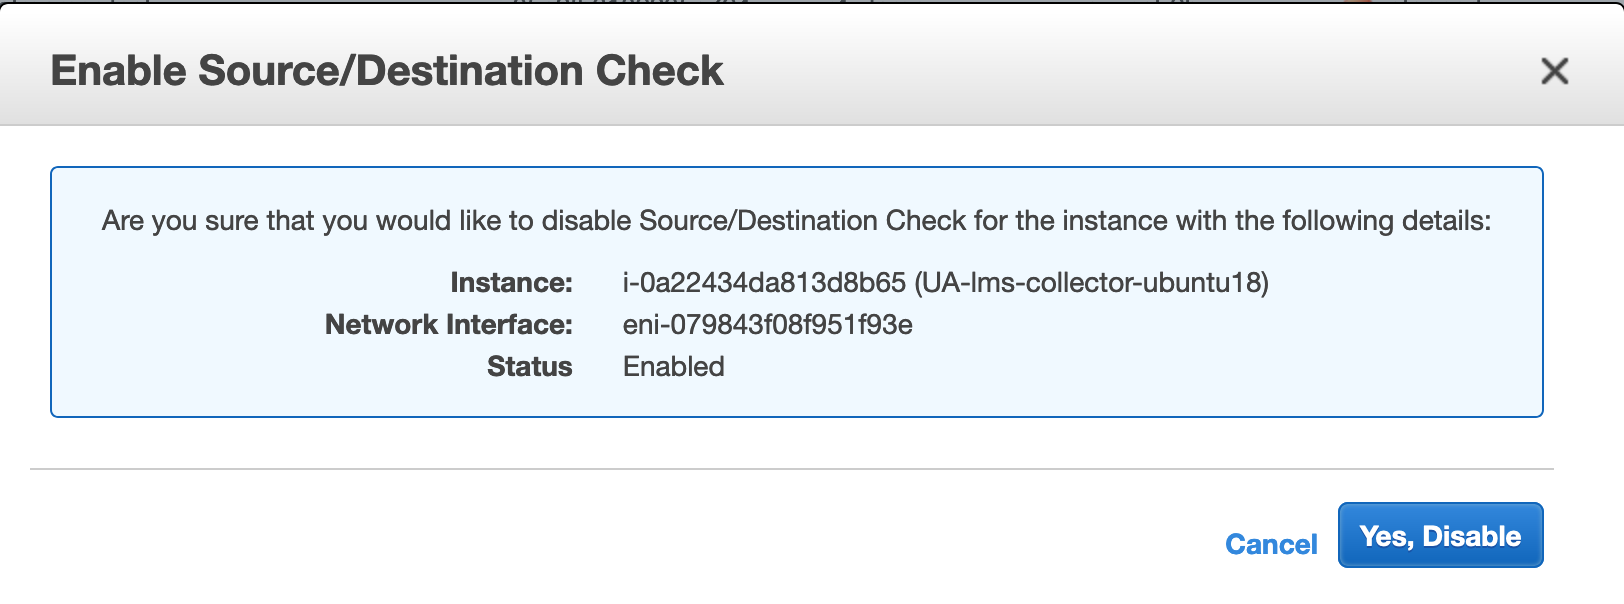
Disable source and destination checks by selecting your instance and then right-click to select Networking > Change Source/Dest. Check.

Click Yes, Disable.

You are now ready to deploy your product. Please refer to your product's Exabeam Administration Guide for installation and configuration steps. Use a terminal application, such as Moba Xterm, to connect to the host via SSH.