Rack Mounting Instructions
Follow the rack mounting instructions to install the Exabeam appliance chassis into a rack unit.
This section provides information on installing the Exabeam appliance chassis into a rack unit with the rails provided. There are a variety of rack units on the market, which may mean the assembly procedure will differ slightly. Please also refer to the installation instructions that came with the your rack unit.
Note
EX2003 and EX4003 are 1U rack units. The rail fits a rack between 26" and 33.5" deep.
EX3000 and EX3003 are 2U rack unit. The rail fits a rack between 26.5" and 36.4" deep
Identify the Sections of the Rack Rails
The rack rails must be properly identified to assemble them in the correct order.
The chassis package includes two rack rail assemblies in the rack mounting kit. Each assembly consists of three sections:
an inner fixed chassis rail that secures directly to the server chassis.
Note
For EX2003 and EX4003, the inner rails are pre-installed on the chassis.
an outer fixed rack rail that secures directly to the rack itself.
a middle rail which extends from the outer rail.
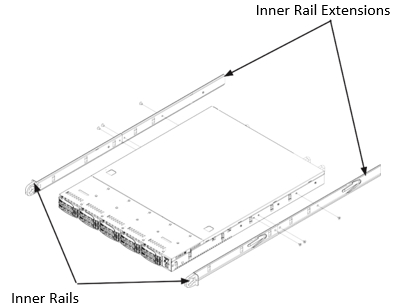 |
EX2003 and EX4003 inner rails
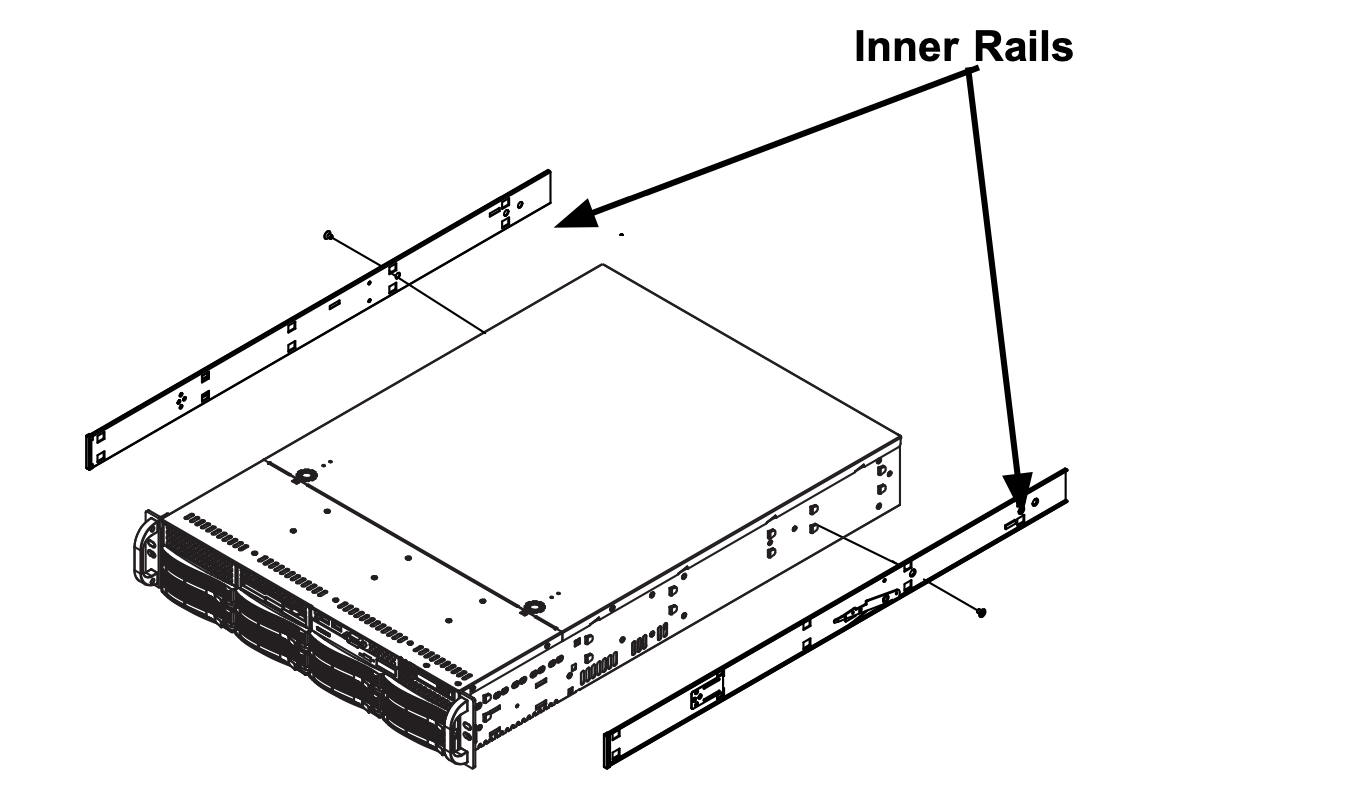 |
EX3000 and EX3003 inner rails
 |
Rail assembly
Warning
Do not pick up the server with the front handles. They are designed to pull the system from a rack only.
Install the Inner Rails
To install the inner rails, you must release the rails then install the rail extension along with the inner rails.
Release the Inner Rails
Each inner rail has a locking latch. This latch prevents the server from coming completely out of the rack when the chassis is pulled out for servicing.
To mount the rail onto the chassis, first release the inner rail from the outer rails:
Pull the inner rail out of the outer rail until it is fully extended as illustrated below.
Press the locking tab down to release the inner rail.
Pull the inner rail all the way out.
Repeat for the other outer rail.
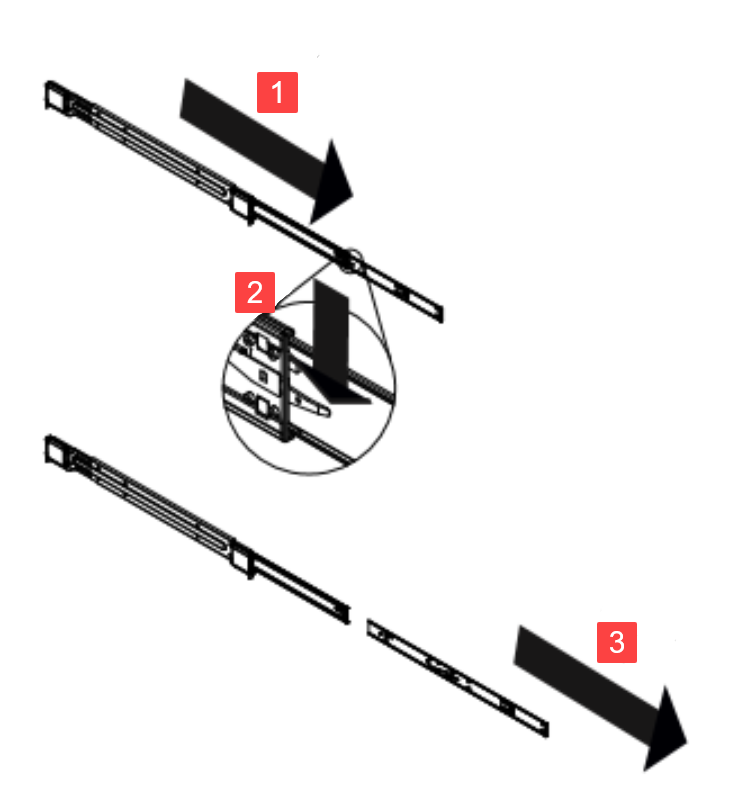 |
Install the Inner Rail Extension and Rails
(Optional) Attach the inner rail extension to stabilize the chassis within the rack.
Note
The Exabeam appliance chassis includes a set of inner rails in two sections: inner rails and inner rail extensions. The inner rails are pre-attached and do not interfere with normal use of the chassis if you decide not to use a server rack.
Place one of the inner rail extensions against the side of the chassis, aligning the hooks on the side of the chassis with the rail extension holes. Ensure the extension faces outward just like the pre-attached inner rail.
Note
The left and right inner rails are symmetrical.
Slide the extension forward, toward the front of the chassis.
Secure the extension to the chassis with two screws.
Repeat steps 1-3 for the other inner rail extension.
 |
Install Outer and Middle Rails
Install the outer and middle rails by following the steps for your appliance type before you install the chassis.
For EX2003 and EX4003
Attach the shorter outer rail to the outside of one of the longer outer rails. You must align the pins with the slide, and both bracket ends must face the same direction.
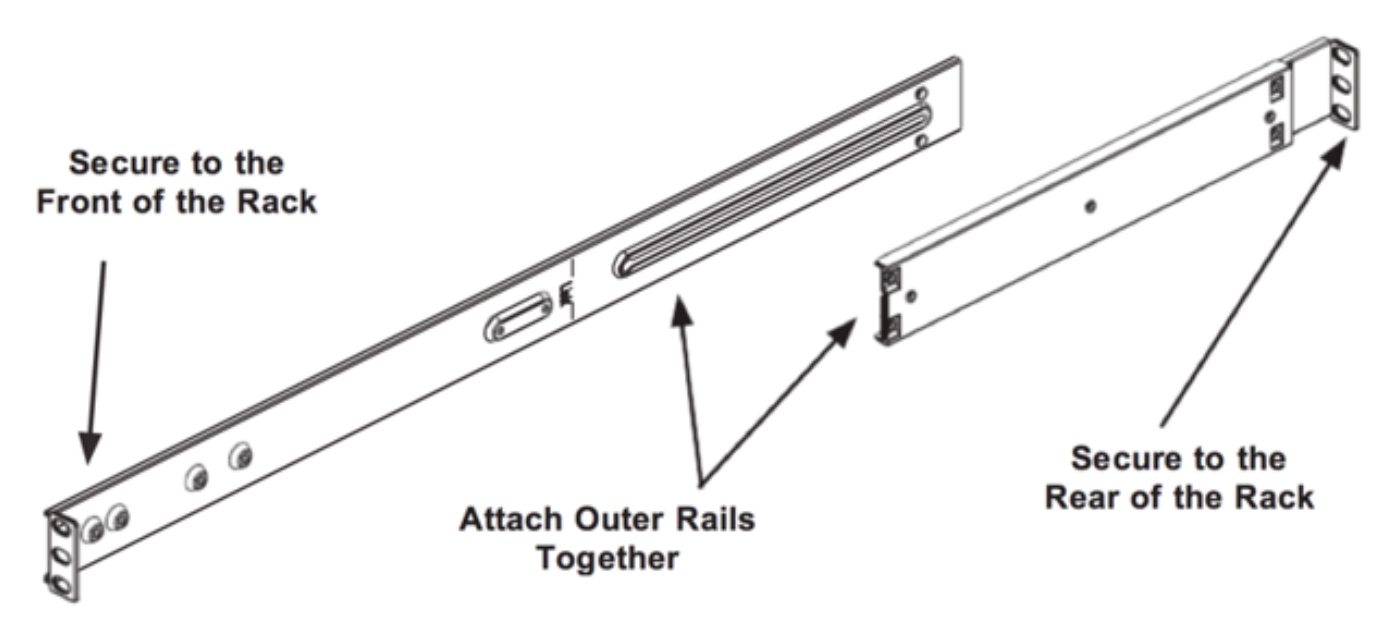
Adjust both the shorter and longer rails to the proper distance by using the sliding adjustment so that the rail fits snugly into the rack.
Clip in, and then secure the long bracket to the front side of the outer rail with two M5 screws, and the short bracket to the rear side of the outer rail with three M5 screws.
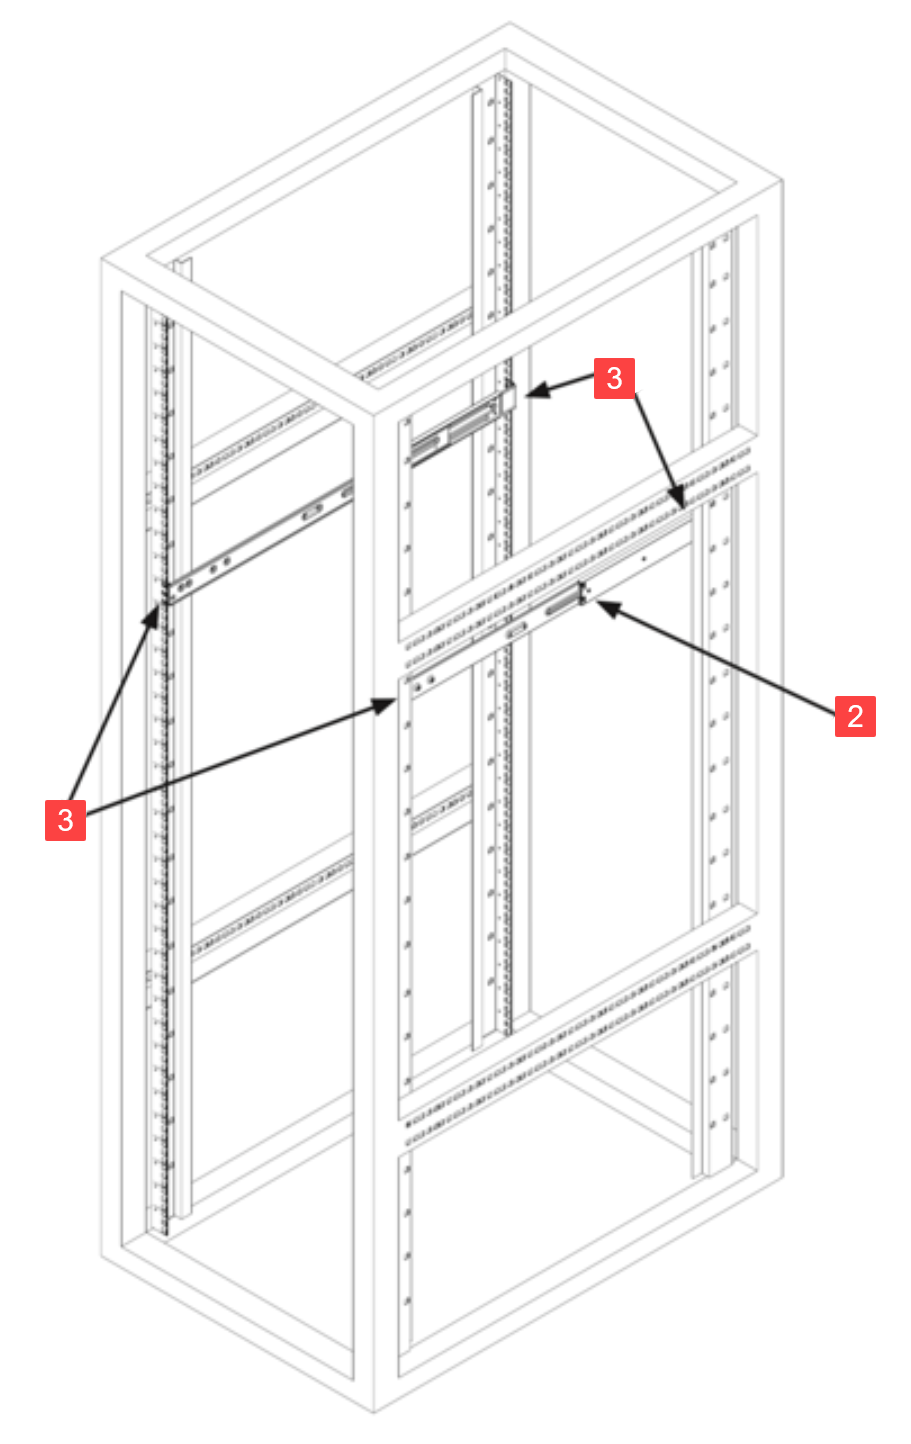
Repeat steps 1-3 for the other outer rail.
For EX3000 and EX3003
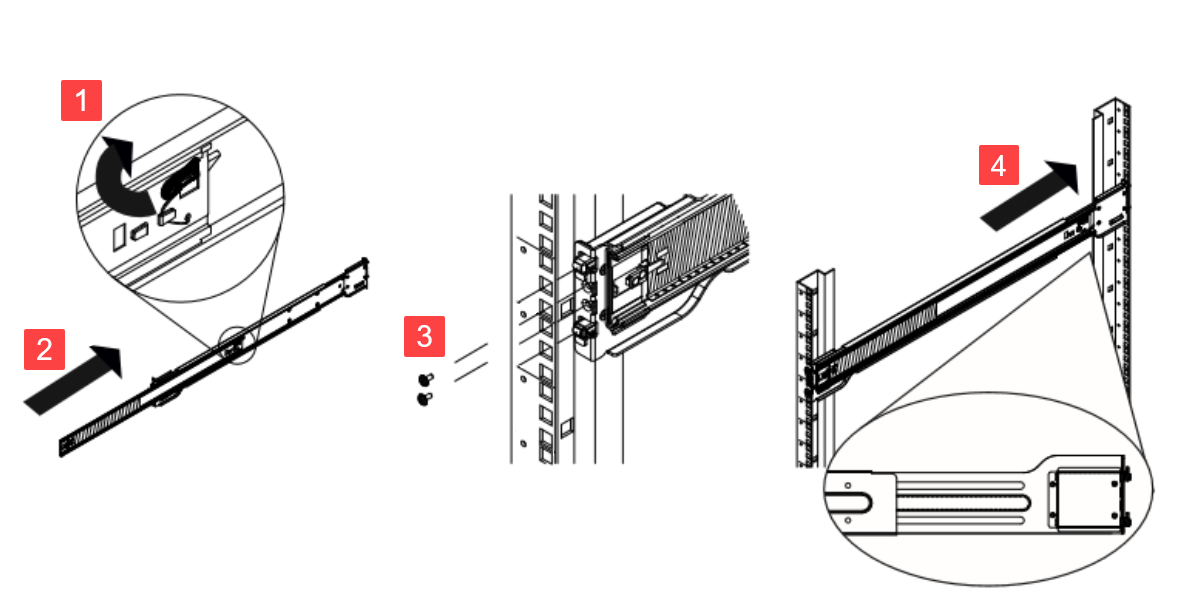
Press upward on the locking tab at the rear end of the middle rail.
Push the middle rail back into the outer rail.
Hang the hooks on the front of the outer rail onto the square holes on the front of the rack. The buttons on the top and bottom of the outer rail push against the tabs, while the hooks go through the square holes. The outer rail takes up six tabs, starting and ending on a thin tab. If desired, use screws to secure the front of the outer rails to the rack.
Pull out the rear of the outer rail, adjusting the length until it fits within the posts of the rack.
Hang the hooks of the rear section of the outer rail onto the square holes on the rear of the rack. Take care that the proper holes are used so the rails are level. If desired, use screws to secure the rear of the outer rail to the rear of the rack.
Repeat steps 1-5 for the other outer rail.
