Step 4 - Create Filtered Context Tables for Enrichment
The goal of this step is to create the filtered context tables that are needed to support certain enrichment rules that are configured in the Log Stream application. The enrichment rules use data stored in the context tables to enrich events accurately for the New-Scale Analytics detection engine and to enhance entity fidelity in Attack Surface Insights.
The context tables you will create in this step are all filtered tables. A filtered table is a type of custom context table that you can create in Context Management. This type of context table makes it possible to create a single table, from one or more connected data sources, with filter conditions defined to extract specific data from each source. The filtered tables you will create in this step are listed in the chart below. For more information, see Working with Filtered Context Tables in the Context Management Guide.
Note
In order for the filtered tables to support the enrichment rules successfully, the table and column names must be reproduced exactly as shown in the chart below when you create the context tables in Context Management.
Table Name | Column Name (Primary Key) | Column Name | Usage |
|---|---|---|---|
ID-User | Employee Number | Primary User Name | Enrich events with usernames from employee ID/Number. |
UID User | ID | Primary User Name | Enrich events with usernames from AD object ID. |
Email User | Primary Login (Email Format) | Primary User Name | Enrich events with usernames from email. |
User SID | Object Sid | Primary User Name | Enrich events with usernames from SID. TipTo find all of the possible User SID values, use a filter such as:
|
Disabled Accounts | Primary User Name | Access Status | Enrich events with information about whether a user account is enabled or disabled. |
To create each filtered table:
Start by following the steps in Create a Custom Context Table Using the Add Custom Option in the Context Management Guide. When configuring each filtered table, ensure the following:
In the Definition step:
The Context Table Name must match a table name in the chart above exactly.
In the Context Type field, select the User option.
In the Connections section, click Yes, Create Connection to display the Source Context Table dropdown field. Select one or more existing user context tables from the list to serve as sources for data in the new custom context table (for example, Active Directory, Microsoft Entra ID, or Okta context tables).
In the Attributes step, the columns you define must match the column names in the chart above exactly.
When you reach the Conditions step in configuring the filtered context table, following the instructions in Working with Filtered Tables in the Context Management Guide. These instructions explain how to define conditions to extract specific information from your connected sources. A suggested condition for the filter is:
Object SID Contains S-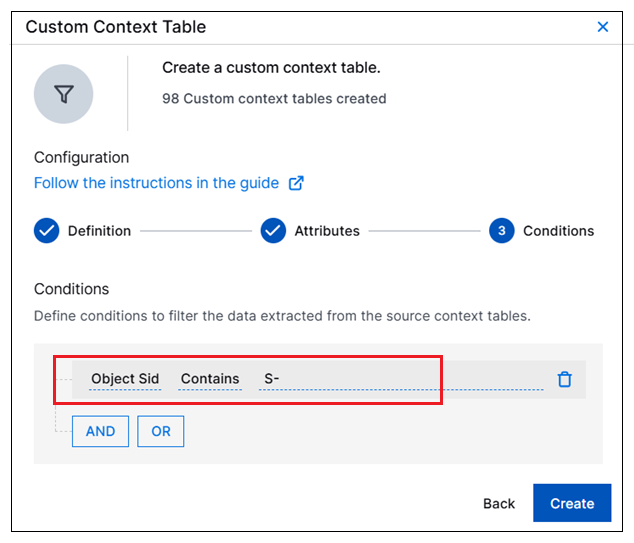
Repeat the process until you've created each of the filtered context tables listed in the chart above.