- About Exabeam Data Lake
- Data Lake Search
- Visualize Results in Exabeam Data Lake
- Exabeam Data Lake Dashboard Setup
- Exabeam Data Lake Reports
- Export Limits for Large Volume Exabeam Data Lake Query Results
- Access Restrictions for Saved Objects in Exabeam Data Lake
- How to Forward Alerts Using Correlation Rules in Exabeam Data Lake
- How Correlation Rules Work
- Correlation Rules in Data Lake vs Advanced Detection Rules in Advanced Analytics
- Auto Disable Correlation Rules during High Latency
- How to Find Disabled or Erred Correlation Rules
- Rule Types in Exabeam Data Lake
- Create a Correlation Rule in Exabeam Data Lake
- Correlation Rules Table in Exabeam Data Lake
- Blacklist/Whitelist Correlation Rules using Context Tables in Exabeam Data Lake
- A. Technical Support Information
- B. Supported Browsers
How to Forward Alerts Using Correlation Rules in Exabeam Data Lake
Exabeam Data Lake provides search-based alerting by incorporating rules that trigger further actions like forwarding the found event logs to another analysis process. Correlation rules can be created by analysts or administrators who want alerting capabilities within Data Lake for known bad behaviors or non-compliant behaviors in their environment.
How Correlation Rules Work
Rules that correlate incoming event logs based on relationships that have been previously defined by analysts is the basis for triggering log forwarding. Each rule contains a search query, a rule type and condition that generates alerts. Data Lake is periodically queried with the defined search query, and the data is passed through the rule conditions, which determines when a match is found. When a match occurs, it triggers one or more alerts.
Correlation Rules in Data Lake vs Advanced Detection Rules in Advanced Analytics
Correlation rules are static rules on incoming logs that alert on known bad or non-compliant behaviors when specified conditions are met. Advanced Analytics rules, on the other hand, rely on understanding user and machine behaviors in an environment to identify the degree of anomaly and criticality of the anomalous behavior and allocate the relevant risk scores to the session associated with that anomaly.
One reason to leverage correlation rules is for alerting on the outage of a service which has no security repercussions. Sometimes, correlation rules are needed to meet compliance requirements. For example, an alert indicating a service failure does not necessarily have a security risk associated with it. This makes more sense to be monitored by a correlation rule within Data Lake . Another example is to alert on any configuration changes on the Firewall to meet compliance needs.
Auto Disable Correlation Rules during High Latency
The Correlation-Rule feature is a highly customizable tool to spotlight specific events when they are triggered. However, some correlation rules may be invalid or highly inefficient and cause performance latency and perhaps ultimately fail when triggered. Data Lake will automatically disable a correlation rule that has not successfully completed processing after 5 minutes 3 times in a row (default settings, can be tailored for your organization).
How to Find Disabled or Erred Correlation Rules
You can verify the status of correlation rules by searching the Exabeam audit logs. The following are available conditions you can query based on activity:
[$ruleId] [$ruleName] create[$ruleId] [$ruleName] update[$ruleId] deletion[${rule.name}] error[${rule.name}] disabled[${rule.name}] disabling failed[${rule.name}] timeout
For more information about audit logs, see Audit Log Management in Data Lake .
Rule Types in Exabeam Data Lake
The rule type is responsible for processing the data returned from Data Lake as follows:
The rule is initialized with the rule configuration.
It is then passed data that is returned from querying Data Lake with the rule’s filters.
And finally the system outputs matches based on this data.
Rule Type | Description | Required Fields | Example Rule |
|---|---|---|---|
Blacklist | Checks a certain field against a blacklist, and match if it is in the blacklist. | You must enter the name of the field to use to compare to the blacklist. You must enter a list of blacklisted values and/or select a context table that contain the blacklisted values. | Trigger when a user in the group "Domain Admins" is added, removed, or changed. |
Frequency | Matches when there are at least a certain number of events in a given time frame. This may be counted on a per-query key basis. | You must enter the number of events which will trigger an alert. You must enter the time those events must occur within. | Trigger if a user is created and deleted within 24 hours. |
Any | Matches everything. Every hit that the query returns will generate an alert. | There are no additional required fields for this rule. | Trigger when a user is successfully authenticated, and logon type is 8. |
Cardinality | Matches when the total number of unique values for a certain field within a time frame is higher or lower than a threshold. | You must enter the time period in which the number of unique values will be counted. You must enter which field to count the cardinality for. | Trigger when a destination host has greater than 20 failed authentication events from different user accounts within 5 minutes. |
Change | Monitors a certain field and matches if that field changes. The field must change with respect to the last event with the same query key. | You must enter the names of the field to monitor for changes. | Trigger when a scheduled task is canceled, completed, created, started, from different countries within 24 hours. |
Flatline | Matches when the total number of events is under a given threshold for a time period. | You must enter the minimum number of events for an alert not to be triggered. You must enter the time period that must contain less than the minimum number of events. | Trigger if no events are received from a Critical System within the last 60 minutes. |
Metric Aggregation | Matches when the value of a metric within the calculation window is higher or lower than a threshold. | You must enter the name of the field over which the metric value will be calculated. You must enter the type of metric aggregation to perform on the field. This must be one of 'minimum', 'maximum', 'average', 'sum', 'cardinality', or 'value count'. | Trigger when a user sends email volume greater than 100MB in a 1 hour timeframe. |
Whitelist | Will compare a certain field to a whitelist and match if the list does not contain the term. | You must enter the name of the field to use to compare to the whitelist. You must enter a list of whitelisted values and/or a list of paths to files which contain the whitelisted values. | Trigger when: Direction is Local to Remote Connection is to Port 53 The IP Address is not in the "DNS Servers" list. |
Create a Correlation Rule in Exabeam Data Lake
Correlation rules are used as parsing mechanisms to match known indicators that analysts consider to be signs of threat or events of interest.
To create a correlation rule:
Log on to Data Lake.
Click the settings icon at the bottom of the left-hand toolbar.

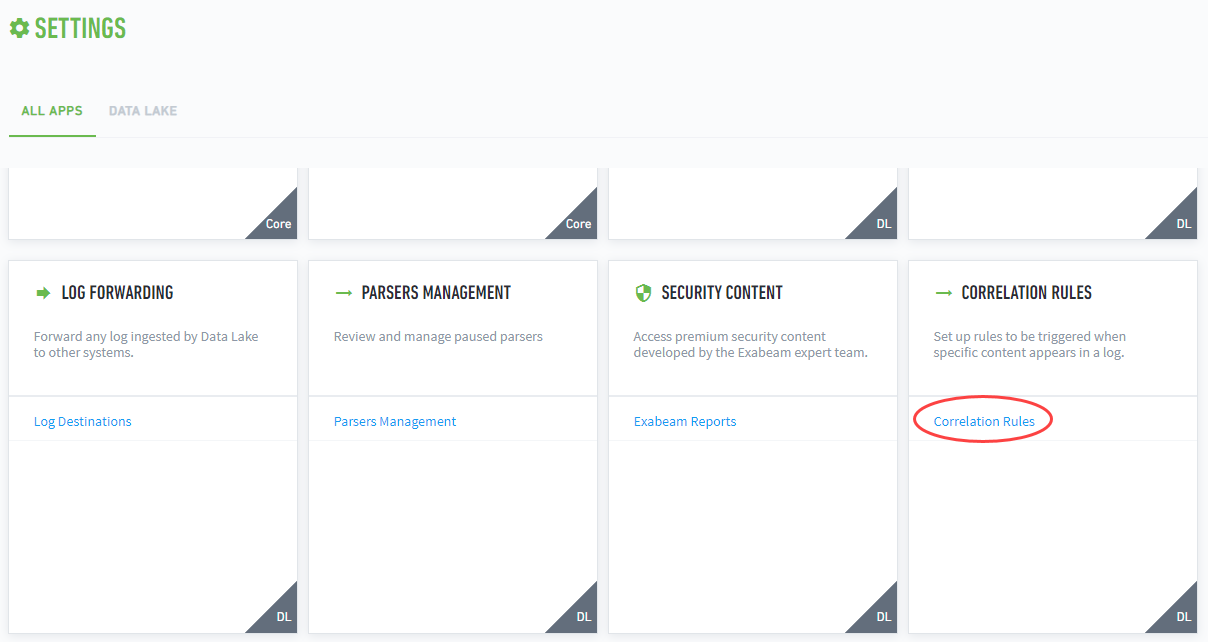
On the Settings page, select Correlation Rules.
Click the blue-and-white plus sign
 to create a rule.
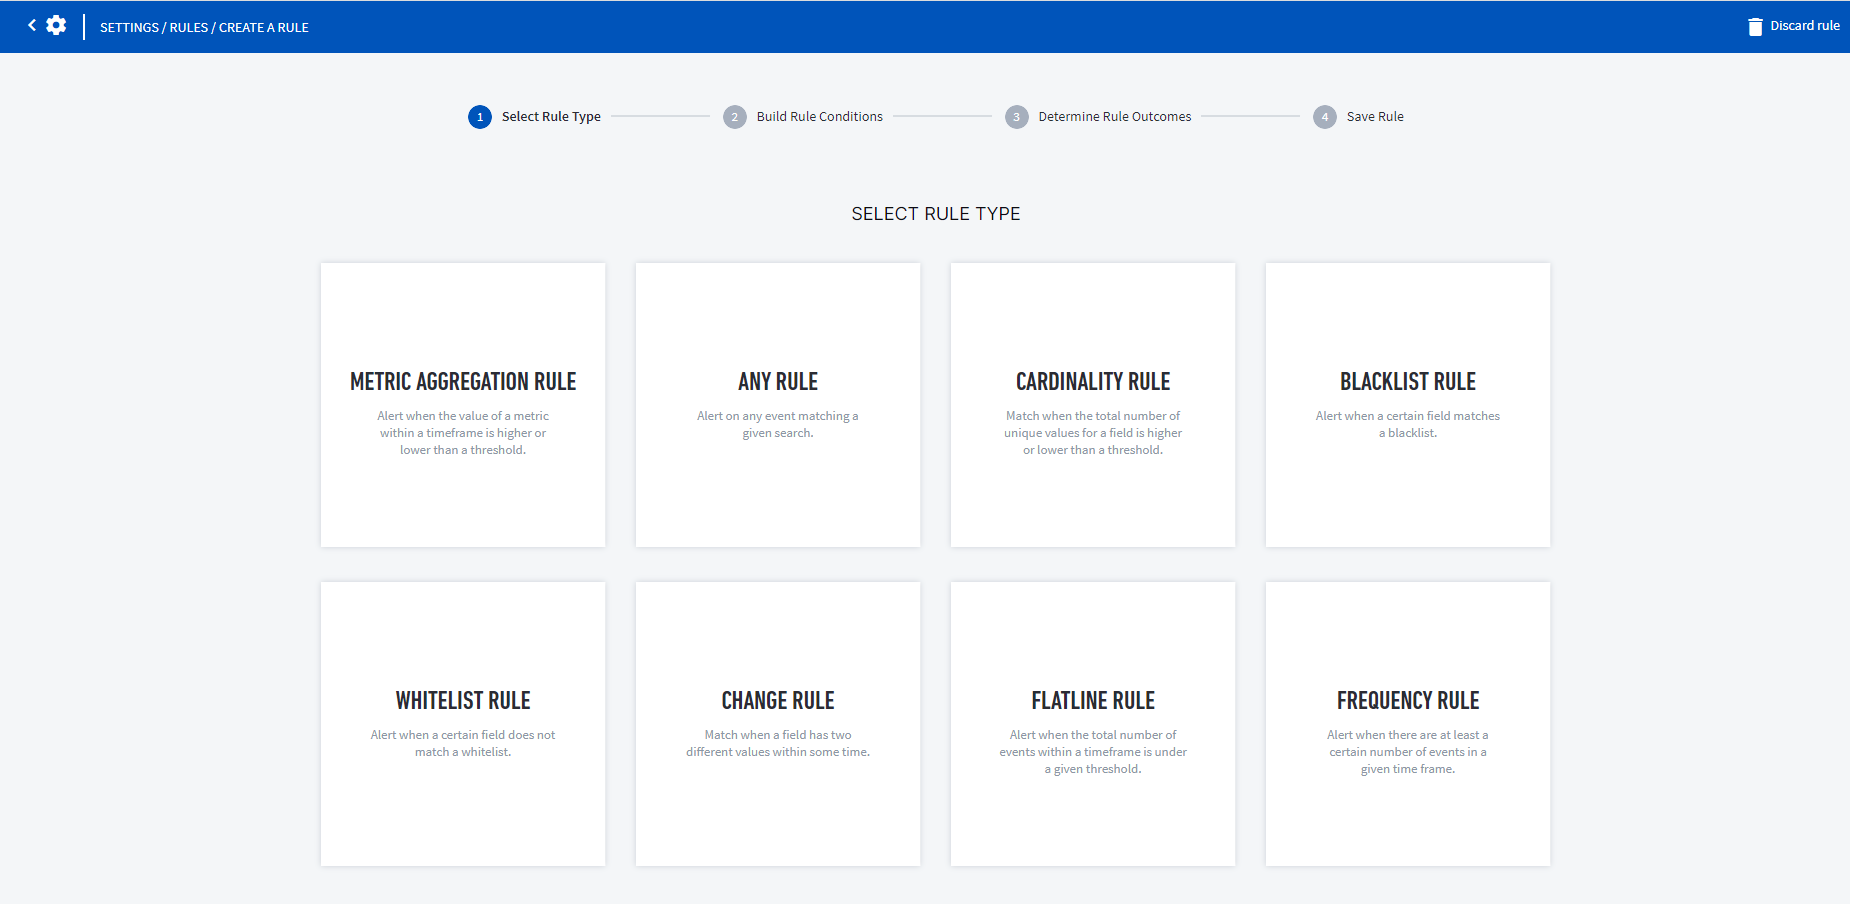
Select a rule type, and then click Continue.
Note
Refer to the Rule Types section for a full list of available rule types.
To build the rule conditions, select the events that this rule will evaluate against.
Select either an existing search or create a new search from scratch.

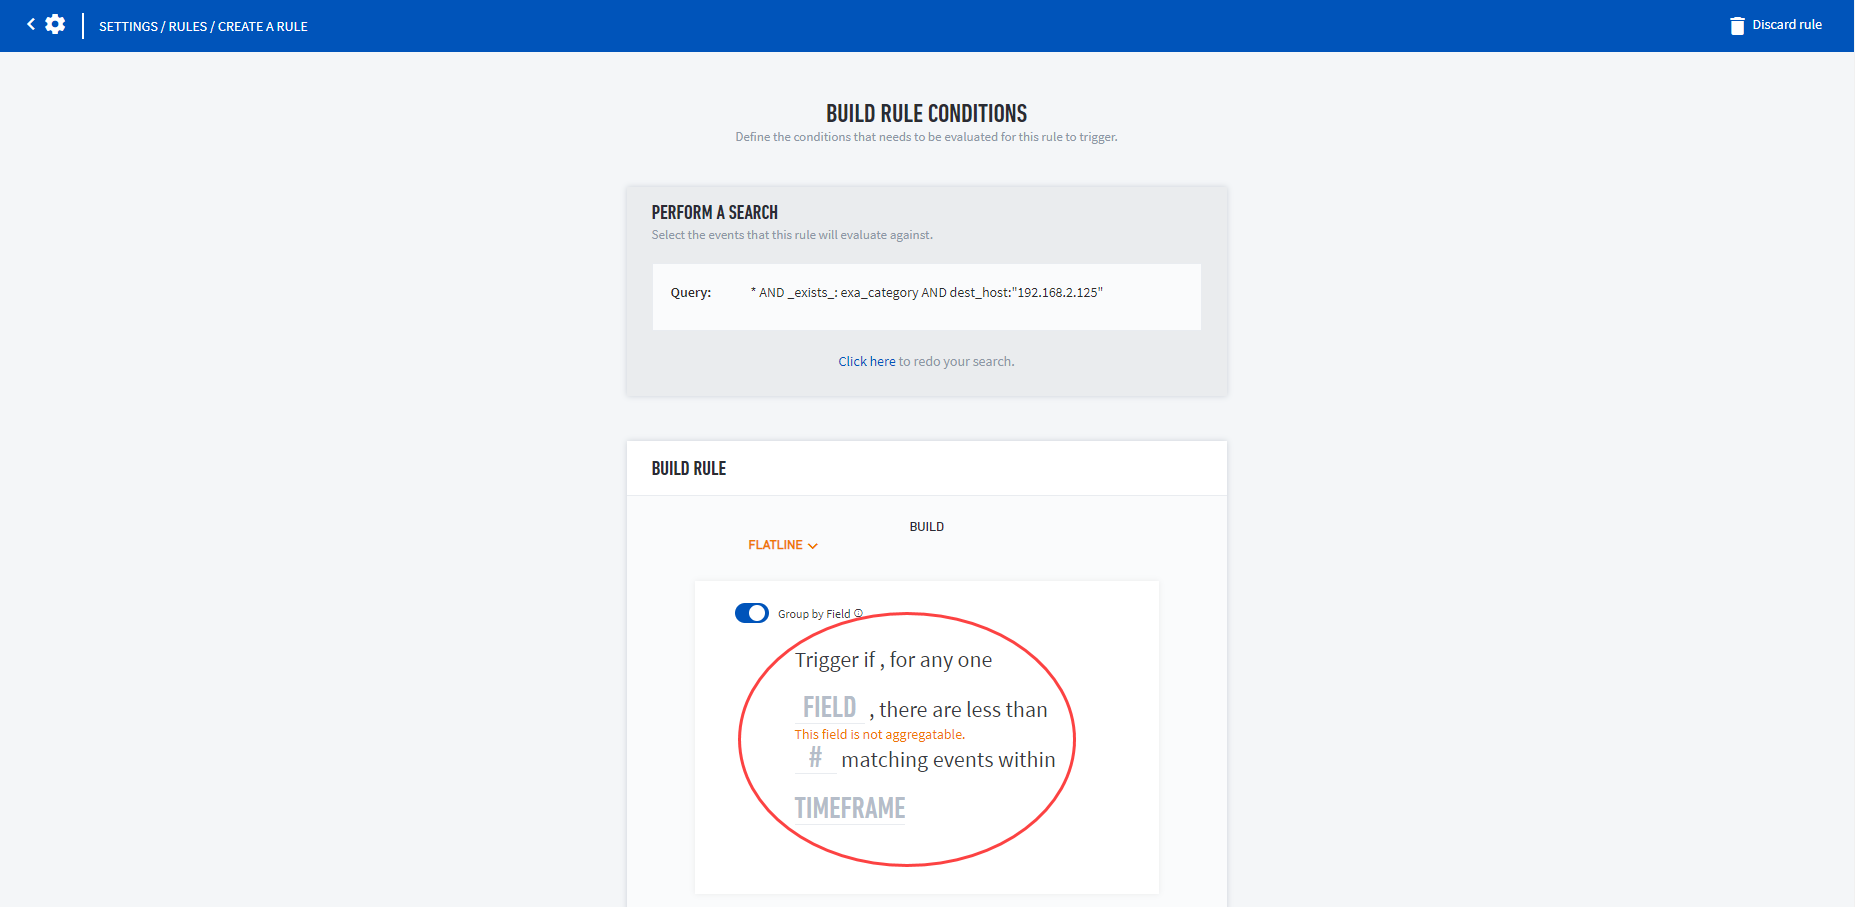
Once you've selected or created a search, the Build Rule Conditions box opens. Configure your rule according to your business needs.
Note
The build rule options (circled below) vary depending on the selected rule type. You can also change the rule type by clicking the Build dropdown menu.
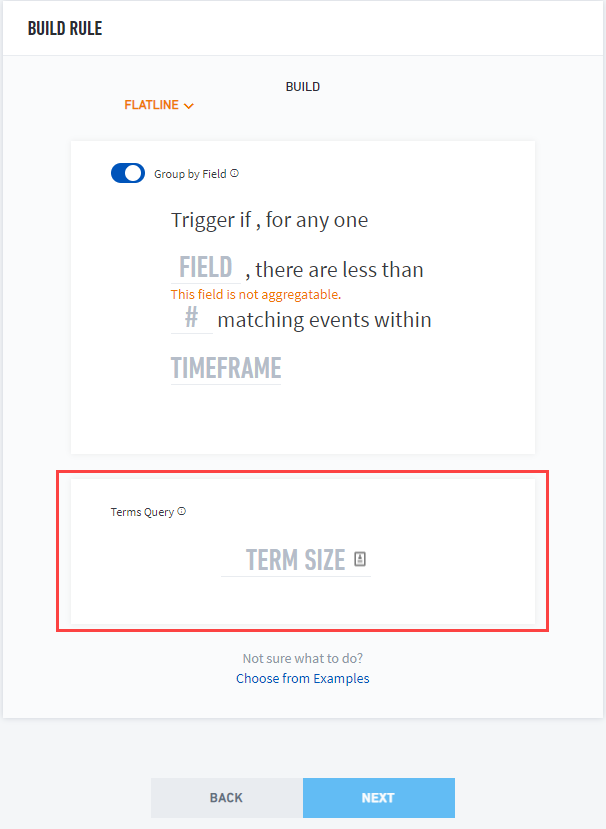
For build types FLATLINE or FREQUENCY, you can create a terms query (aka aggregation query) whereby you can apply a TERM SIZE to aggregate and improve search performance. The default term size is 50.
Click Next.
Define the outcomes when the new correlation rule triggers.
Alert – Send an alert to Data Lake. The alert is also then parsed and indexed as an “Exabeam Alert” along with the parsed log and details regarding the rule that triggered the alert.
Alert Severity – Set the severity of the alert as shown in Data Lake (i.e., None, Low, Medium, High, or Critical).
Suppress Repeating Alerts – If the rule is particularly busy or triggers a high number of alerts, configure the rule to suppress alerts for set number of seconds, minutes, hours, days, or weeks.
Suppress for - If you are suppressing repeating alerts, define the length of time for which you want to suppress the rule.
Add Risk to Entities – Send an alert to Advanced Analytics and associate it with users and/or assets. Additionally, assign a risk score to the alert as it appears in Advanced Analytics.
Note
Add Risk to Entities only appears if you have deployed an instance of Advanced Analytics and configured log forwarding via syslog to Advanced Analytics (Settings > Log Forwarding > Advanced Analytics Feed). For more information on forwarding logs from Data Lake to Advanced Analytics, please refer to the Data Lake Admin Guide.

Send an Email – Send an email to specific individuals in your organization, include a subject line and description, and choose between one and four attachment options (e.g., link to alert, attach as CSV, attach as PDF, and search string (DL)).
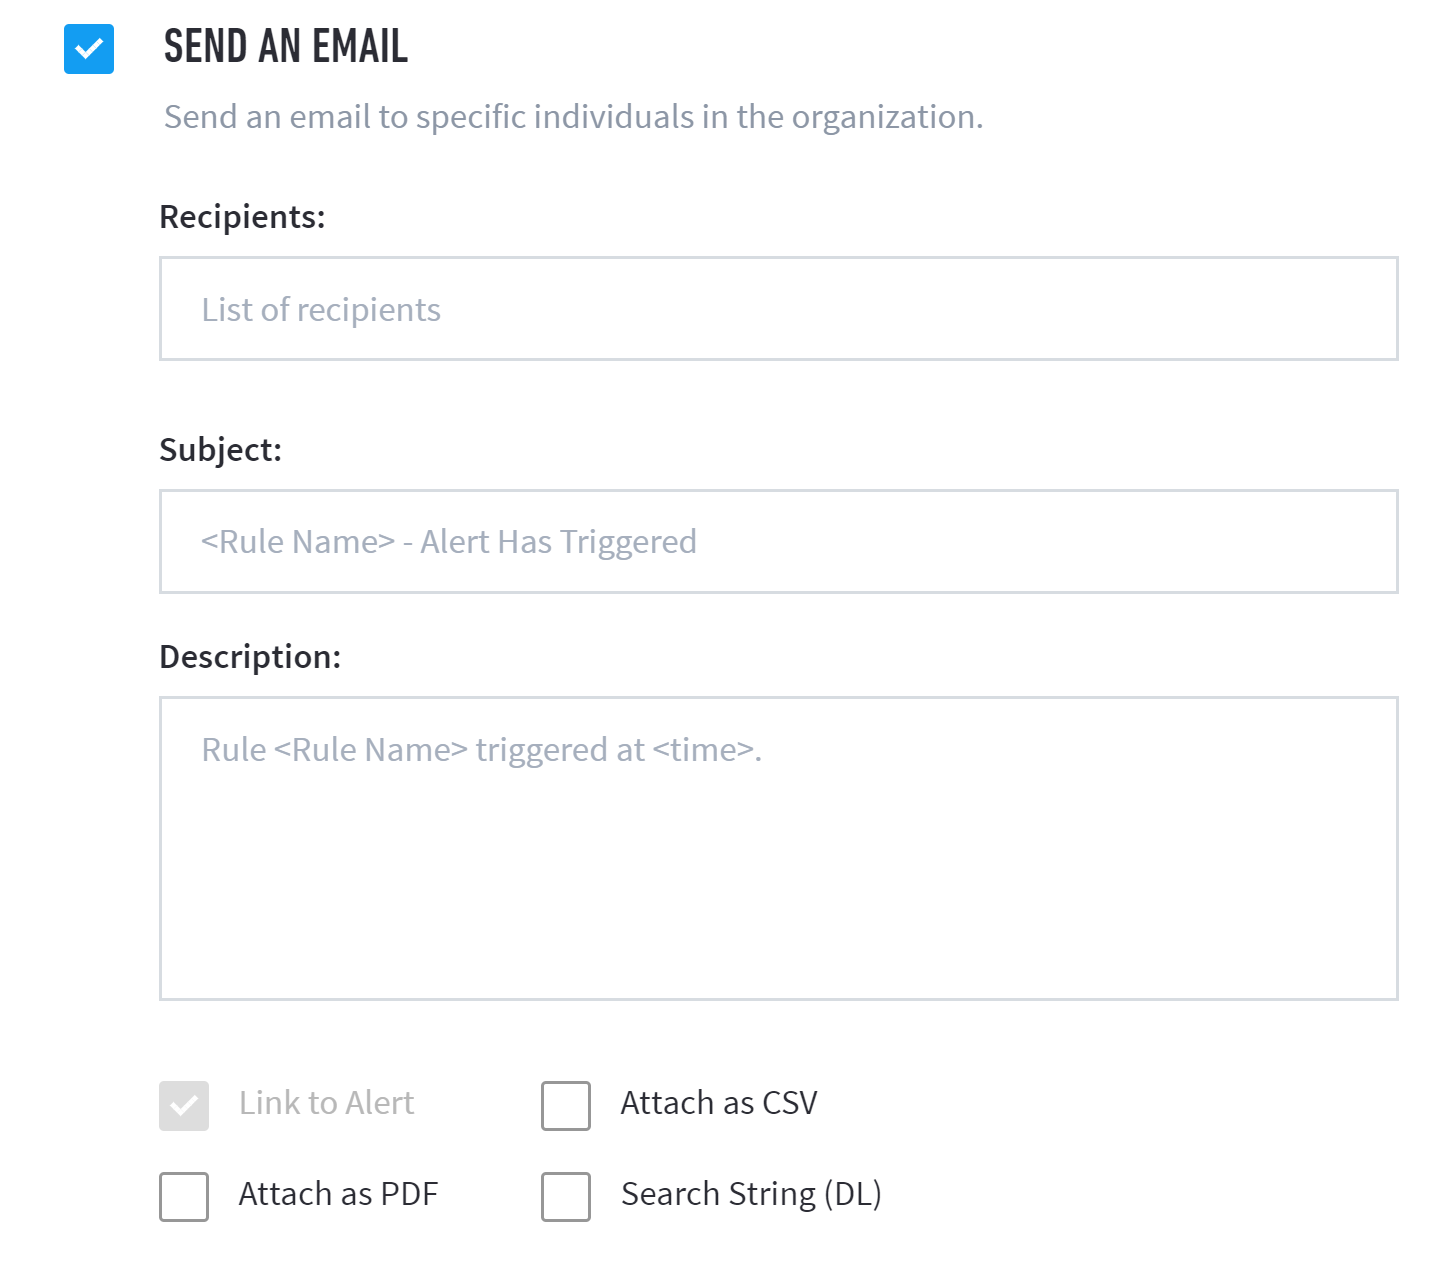
Important
You must have email notifications configured to use this option. To enable email notifications triggered by correlation rules, use the following steps to configure:
Navigate to Settings > Notifications > Setup Notifications.
Edit the existing email notification entry or click
 to create a new email notification.
In the Setup Email Notifications menu, enter server and template information and then in the Notifications by Product section, ensure the Scheduled Reports checkbox is selected.
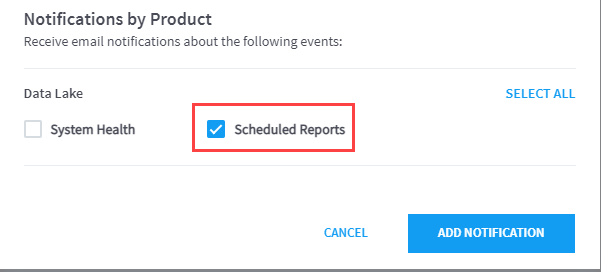
Click ADD NOTIFICATION to apply the configuration.
Send a Syslog – Send an alert to a Syslog server.
Click Next.
Save the rule.
Select a Rule Category. You can choose multiple existing categories, or add a newly created custom category.
Enter a Rule Name.
Enter a Rule Description.
Click Save.
The rule is saved and appears within your correlation rule table.
Correlation Rules Table in Exabeam Data Lake
Now that you have created your correlation rules, use the rules table to edit, delete, and otherwise manage your correlation rules.
Located in the top-right corner of the correlation rules page, the search bar lets you search across rules by Categories, Type, Product, and Name.

The correlation rules table is organized into columns, and includes the following information:

Title – Name of the rule. Click the Title column header to sort the table alphabetically by title.
Product – Exabeam product associated with the rule. Click the lined triangle icon next to the Product column header to filter your rules by specific products.
Type – Rule type. Click the lined triangle icon next to the Type column header to filter your rules by specific rule types.
Severity Level – Severity level (e.g., None, Low, Medium, High, or Critical). Click the lined triangle icon next to the Severity Level column header to filter your rules by specific rule types. Additionally, click the current severity level to change the severity level of any rule in the table.
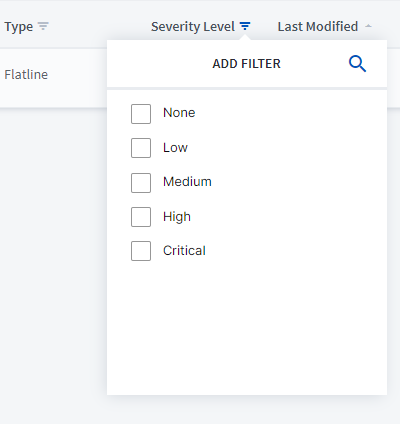
Last Modified – Date the rule was last modified. Click the Last Modified column header to sort the table by earliest or most recent modification date.
Category – Categories associated with the rule. Click the lined triangle icon next to the Categories column header to filter your rules by specific rule categories. Hover your cursor over the category list of a single correlation rule to view the full list of categories associated with the rule.
Warning
Context tables (whitelists, for example) are limited to 2000 rows of data when used in correlation rules. Otherwise, an error message table is too large is appear and querying will fail.
Managing Correlation Rules
The correlation rules table lets you sort your rules according to Title and Last Modified. It also lets you filter your rules according to Product, Type, Severity Level, and Categories.
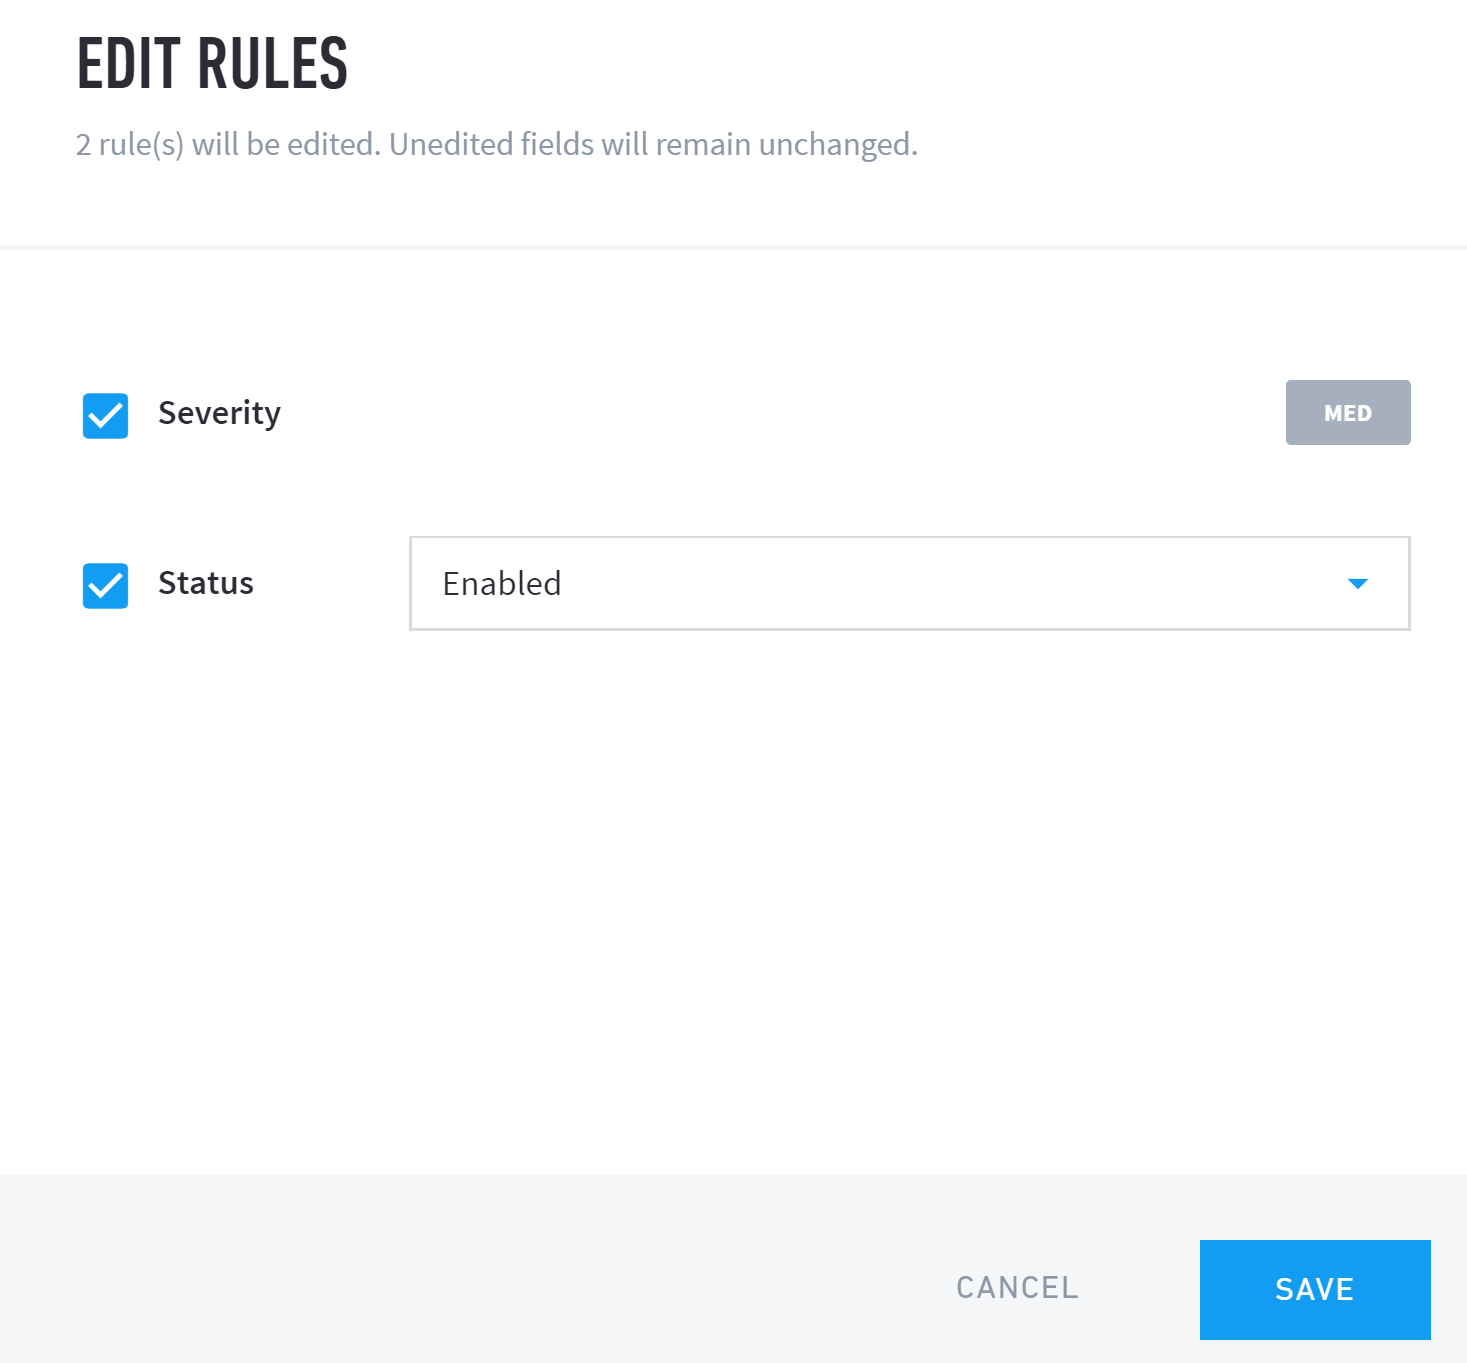
Click the checkbox for any rule to select and either delete or edit a rule. Select multiple rules to perform bulk deletions or edits on all selected rules.
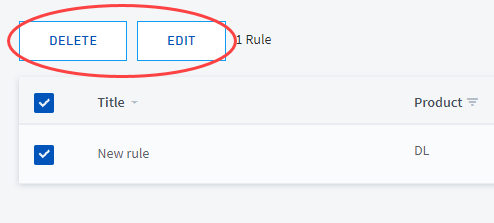
Deleting removes the selected rule(s) completely, while editing a rule lets you set the severity and status for the selected rule(s).
 |
Hover over any single rule in the rules table to enable additional management actions.
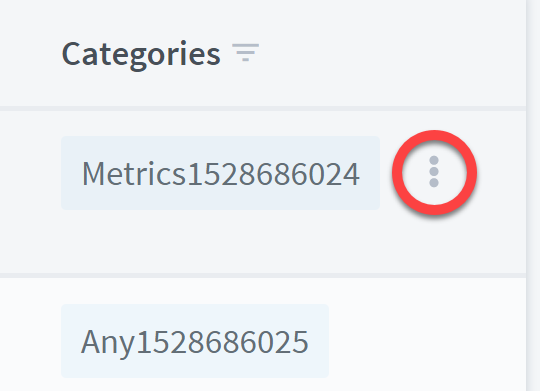 |
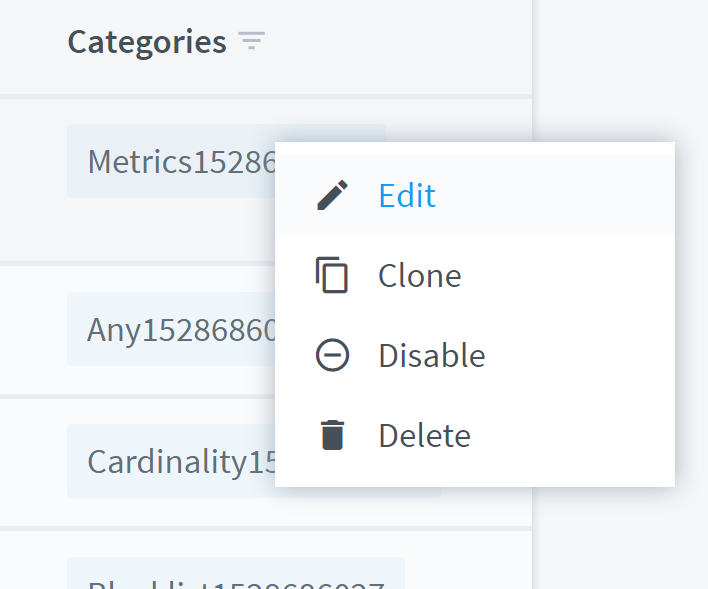
Click the vertical ellipsis to edit, clone, disable, or delete the selected correlation rule. Disabled rules are displayed in gray.
 |
Blacklist/Whitelist Correlation Rules using Context Tables in Exabeam Data Lake
Context table data can be used to build Blacklist and Whitelist Correlation Rules. Use pre-existing context or uploaded custom context tables (see section Add a Context Table.)
Navigate to Settings > Correlation Rules > Correlation Rules.
Click the blue-and-white plus sign
 .
.
Select the Blacklist Rule or Whitelist Rule.
Click ADD OR CREATE A SEARCH to and decide on a new search or using an existing search.
Click Create Rule.
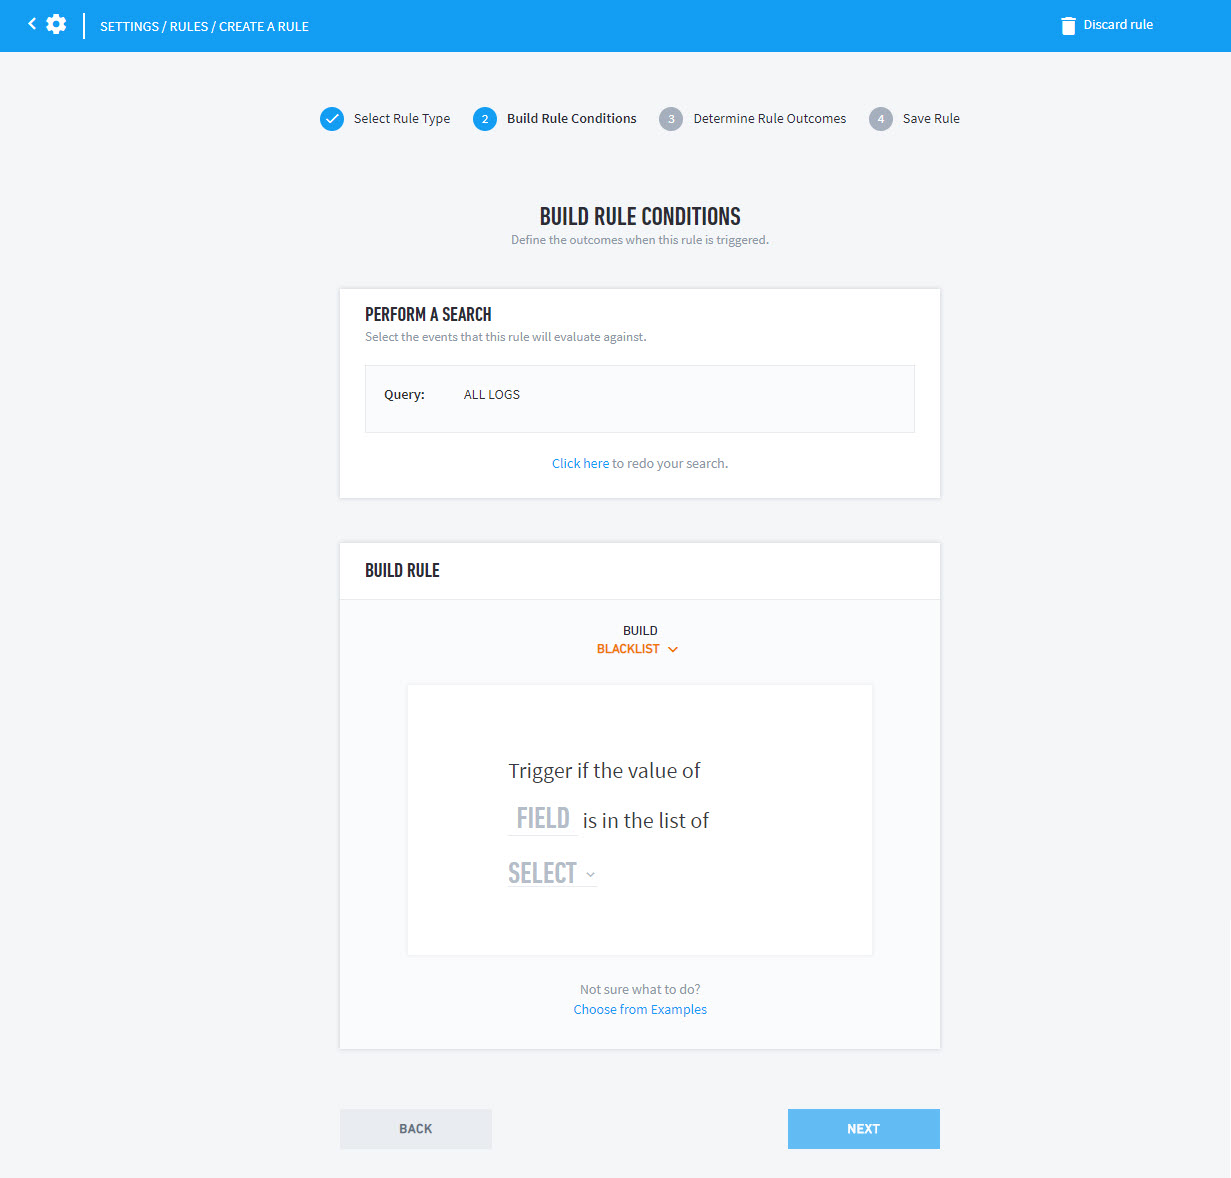
Click CREATE RULE.

On the Build Rule Conditions page, select the FIELD that you want to alert on then click SELECT to choose a context table from the list.
Click NEXT to move to the Rule Outcomes page.
Define the rule outcomes.
Click NEXT to move to the Save Rule page.
Fill in the required fields and click SAVE.
