
- Connector Migration Overview
- Cloud Collectors Overview
- Navigate the Cloud Collectors UI
- Which Collector to Use?
- Hybrid Deployment Experience
- Supported Regions for Cloud Collectors
- Access the Cloud Collectors Service
- Set up a New Cloud Connectors Instance
- Early Access Cloud Collectors
- Armis Cloud Collector
- Armis Context Collector
- AWS Inspector Cloud Collector
- AWS Redshift Cloud Collector
- Cybereason Cloud Collector
- Google Workspace Context Cloud Collector
- OneLogin Cloud Collector
- Palo Alto Networks SaaS Security Cloud Collector
- Rest API Context Cloud Collector
- Symantec CloudSOC Cloud Collector
- Troubleshooting Cloud Collectors
Prerequisites to Configure AWS Inspector Cloud Collector
Before you configure the AWS Inspector Cloud Collector, complete the following prerequisites.
Provide the inspector2:ListFindings permission to the Inspector data source in the IAM policy.
Add Accounts for AWS Cloud Collectors
For ease of setup, you can supply your AWS account information for use across one or more AWS Cloud Collectors. For example, you could use the same account across an AWS CloudTrail Cloud Collector and an AWS S3 Cloud Collector.
Before you can set up the shareable account, you must set up the identity in AWS and use either basic or STSAssumeRole authentication based on the options available in the AWS account. The method STSAssumeRole is the most recommended method of authentication for AWS. This method allows you to monitor S3/SQS in different AWS accounts.
To add the account, you must create an IAM Policy, an IAM user, an IAM role, and an AWS account. Based on the authentication method that you select, create an IAM User or Role.
If you select the basic authentication method for authenticating with IAM user, you must:
If you select the STSAssumeRole authentication method for authenticating with STSAssumeRole user, you must:
For any of the authentication methods basic or STSAssumeRole, an IAM Policy is required, with minimal permissions that allows it to manipulate the SQS queue and read the objects from the S3 bucket. You must Create an IAM Policy.
Create an IAM Policy
In your AWS console, navigate to Services > IAM > Policies > Create policy.
Click on the JSON tab, to get an online editor.
Ensure that each of the AWS Cloud Collectors have their own IAM Policy with the relevant permissions.
Replace the default empty JSON with the JSON below.
AWS CloudTrail (via S3) and AWS S3
Use the following JSON and update the Queue ARN and Bucket ARN based on your configuration.
 {
  "Version": "2012-10-17",
  "Statement": [
    {
      "Action": [
        "sqs:DeleteMessage",
        "sqs:ReceiveMessage"
      ],
      "Effect": "Allow",
      "Resource": "arn:aws:sqs:us-west-1:123456789012:<resource-id>"
    },
    {
      "Action": [
        "s3:GetObject"
      ],
      "Effect": "Allow",
      "Resource": "arn:aws:s3:::<bucket_name>/*"
    }
  ]
}
In the above policy, the first statement refers to SQS queues which are used for SQS events. For your configuration, substitute the names of your S3 buckets and/or queues. You can update the SQS or Queue ARN. The second statement refers to the S3 bucket. You can update the Bucket ARN.
To obtain the Queue ARN to be added in
"Resource": "arn:aws:sqs:us-west-1:123456789012:<resource-id>"and Bucket name or ARN to be added in"Resource": "arn:aws:s3:::<bucket_name>", see ??? and ???.Note
If your S3 buckets are encrypted, you must add additional permissions to the policy. For more information, review the following guide: https://aws.amazon.com/premiumsupport/knowledge-center/decrypt-kms-encrypted-objects-s3/.
Create an IAM User
To authenticate with IAM user, use the following steps. For more information, see Creating an IAM user in your AWS account in the AWS documentation.
In your AWS console, navigate to Services > IAM > Users > Create user.
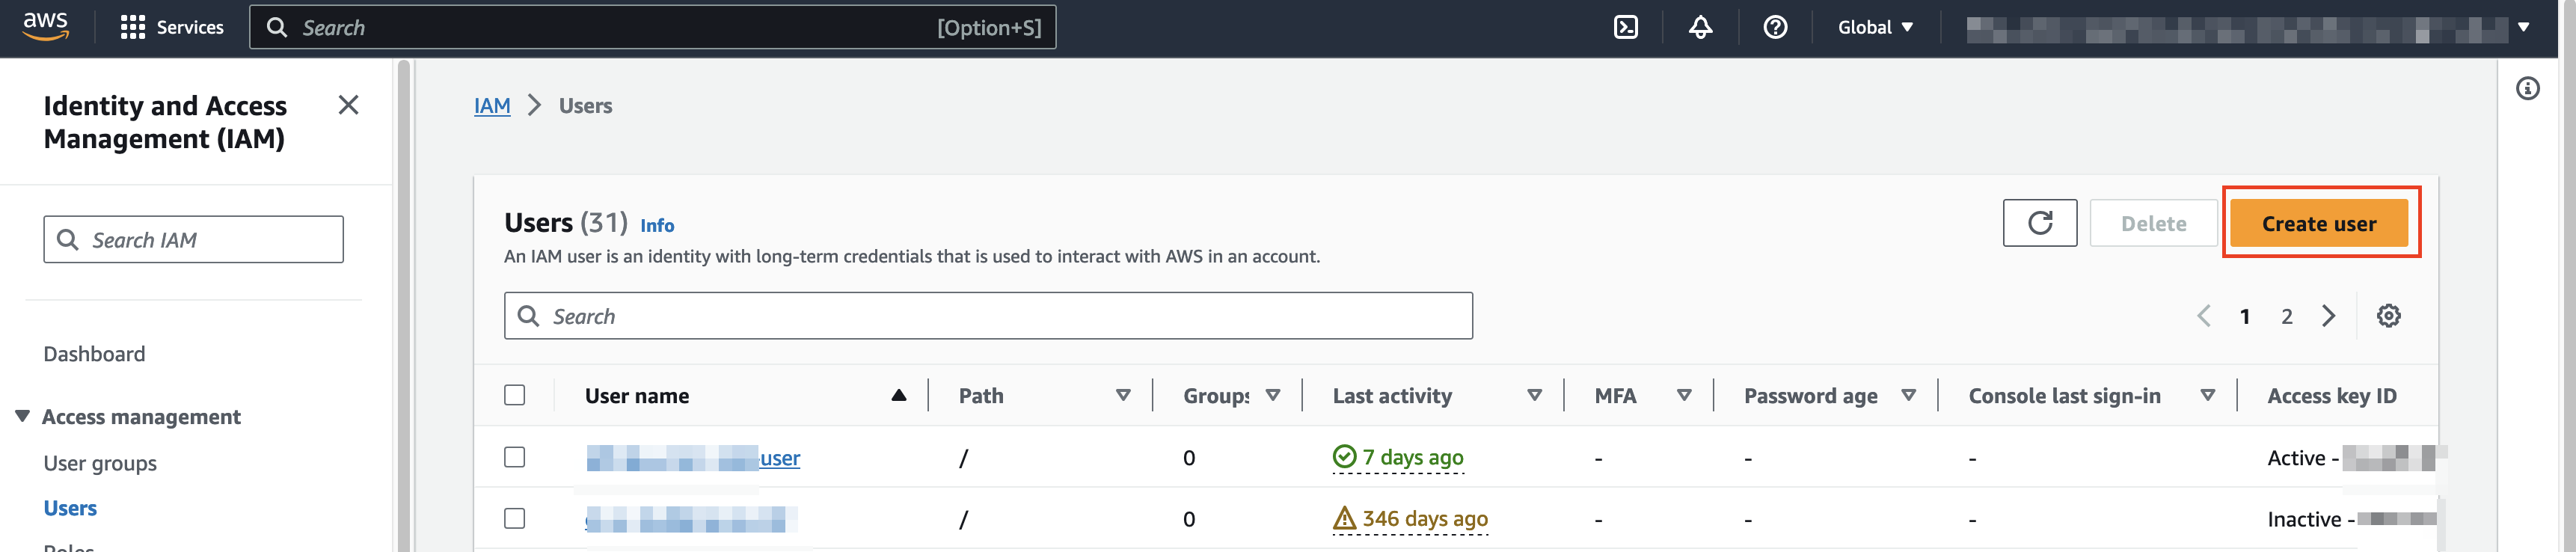
Specify a unique name for the user on the Specify user details page, and click Next.
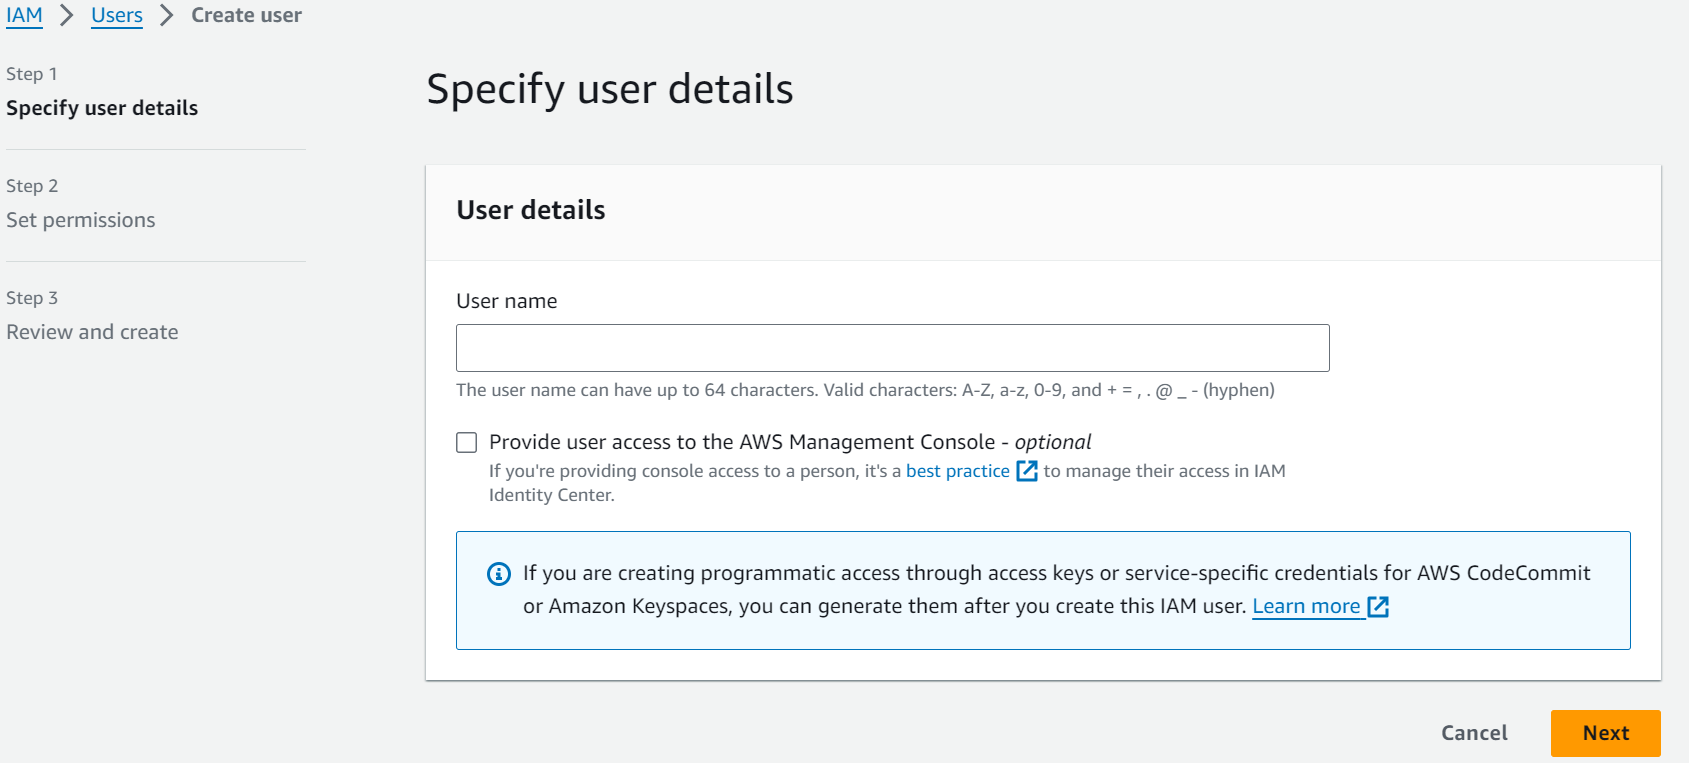
On the Set permissions page, (for Basic authentication only) select Attach Policies Directly and search for any policies you created.
Typically you will have one policy per cloud collector. For STSAssumeRole authentication, skip this step.
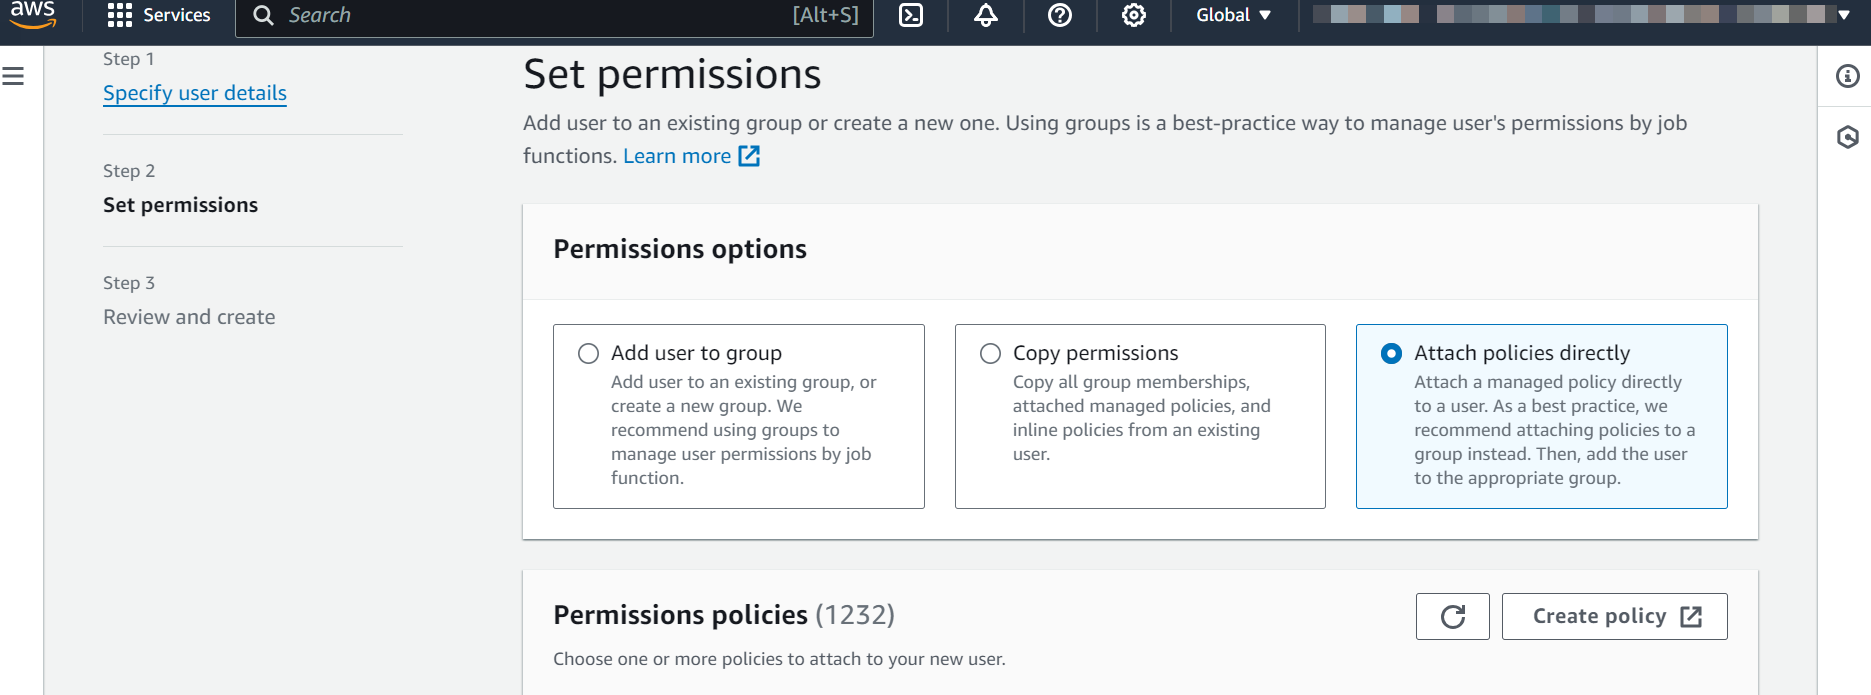
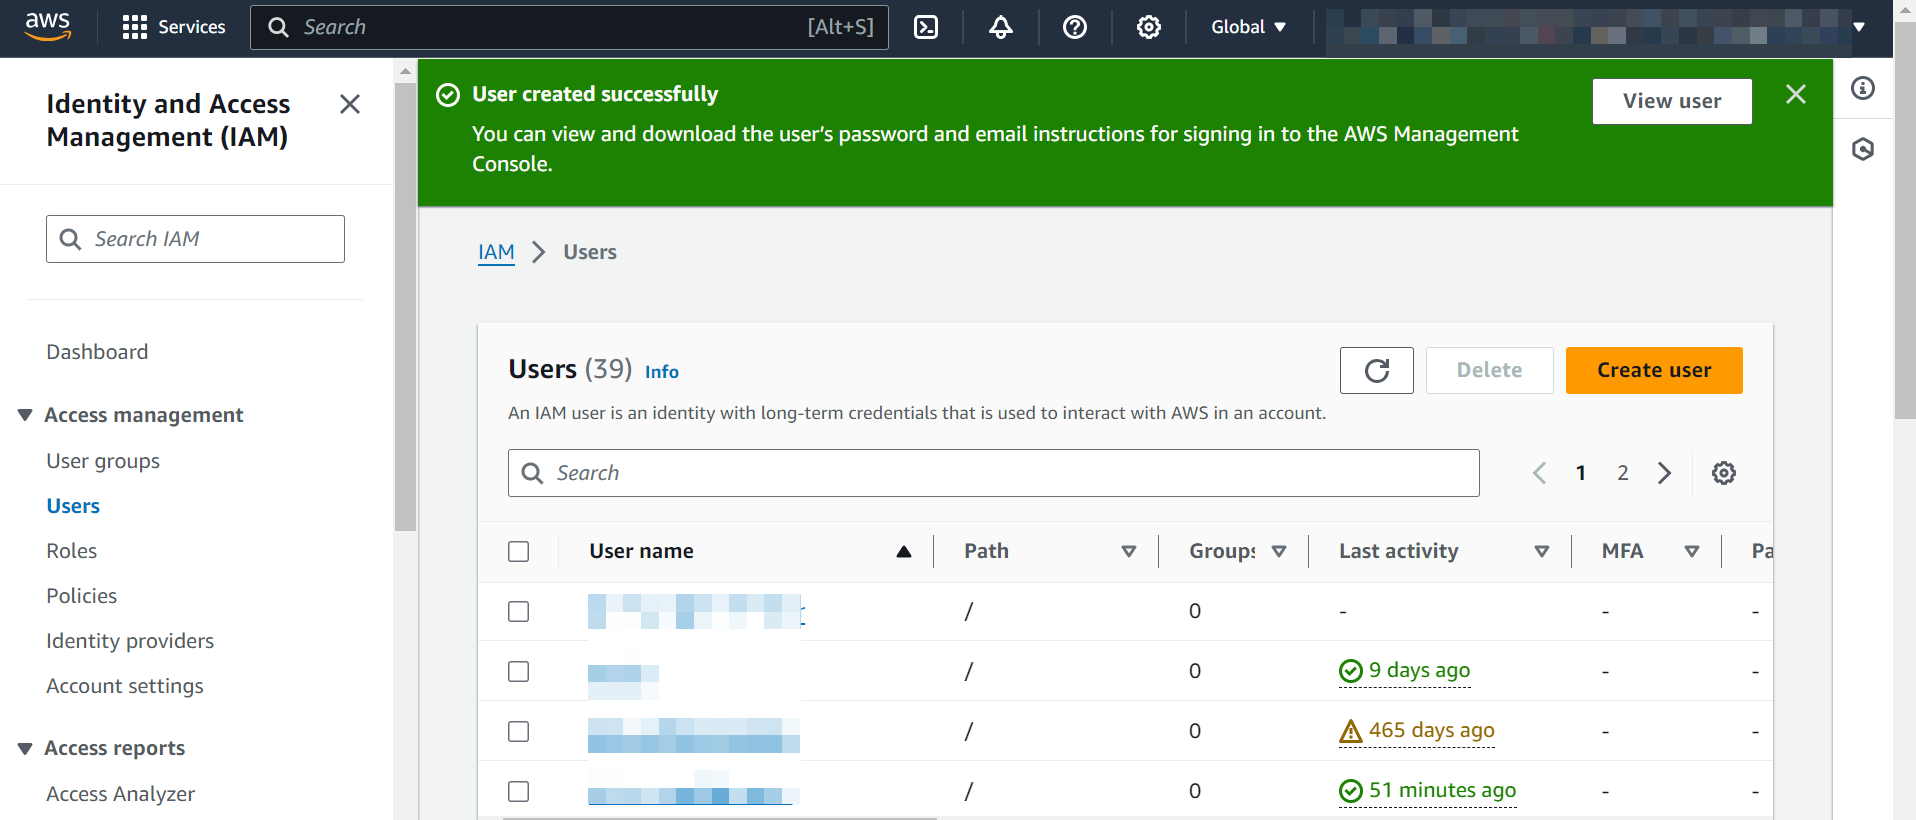
Continue with and complete the user creation process (tags are optional).
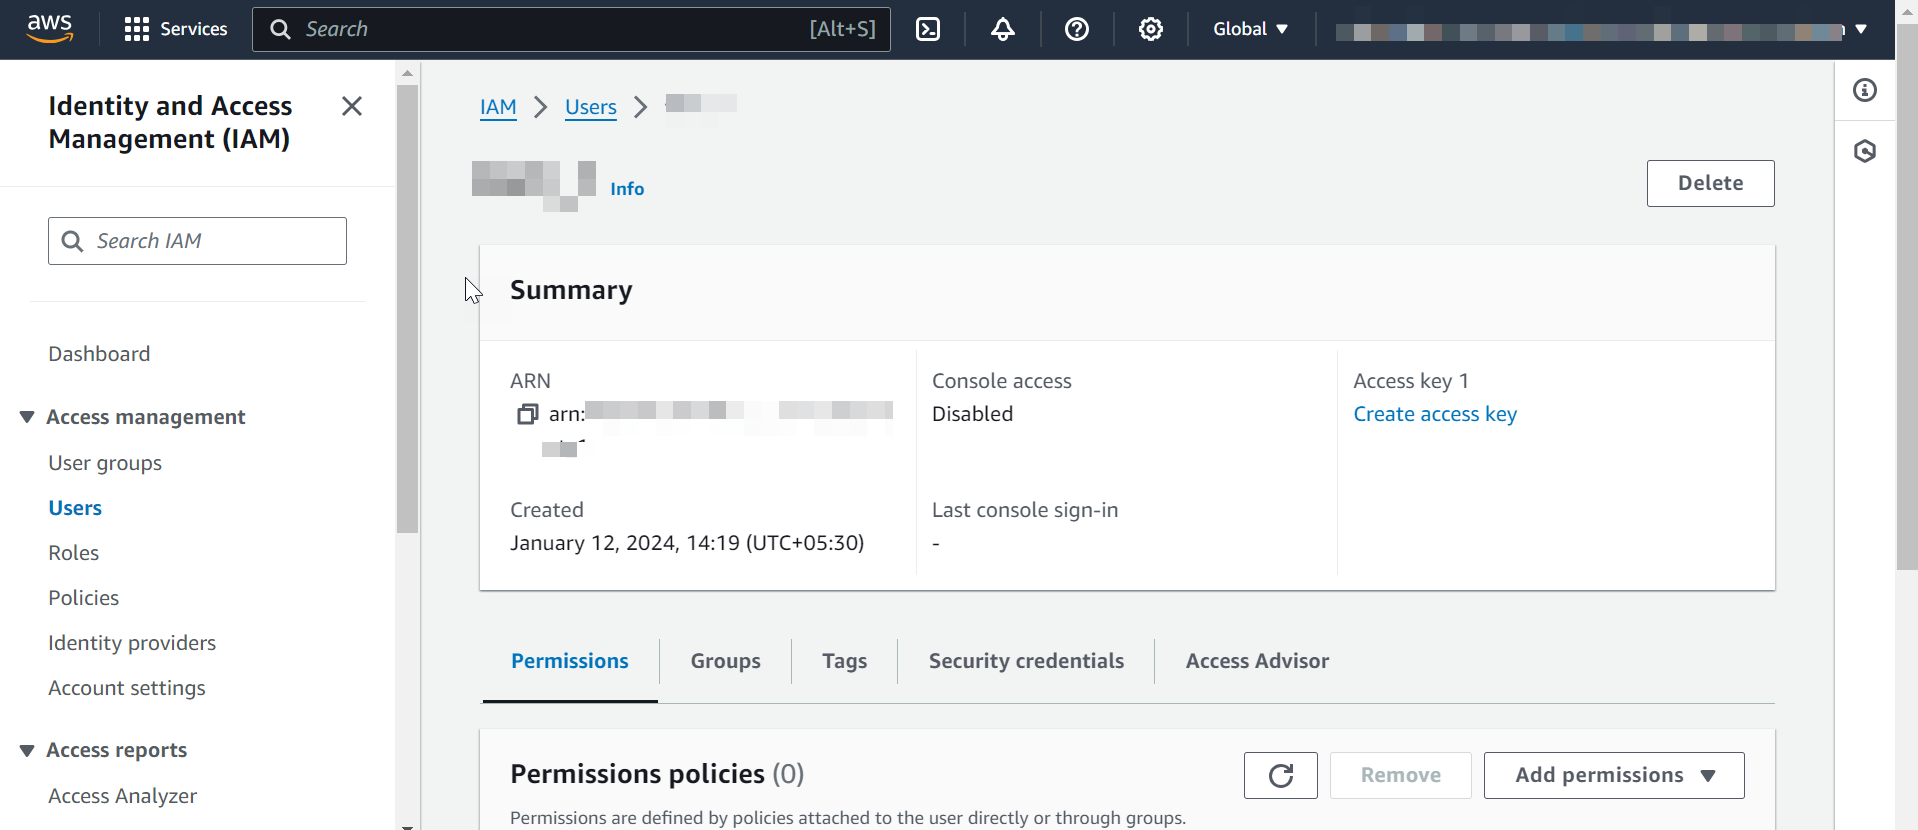
After creating a user, click View user in the notification.
Create an access key by clicking Create access key in the Summary section. For more information on creating and managing access keys, see Managing access keys for IAM users in the AWS documentation.
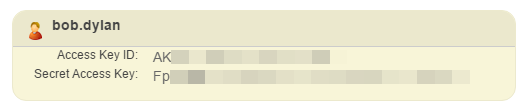
Record the Secret Access Key and Access Key ID. Optionally download the credentials in CSV format, as they will not be accessible after you leave this page.
Create an IAM Role
An IAM Role is required for the STSAssumeRole authentication. To create an IAM role, use the following steps.
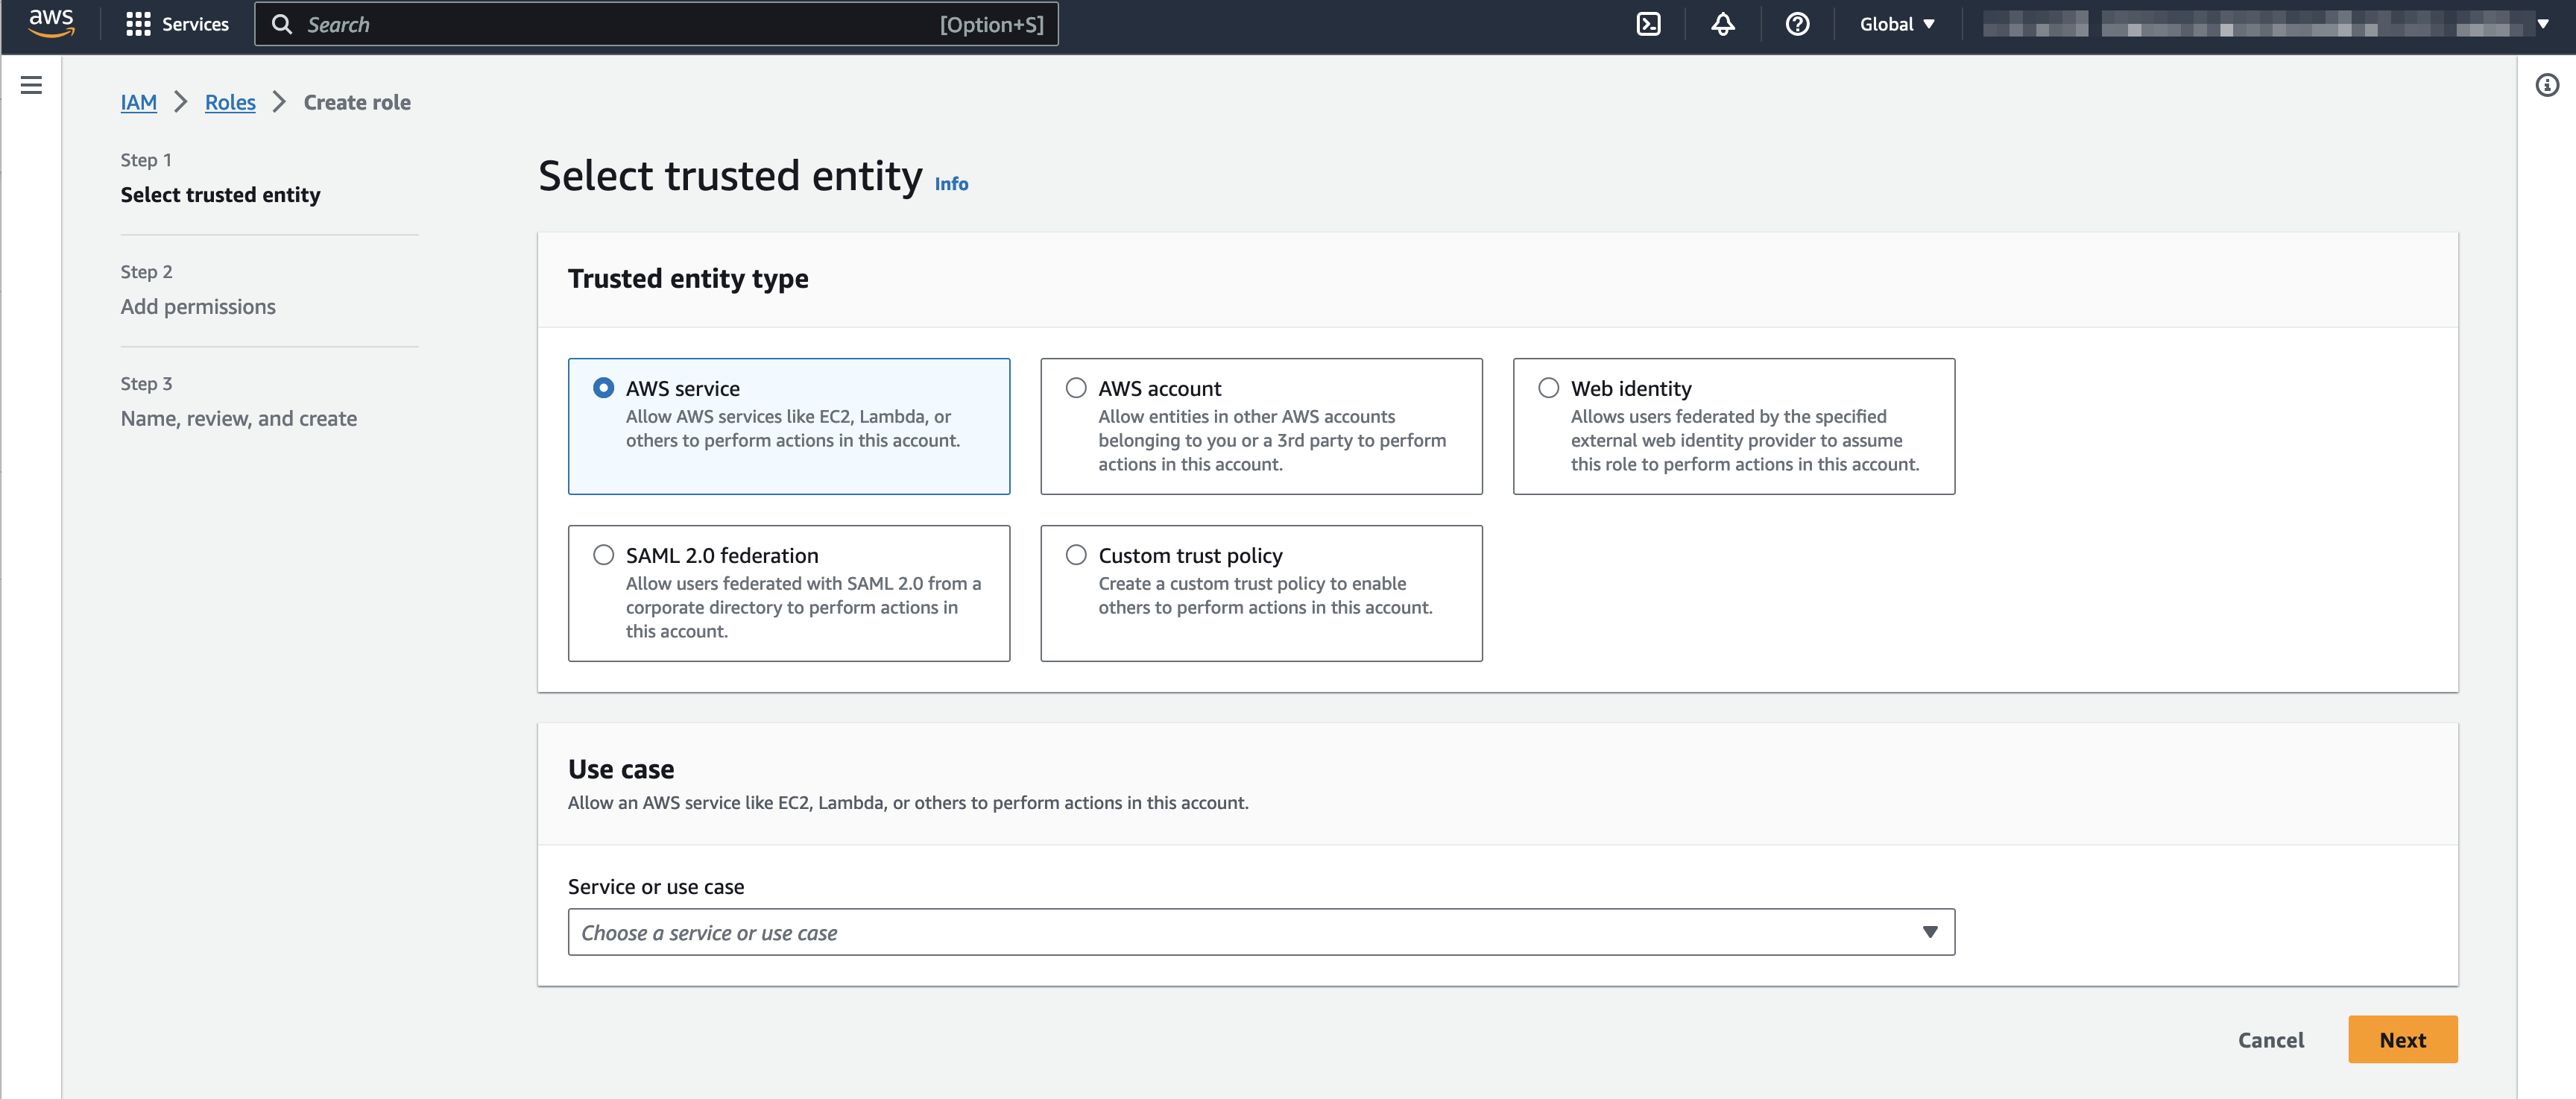
In your AWS console, navigate to Services > IAM > Roles > Create Role.
Enable the AWS service and select EC2 service from the Service or use case list, then click Next: Permissions.
This will create a Trust relationship that allows EC2 instances to call AWS services on your behalf. You will modify the Trust relationship later, per authentication method that you choose.
Search the policy created earlier and check its checkbox. Click ext: Name, review, and create.
Specify a meaningful name, for example ExabeamCCAWSConnectorRole, and provide a description. Then click Create Role.
Optionally add tags. Click Next: Review.
For the user you want to assume the role:
Go to Trust relationships tab and then click Edit trust relationship.
Make sure the Statements array contains the following entry (modify accordingly for your user):
{
   "Effect":"Allow",
   "Principal":{
      "AWS":"arn:aws:iam::123456789012:user/ccuser"
   },
   "Action":"sts:AssumeRole"
}
Click Update Trust Policy.
Search for and then select the new role.
Record the role ARN.
Navigate to IAM > Roles and search for the role created earlier.
Create an AWS Account
Create an AWS account in which the authentication credentials for the AWS service are saved. Perform this workflow after you complete the setup of the identity in AWS as described in the earlier sections such as creating an IAM Policy, authenticating with an IAM user, and authenticating with STSAssumeRole in Add Accounts for AWS Cloud Collectors.
To create an AWS account:
Log in to the New-Scale Security Operations Platform with your registered credentials as an administrator.
Navigate to Collectors > Cloud Collectors.
Click Accounts, then click New Account.
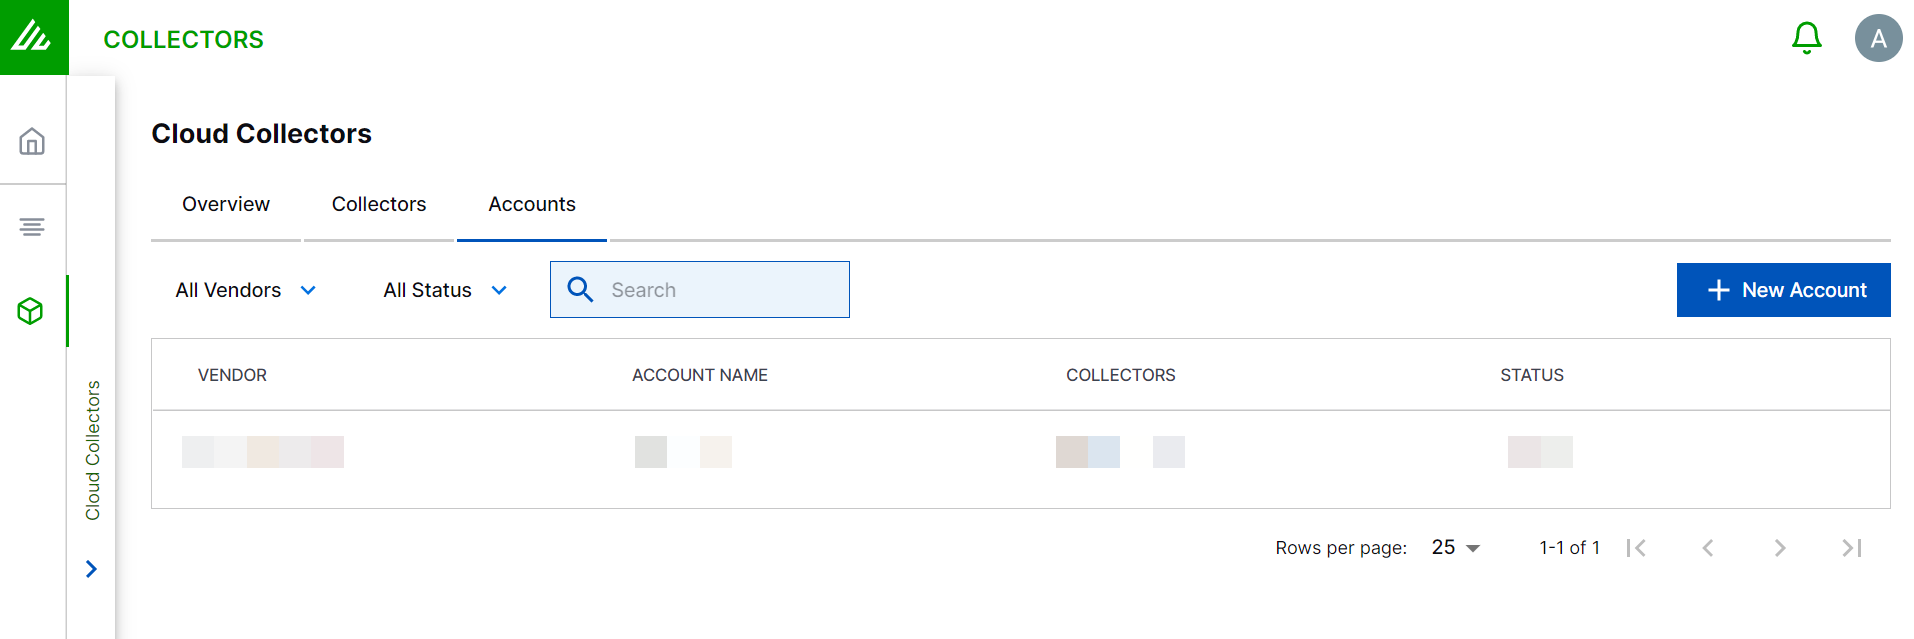
In the Add a New Account page, enter the required information.
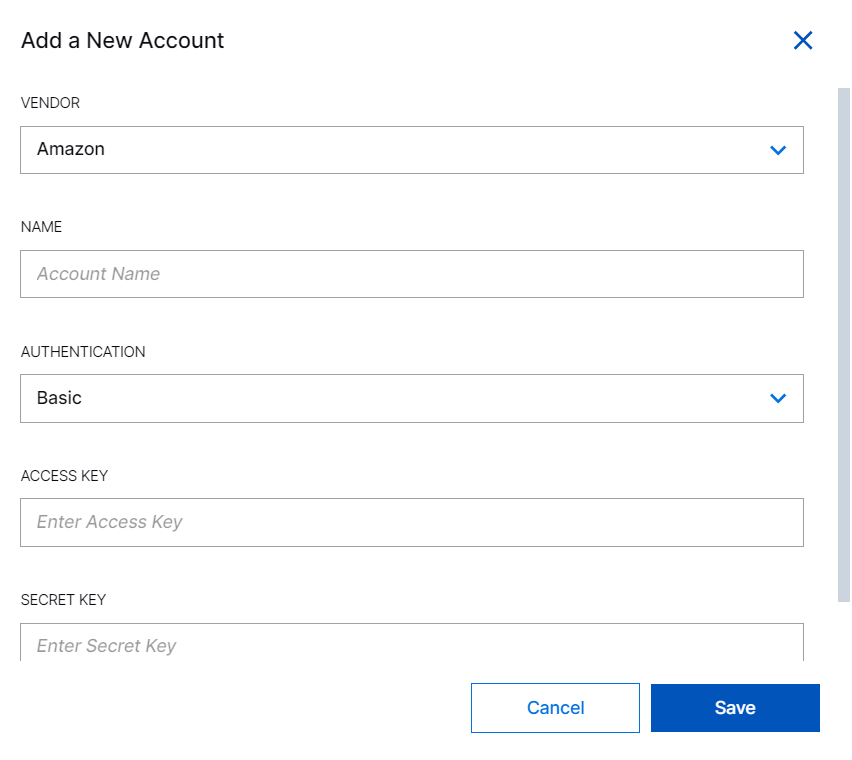
VENDOR – Select the vendor as Amazon.
NAME – Specify a name for the AWS account.
AUTHENTICATION – Select and provide information for the authentication type, either Basic or STSAssumeRole:
ACCESS KEY – Enter the secret key that you obtained while creating a designated user.
SECRET KEY – Enter the secret key that you obtained while creating a designated user.
ROLE ARN – (STSAssumeRole only) Enter the role ARN that you obtained while creating an IAM role.
ROLE SESSION NAME – (STSAssumeRole only) Specify a name for the role session to identify the use of this role. For example, Exabeam.
EXTERNAL ID – (STSAssumeRole only, optional) Enter a unique identifier that might be required when you assume a role in a different AWS account.
SIGNING ENDPOINT – (STSAssumeRole only) Select the signing endpoint from the list to which you want to redirect STS requests. For example, sts.amazonaws.com, or sts.us-west-1.amazonaws.com.
Click Save.
Proceed to Onboard Cloud Collectors.
When you onboard new collectors for AWS services, you must select the AWS account. You can reuse credentials between different AWS collectors provided that you have the required permissions configured for the collector.