Create an Event Selection Policy Statement
To manually create an event statement:
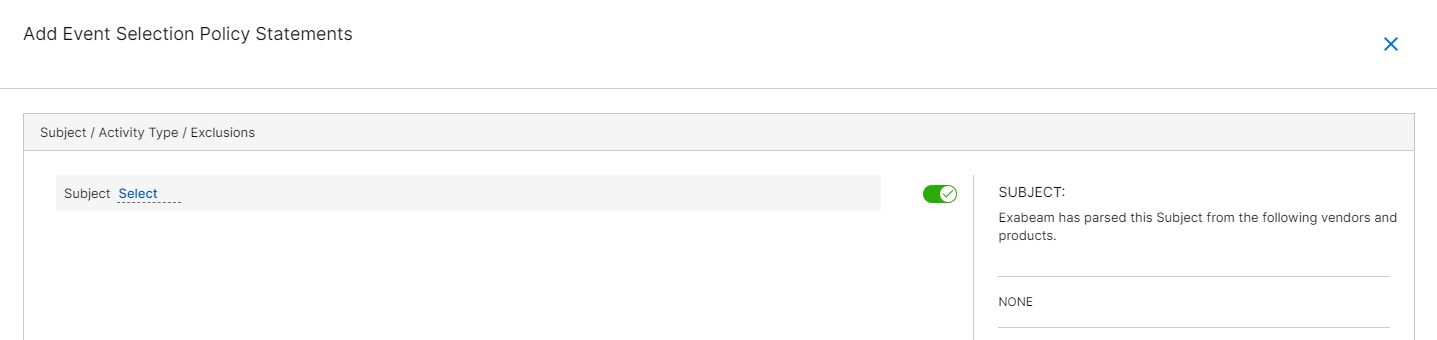
On the Event Selection home page, click Add Event Statement.
The Add Event Selection Policy Statements dialog displays.
The
 icon indicates that this statement will automatically be enabled when you save. Click the icon to have the statement automatically disabled.
Select a subject from the drop-down menu. A panel on the right displays a list of vendors and products that have recently provided Exabeam with information about the selected subject.
Note
The drop-down menu will only contain subjects for which an event statement has not yet been defined, as there cannot be more than one event statement for a subject.
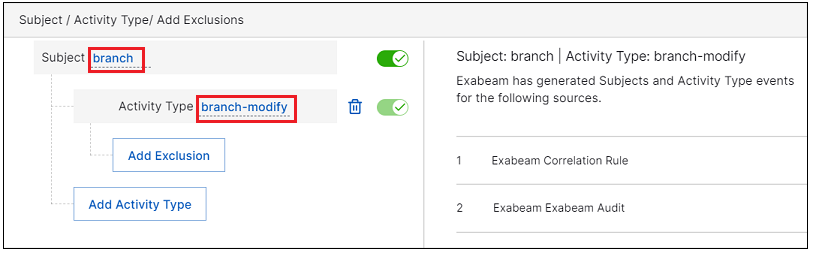
Click Add Activity Type, and select an activity type from the drop-down menu.
Note
The drop-down menu will contain the activity types parsed for the subject of this event statement, and conforms to the Common Information Model (CIM) 2.0. For more information, see Common Information Model.
In the panel on the right, you can view a list of vendors and products that have recently provided Exabeam with information about the selected subject and activity type combination. Click the selected activity type, as shown in the image below. If you want to toggle the vendor and product list back to all sources for the subject, click the selected subject.
To add exclusions to this activity type, click Add Exclusion.
Select a field from the drop-down menu.
Note
The field list will contain all fields that have been parsed for this activity type, including those that conform to the Common Information Model (CIM) 2.0, as well as any custom or TIS enriched IOC fields selected in Parser Manager.
Select an operator from the drop-down menu.
Define the value and press
Enter.
Note
To add multiple exclusions to an activity, click Add Exclusion again and define as above (expression added with an
oroperator), or click the icon and define as above (expression added with an
 andoperator). Events that match these selections will be excluded.Repeat steps 3 and 4 until the event statement is defined to your satisfaction. Click the
 icon to delete any parts of the statements you do not want. If you are creating an exclusion when you click the icon, the full statement line is deleted.
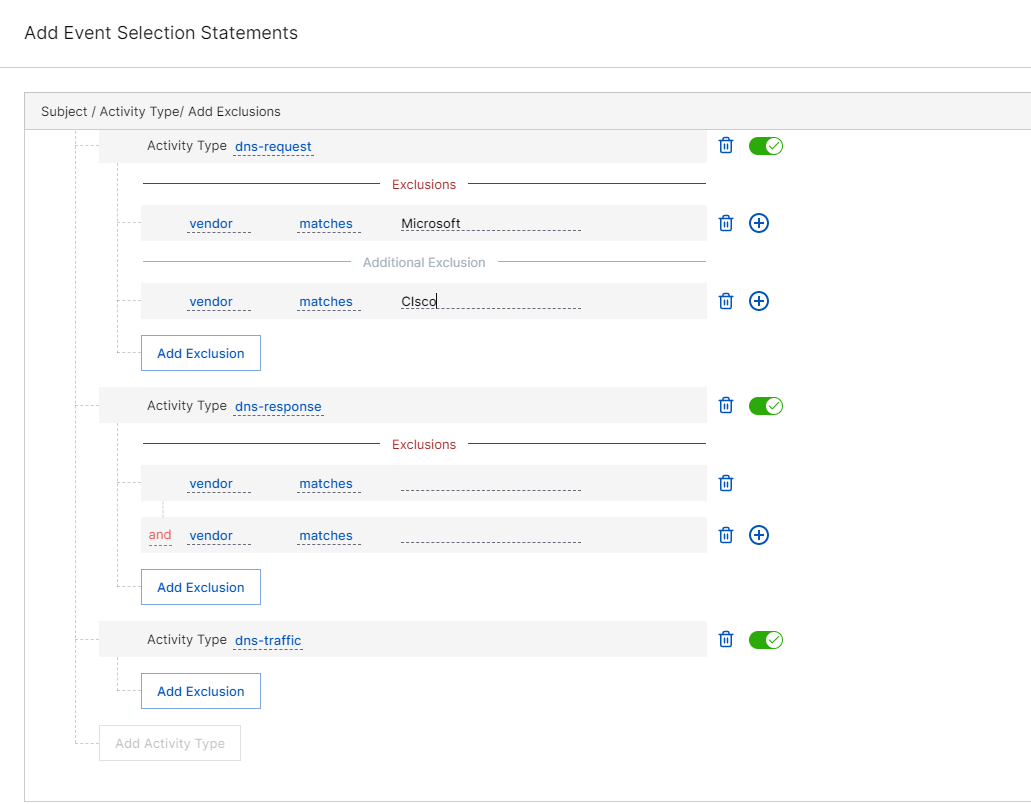
Click Save.
Note
The system validates the statement as you build it, and will not let you save if the statement is invalid in anyway. For example, you must add at lease one activity type to the statement, or the system will not let you save.
Your newly created event statement will appear in the event statements list.