- Welcome to the New-Scale Security Operations Platform
- Licenses
- Supported Regions for Data Residency
- Get Started with the New-Scale Security Operations Platform
- Universal Role-Based Access
- Exabeam Nova
- Monitoring
- Export Your Exabeam Data
Manage Global Notifications Preferences
Global notifications are created from webhooks, which enable you to automatically send messages from Exabeam to third-party applications (such as Microsoft Teams or Slack) in real time whenever specified events are triggered. The Global Notifications page is the interface for administrators to turn these notifications on or off and select where to send them. From this page you can also edit existing webhooks and add new webhooks.
Managing global notifications requires creating a new webhook connection and configuring the notification options for different Exabeam applications and services. For details, follow the links below:
Add a New Notification Channel
Configure webhooks to add new notification channels. To create a new webhook connection:
In the New-Scale Security Operations Platform, click Settings (
 ) in the left navigation pane and select Global Notifications.
 The Global Notifications page opens. The Channels section at the top of the page displays your existing webhooks.
Note
This Settings page only shows webhook options for notification purposes. To configure options for other types of webhooks, navigate to Settings > Developer > Webhooks.
Click Add channel.
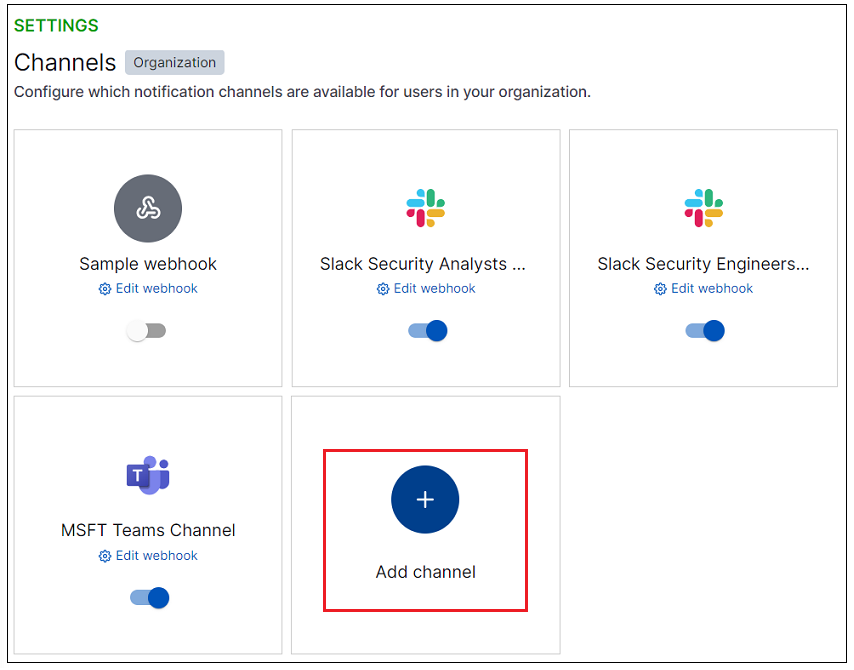
Select the type of notification channel you want to create. Current options include:
Slack – Create a webhook connected to a specific Slack channel. For the endpoint URL you'll need in the next step, follow the steps below in Find the Incoming Webhook Endpoint for Slack.
Microsoft Teams – Create a webhook connected to a specific Teams channel. For the endpoint URL you'll need in the next step, follow the steps below in Find the Incoming Webhook Endpoint for Microsoft Teams.
Custom Webhook – Create a custom webhook connected to a specific URL.
Email – Send notifications from system events to a specific user email or distribution list.
Log into Slack, either in the desktop application or online.
Create a new channel or locate an existing channel and click it to expand the options menu.
Select View channel details. A details dialog box opens.
Select the Integrations tab and click Add an App.

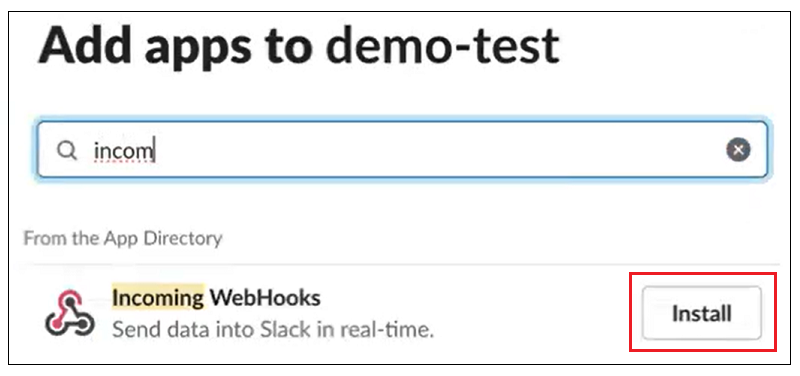
In the Add apps page, use the search bar to find Incoming WebHooks.
Click Install.
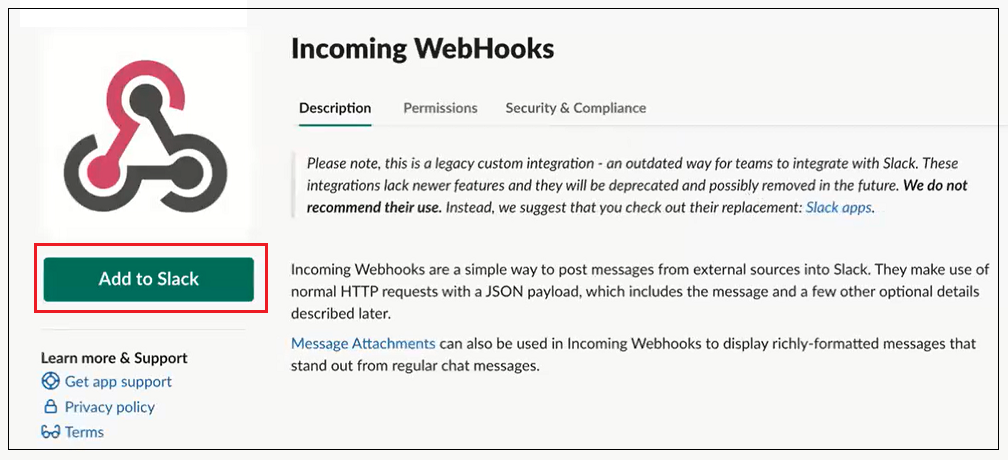
On the Incoming WebHooks page, click Add to Slack.
In the Post to Channel section, use the dropdown arrow to choose the channel you're creating a webhook for.

Click Add Incoming WebHooks integration. A WebHook URL is generated and displayed on the Incoming WebHooks page.
Copy the URL from the Webhook URL field.

Paste this URL into the in the Endpoint Information section when configuring a new Slack webhook in the New-Scale Security Operations Platform.
In Microsoft Teams, you will need to use the Workflows application to configure an endpoint for any Teams channel to which you want to send notifications.
Log into Microsoft Teams.
In the left navigation panel, click the View more apps icon (
 ) and select the Workflows application.
 If you have not used Workflows previously, you might need to search for it and click Add to add it to your available apps.
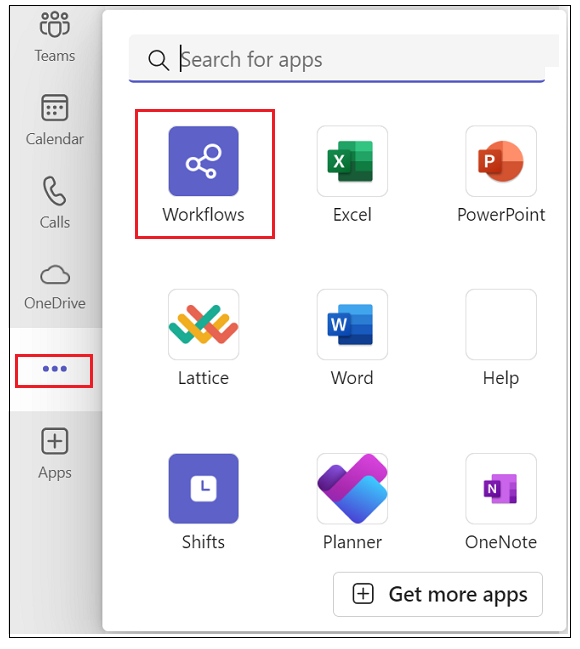
The Workflows application opens in your Teams window.
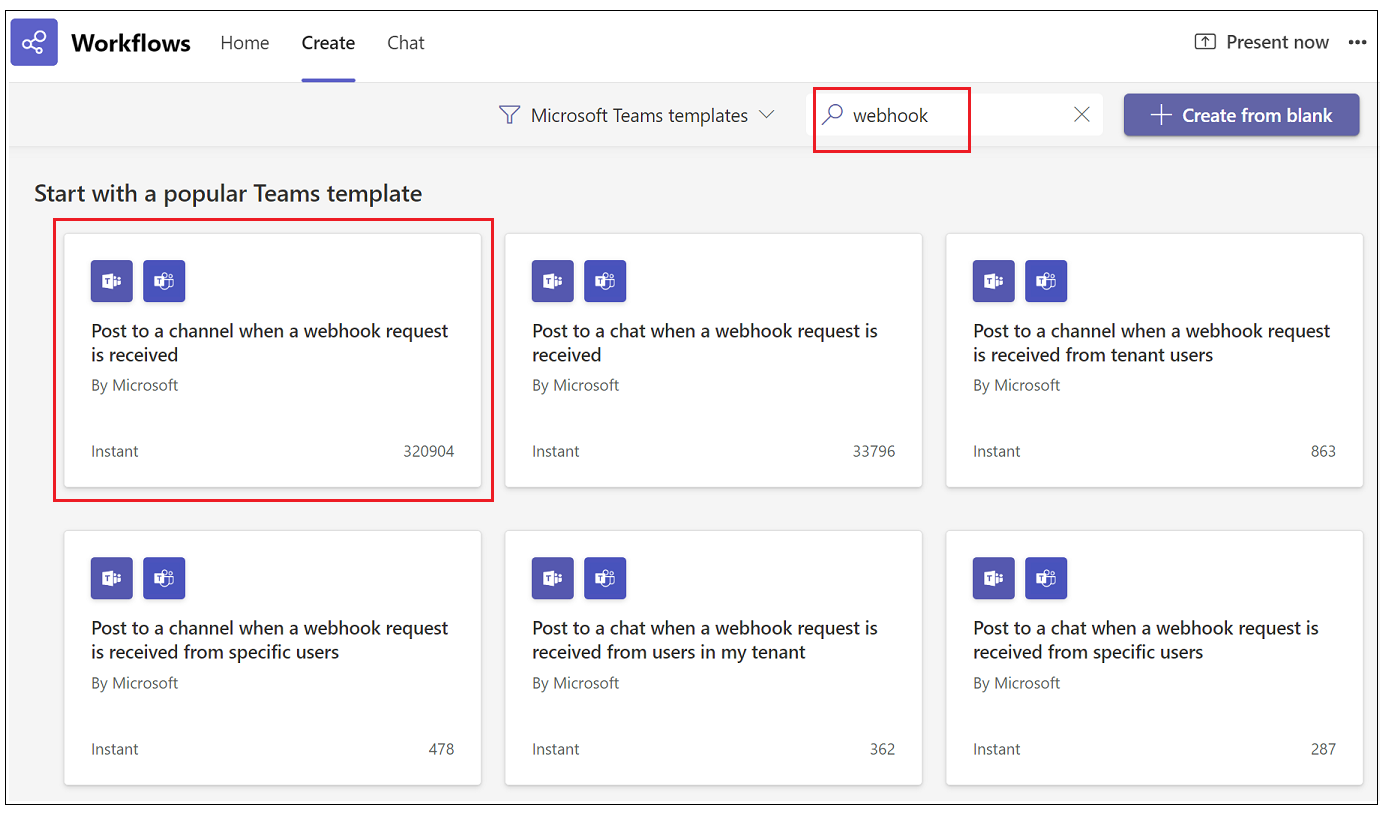
At the top of the Workflows application window, click Create. A page of existing Microsoft Teams templates opens.
In the Search templates... field, enter
webhookand press Enter on your keyboard to filter the templates.Select the template in the top left corner called Post to a channel when a webhook request is received. A Create a flow dialog box opens.
Enter a name for the new flow in the Flow name field and click Next. The next flow configuration screen is displayed.
Enter information in the following fields:In the Microsoft Teams Team field, use the drop down arrow to find and select one of your existing teams.
Microsoft Teams Team – Use the drop down arrow to find and select one of your existing teams. Alternately, you can click Add a custom item and create a new team.
Microsoft Teams Channel – Use the drop down arrow to find and select an existing channel in the team you selected in the previous field. Alternately, you can click Add a custom item and create a new channel for the team
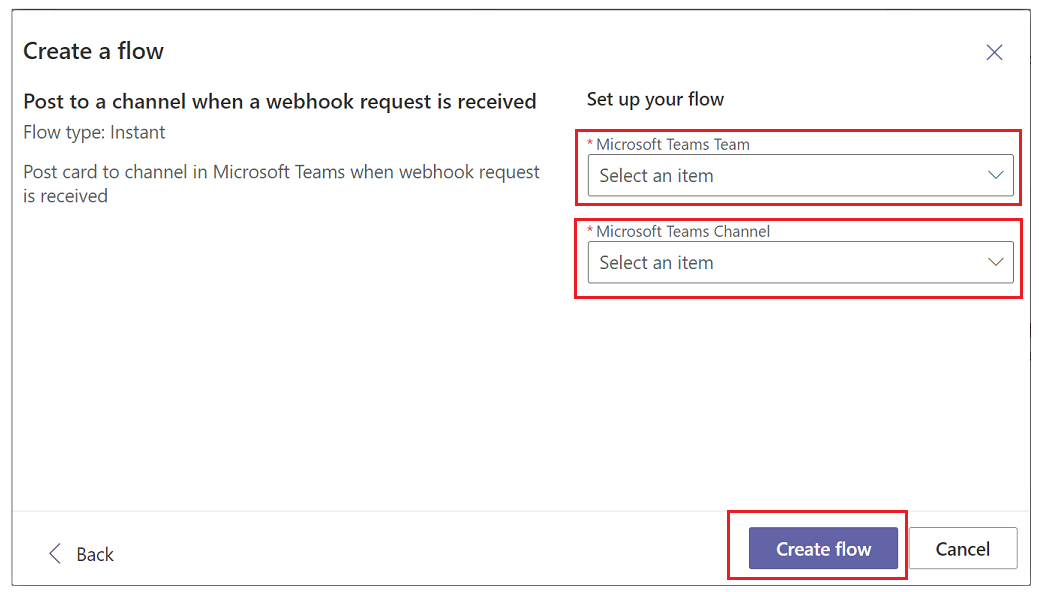
Click Create flow. If your new flow is added successfully, a URL link is generated and displayed in the dialog box.
Click the Copy icon (
 ) to copy the URL to your clipboard.
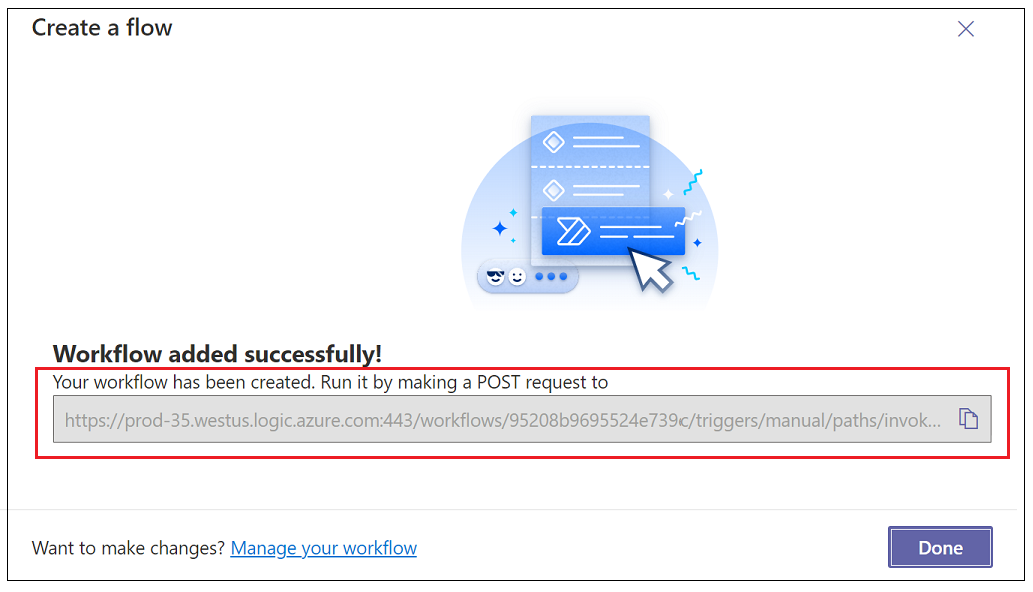
Paste this URL into the Endpoint Information section when configuring a new Microsoft Teams webhook in the New-Scale Security Operations Platform.
Tip
When you create a workflow, you are the sole owner of that flow and only you can modify or manage it. It's a good idea to assign a co-owner to the flow so that it can be accessed even if you are unavailable. To add a co-owner:
Click Home at the top of the Workflows app screen.
Select a flow to open a details page.
From the Connections box on the top right, click Edit.
Enter a user or group to serve as a co-owner. The new co-owner is notified and is displayed in the Co-owners box below Connections.
If using a custom webhook, enter a Webhook name and Endpoint Information in the Add new custom webhook dialog box.
Click Add webhook. A new webhook tile is displayed in the Channels section of the Global Notifications page.
Configure Global Notification Options
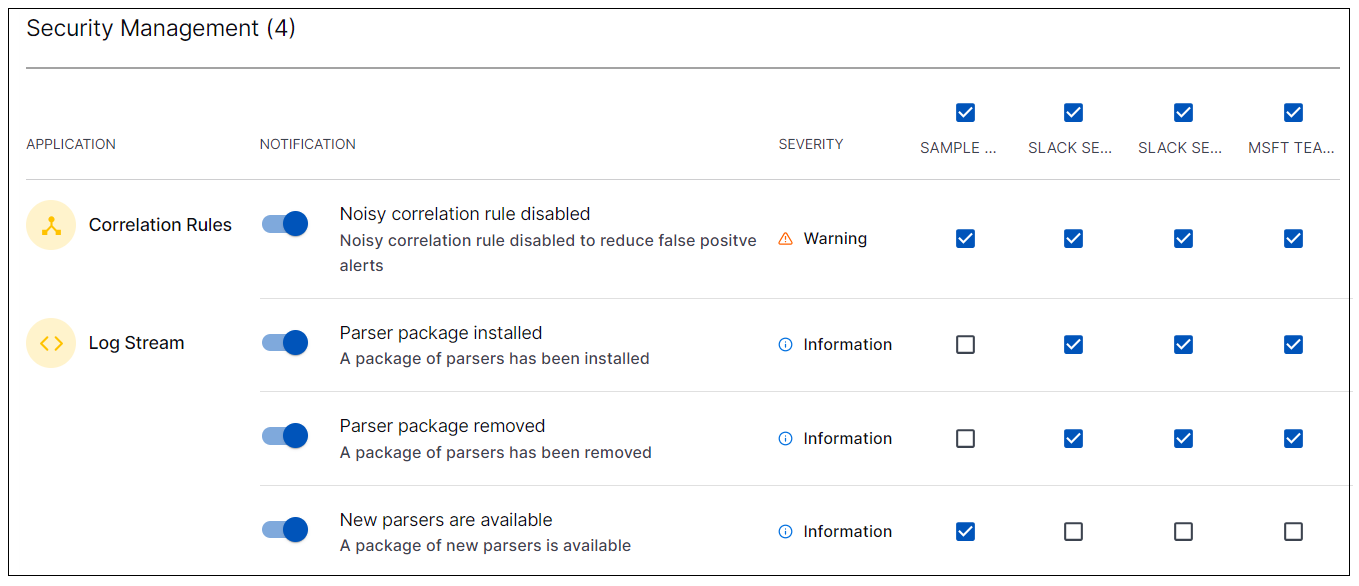
The Delivery section of the Global Notifications page provides the following options for filtering and configuring the global notifications:
You can filter the notifications lists to locate specific notifications you want to view:
To filter by Categories, Applications, or Severities, click their respective drop-down menus and select from the available values.
To Filter by notification title, click in the filter box and start typing a title or keywords within a title.

To turn notifications from a specific application on or off for all channels, click their Notification toggles. A blue toggle indicates a notification is on; a gray toggle indicates a notification is off.

To configure which channels should receive notifications from a specific application, select the appropriate check boxes for each application row.
