- Welcome to the New-Scale Security Operations Platform
- Licenses
- Supported Regions for Data Residency
- Get Started with the New-Scale Security Operations Platform
- Universal Role-Based Access
- Exabeam Nova
- Monitoring
- Export Your Exabeam Data
Set up Microsoft Entra ID (formerly Azure) as your Identity Provider
If you use Microsoft Entra ID as a third-party Single Sign-On (SSO) provider, you can integrate your Microsoft Entra ID with Exabeam to ensure a secure login experience.
Note
Examples throughout these instructions may reflect the earlier name of Azure.
Important
Ensure you select the appropriate account during SAML authentication after setting up. If you select an account under a different domain during the SAML authentication process, you may appear to be logged in with that alternate domain, even if it is not registered or intended for use with Exabeam SSO.
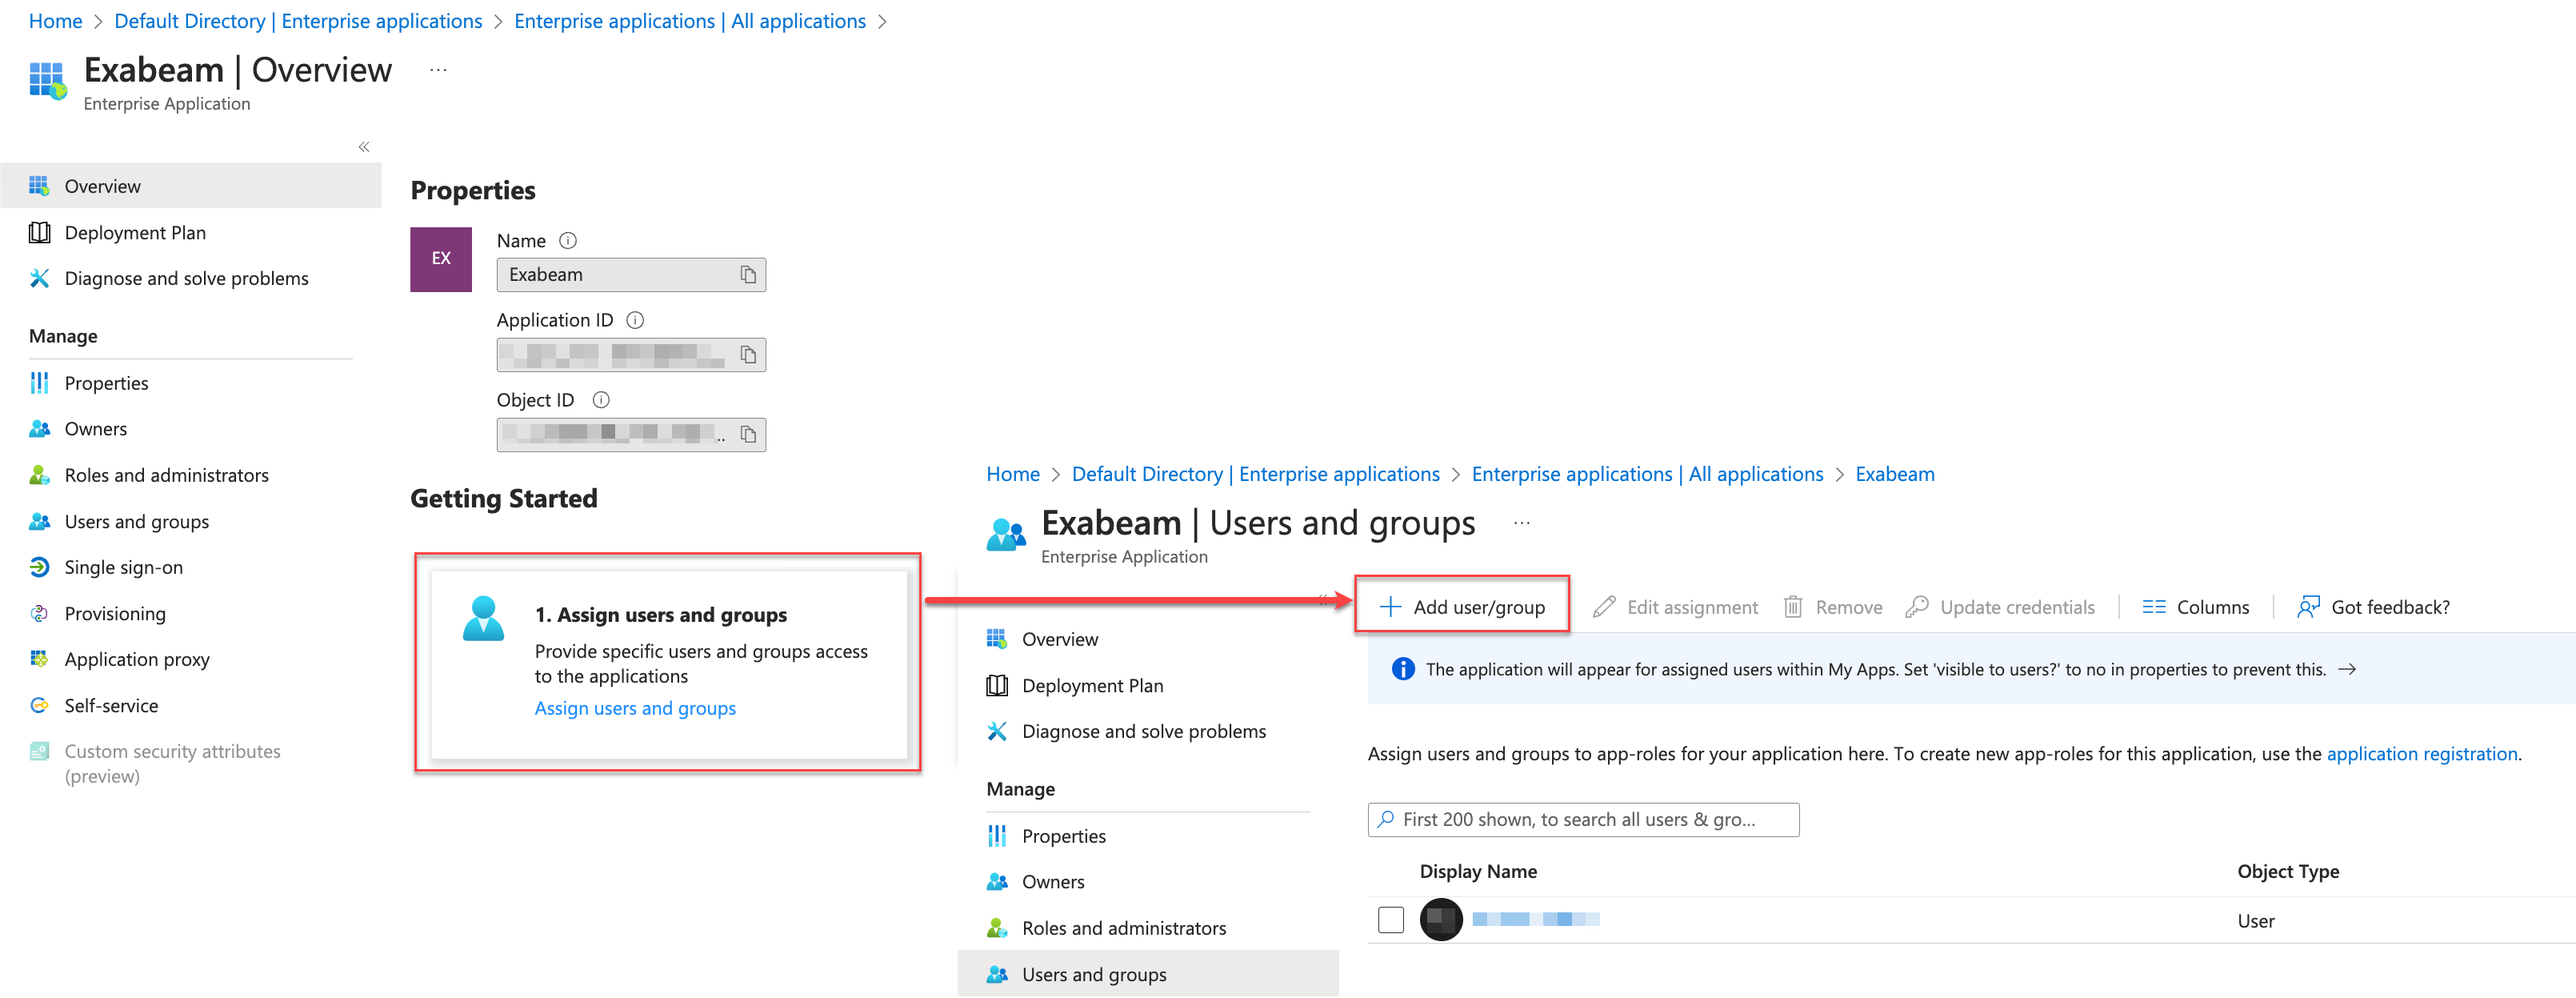
Add the Exabeam Application in Microsoft Entra ID
Before you set up the IdP settings in Exabeam, you must add an Exabeam Application in Microsoft Entra ID. The attributes and SAML settings that you define will be needed for your Exabeam configuration.
Create your own application for Exabeam as an Enterprise application in the Microsoft Entra admin center.
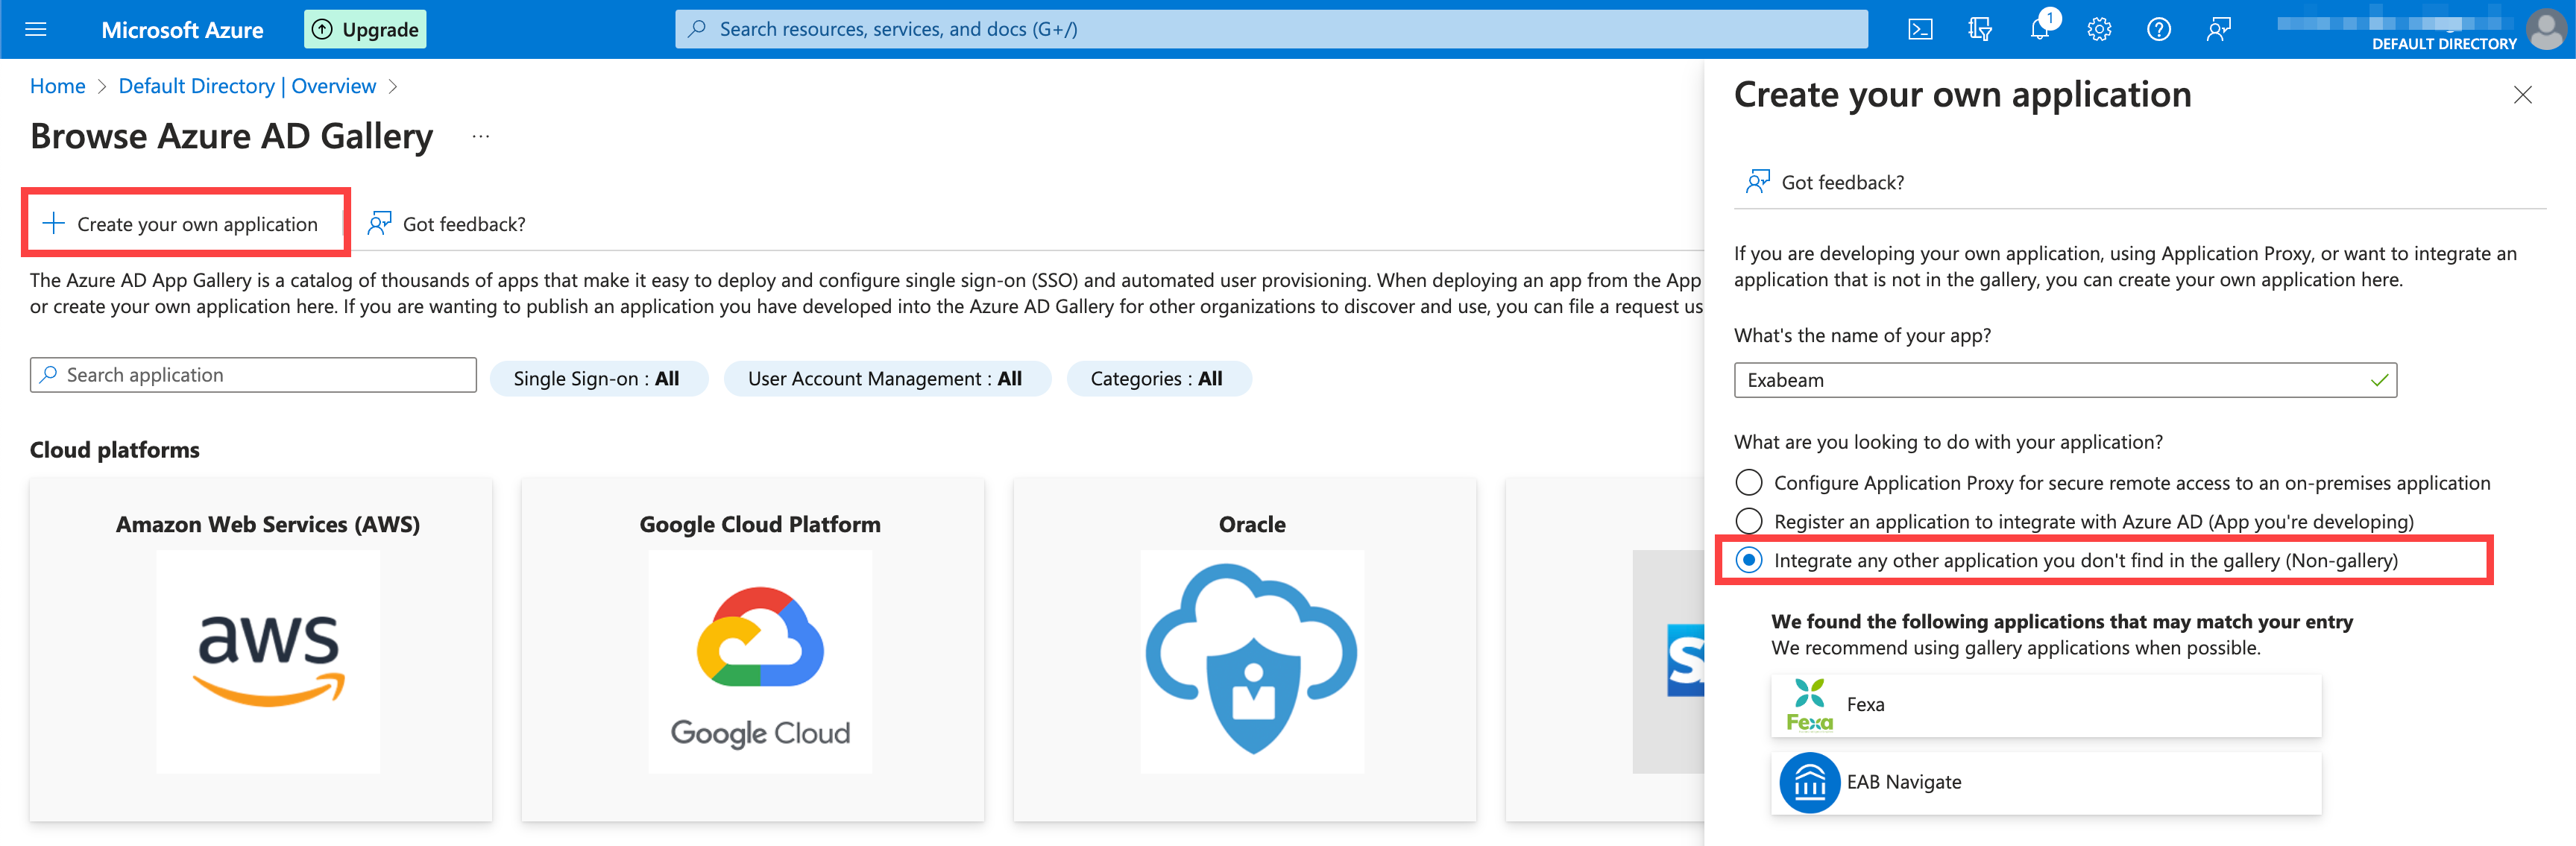
For full instructions, see the Microsoft Entra ID Quickstart: Add an enterprise application.
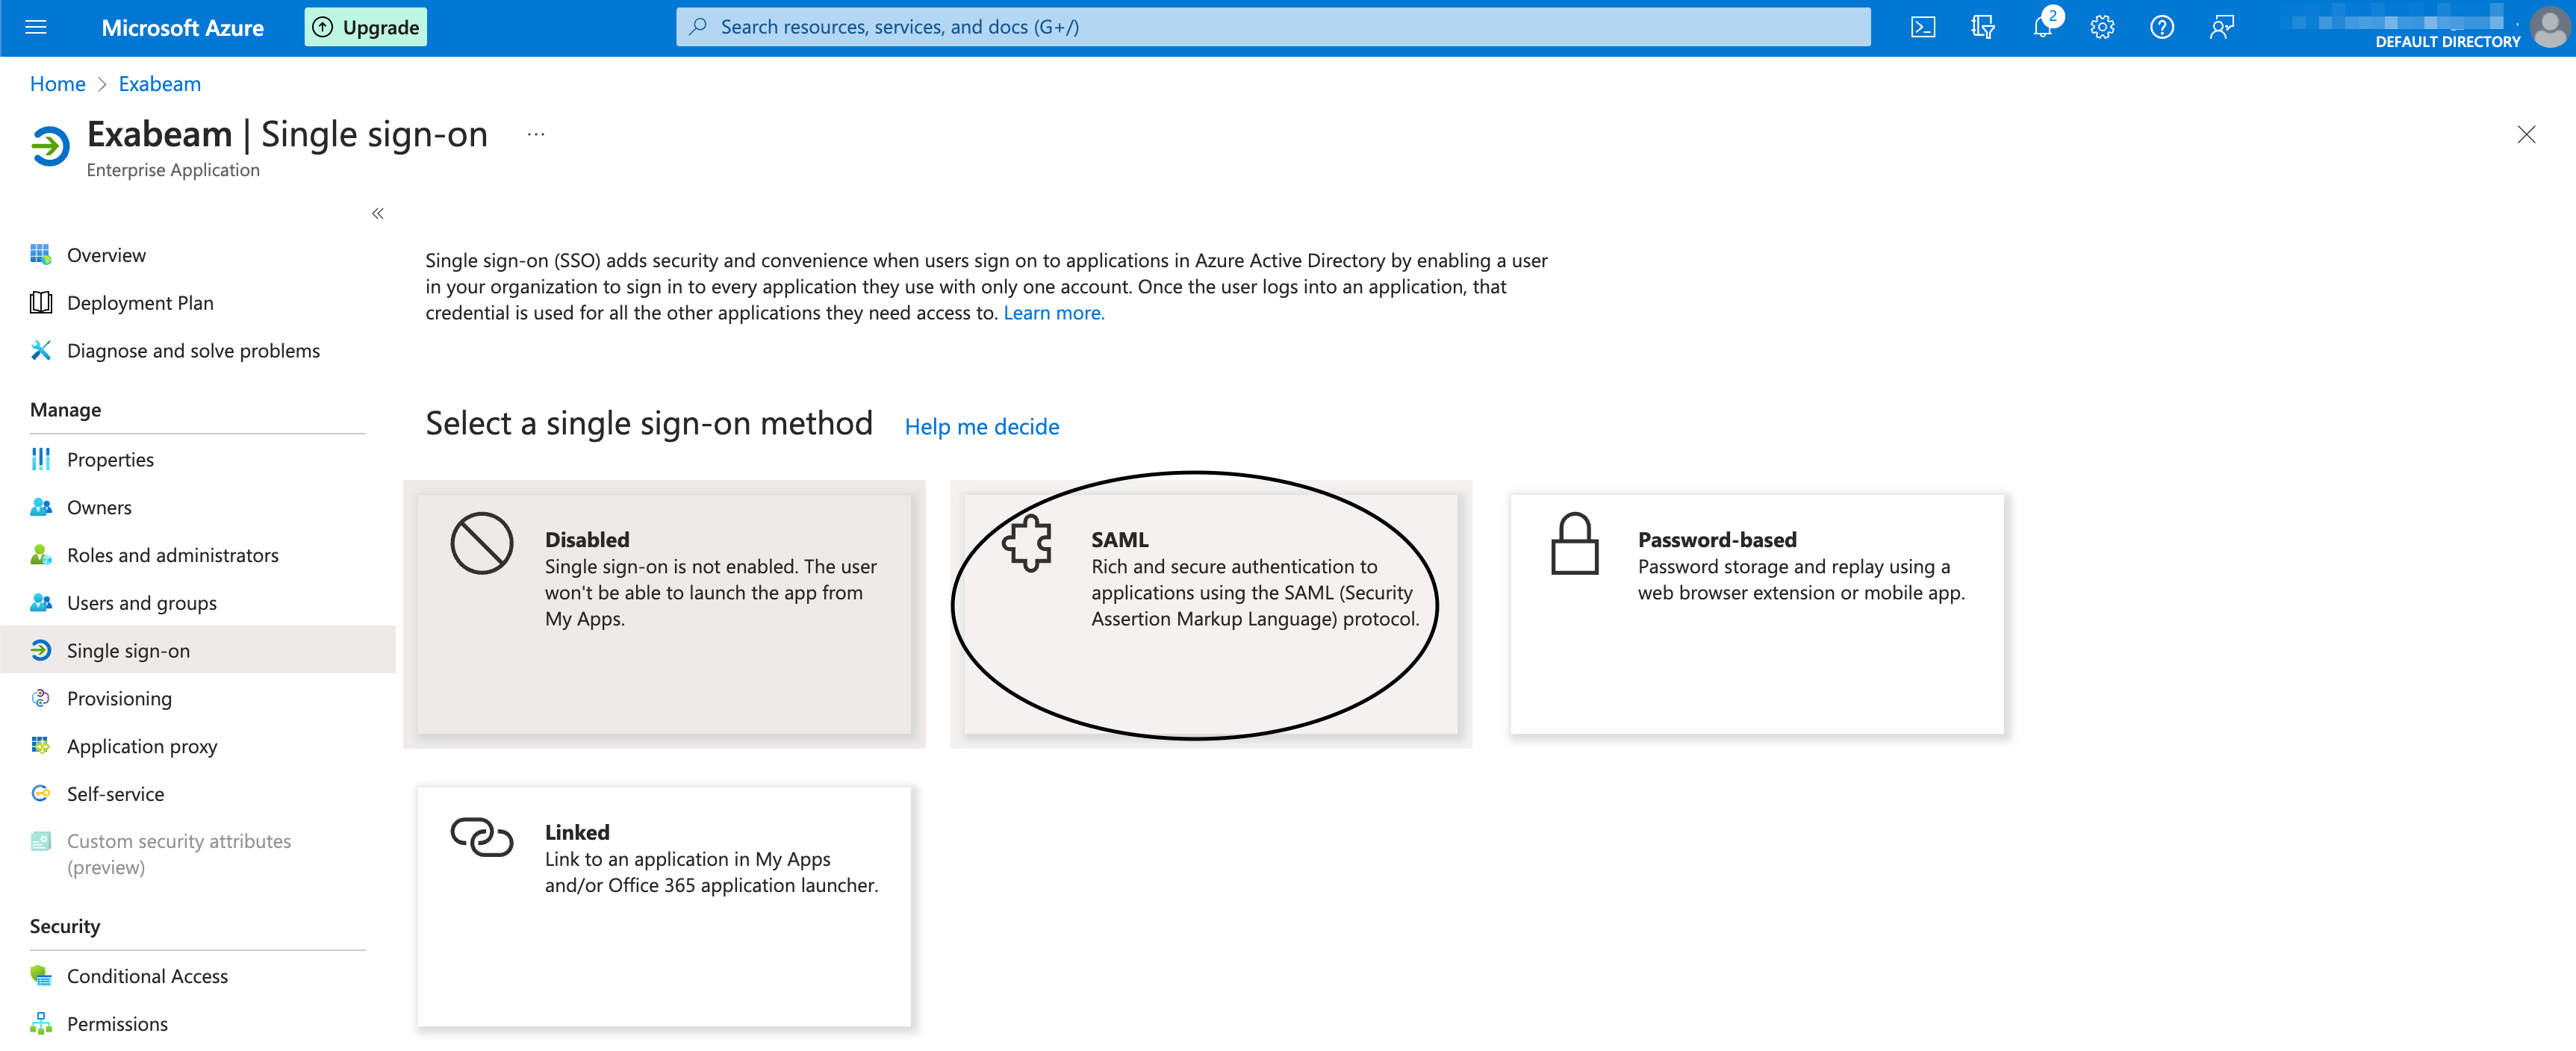
Configure Single Sign-On as the authentication method for your Enterprise application.
During the setup, you will:
Supply placeholder links for the Identifier (Entity ID) and Reply URL (Assertion Consumer Service URL).
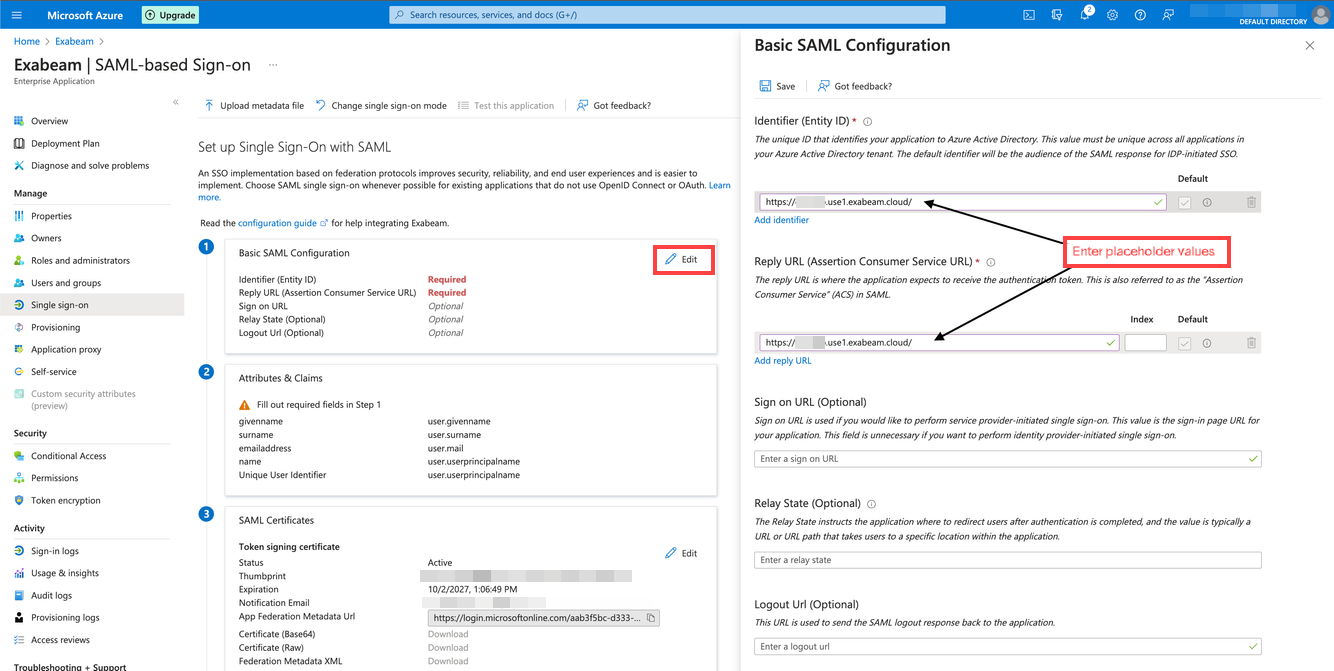
You will later return to the configuration to replace the links after you complete the Exabeam-side configuration.
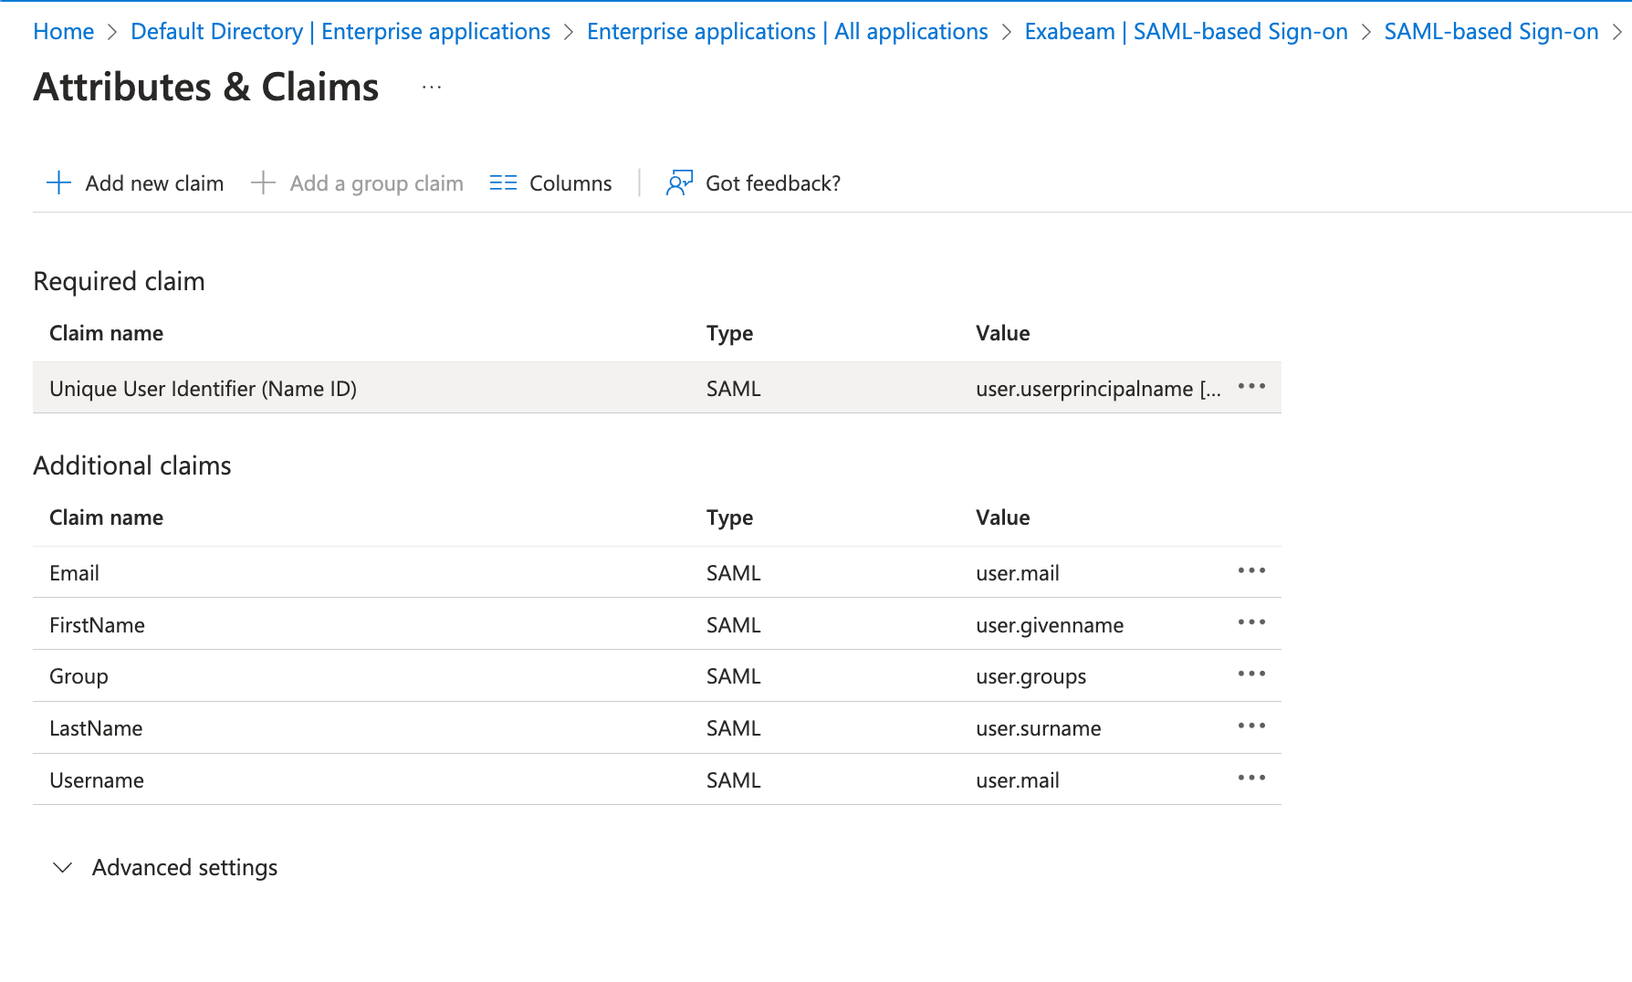
Edit or add the attribute statements that Microsoft Entra ID will share with Exabeam.
Microsoft Entra ID Name
Value
Unique User Identifier (Name ID)
Warning
Do not use this field. Instead, create a new Username field. If any field is missing, Add new claim and define it.
FirstName
user.givennameLastName
user.surnameEmail
user.mailUsername
user.mailor an alternate definition if you do not use email for your username.Configure a group claim to define the user's group membership information that you want to use in the application.
Set the Group Claims to Groups assigned to the application (see Source attributes and then set that to Group ID).
Configure group mapping for the new application.
Set up groups to limit access to the New-Scale Security Operations Platform to only the users who need it. For each group that you create, make sure to assign the Exabeam application to that group.
Note
Note the Object ID of the group. You will need the unique identifier when you configure group mapping in Exabeam.
Test the integration to ensure that users can successfully sign in to the application using Microsoft Entra credentials.
If testing is successful, deploy the integration to make it active.
Add Microsoft Entra ID as the IdP in Exabeam
Add a Third-Party Identity Provider for Microsoft Entra ID.
During this workflow, you will enter information about the Exabeam Application that you set up in Microsoft Entra ID. It is recommended to have both the Exabeam IdP configuration and the Microsoft Entra admin center open at the same time.
The following table identifies the fields that are relevant to configure Microsoft Entra ID as the IdP:
Exabeam Field
Microsoft Entra ID Inputs
Identity provider name
Microsoft Entra ID
SAML Entity ID
Identifier (Entity ID).
Login URL
Sign-On URL.
Upload IdP Certificate
Copy or download the certificate from the SAML certifications section of the app configuration in Microsoft Entra ID.
Logout URL and Logout Redirect URL
These fields are optional in the New-Scale Security Operations Platform and will be automatically generated if left blank, however if you want redirect links, input those.
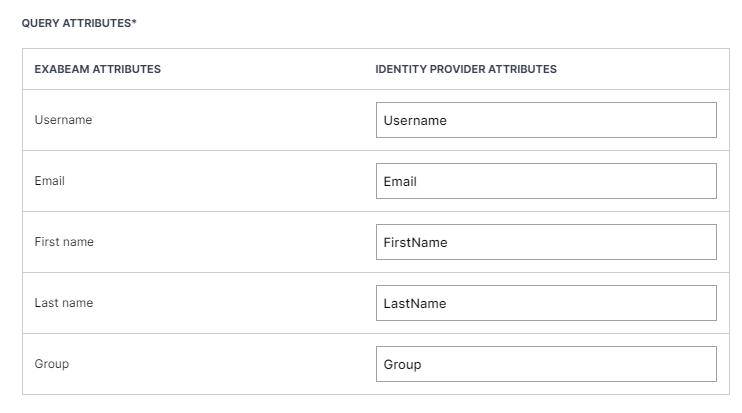
Query Attributes
Match the attributes exactly to the Claim Name you specified in Microsoft Entra ID.
Configure the Exabeam properties in Microsoft Entra ID.
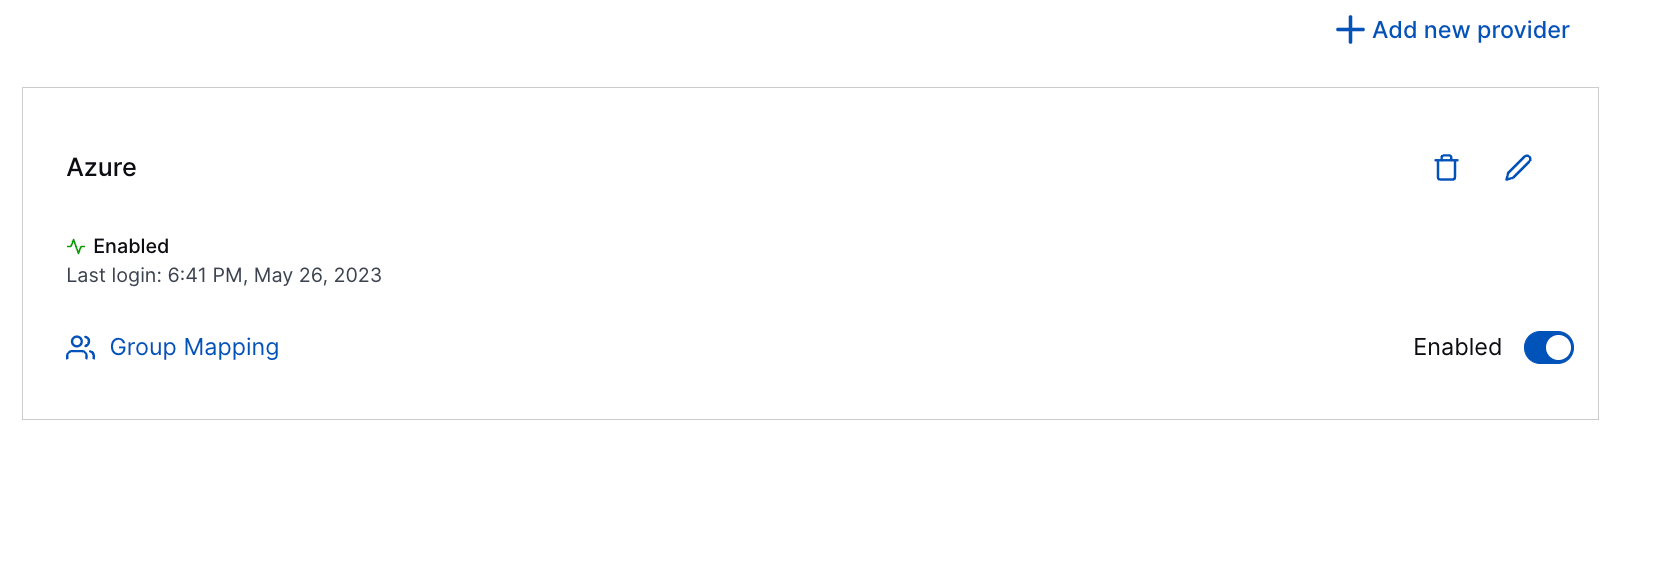
After you complete the setup, the New-Scale Security Operations Platform displays a summary of your IdP settings.
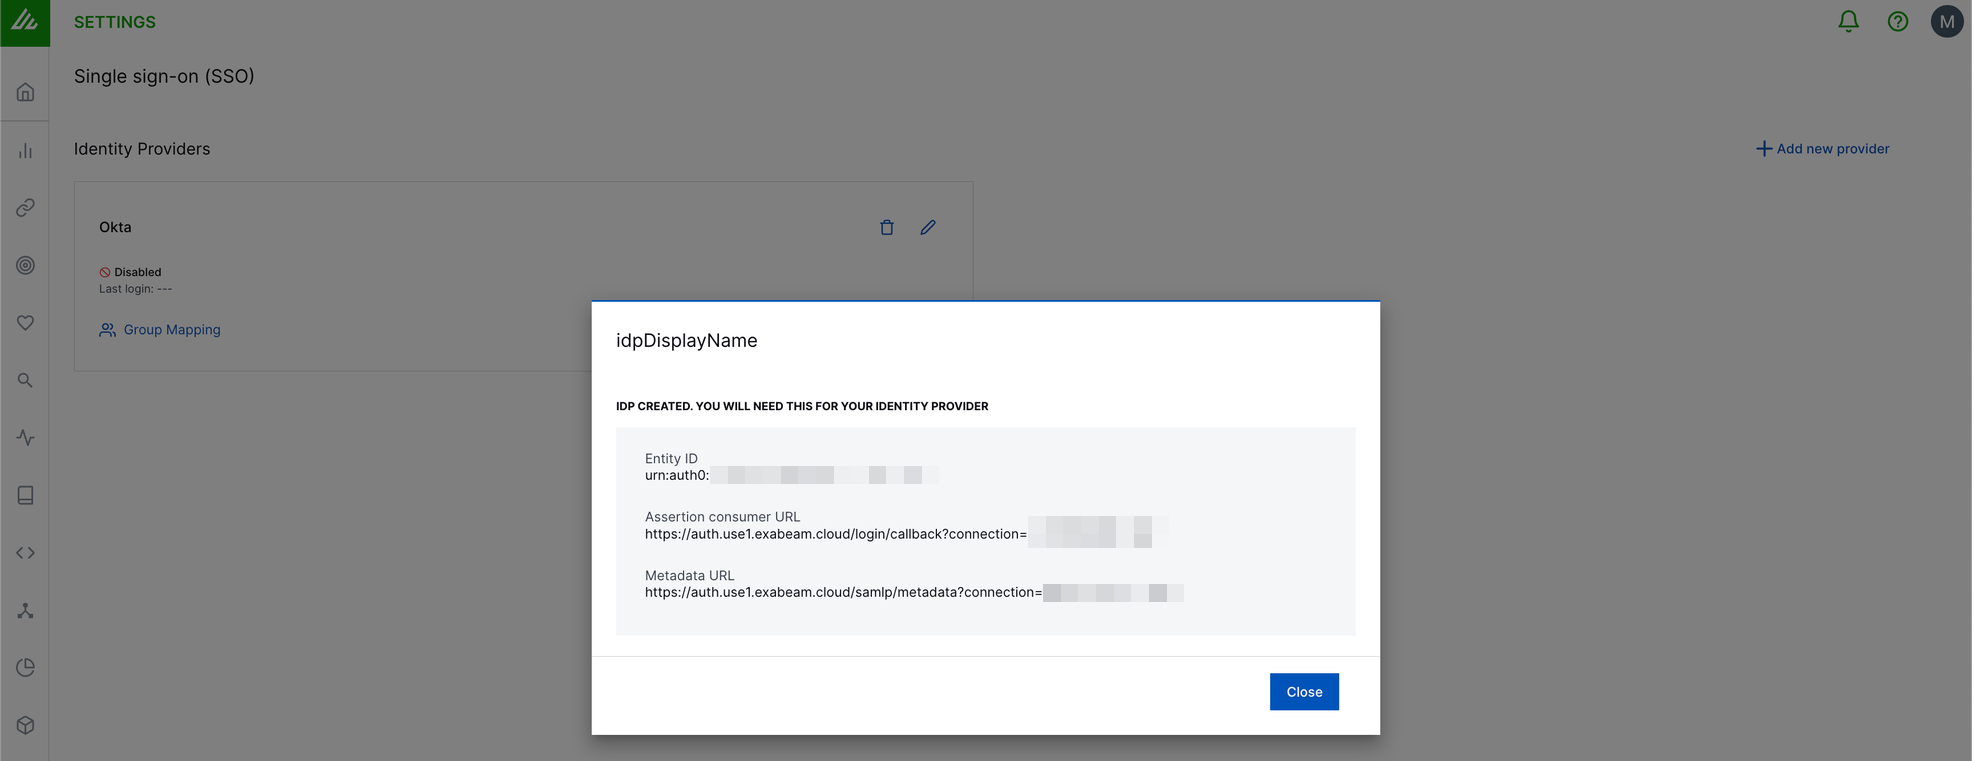
Update the app configuration Microsoft Entra ID to supply the Entity ID as the Identifier (Entity ID) and Assertion consumer URL as the Reply URL (Assertion Consumer Service URL).
Configure and enable group mapping in the New-Scale Security Operations Platform.
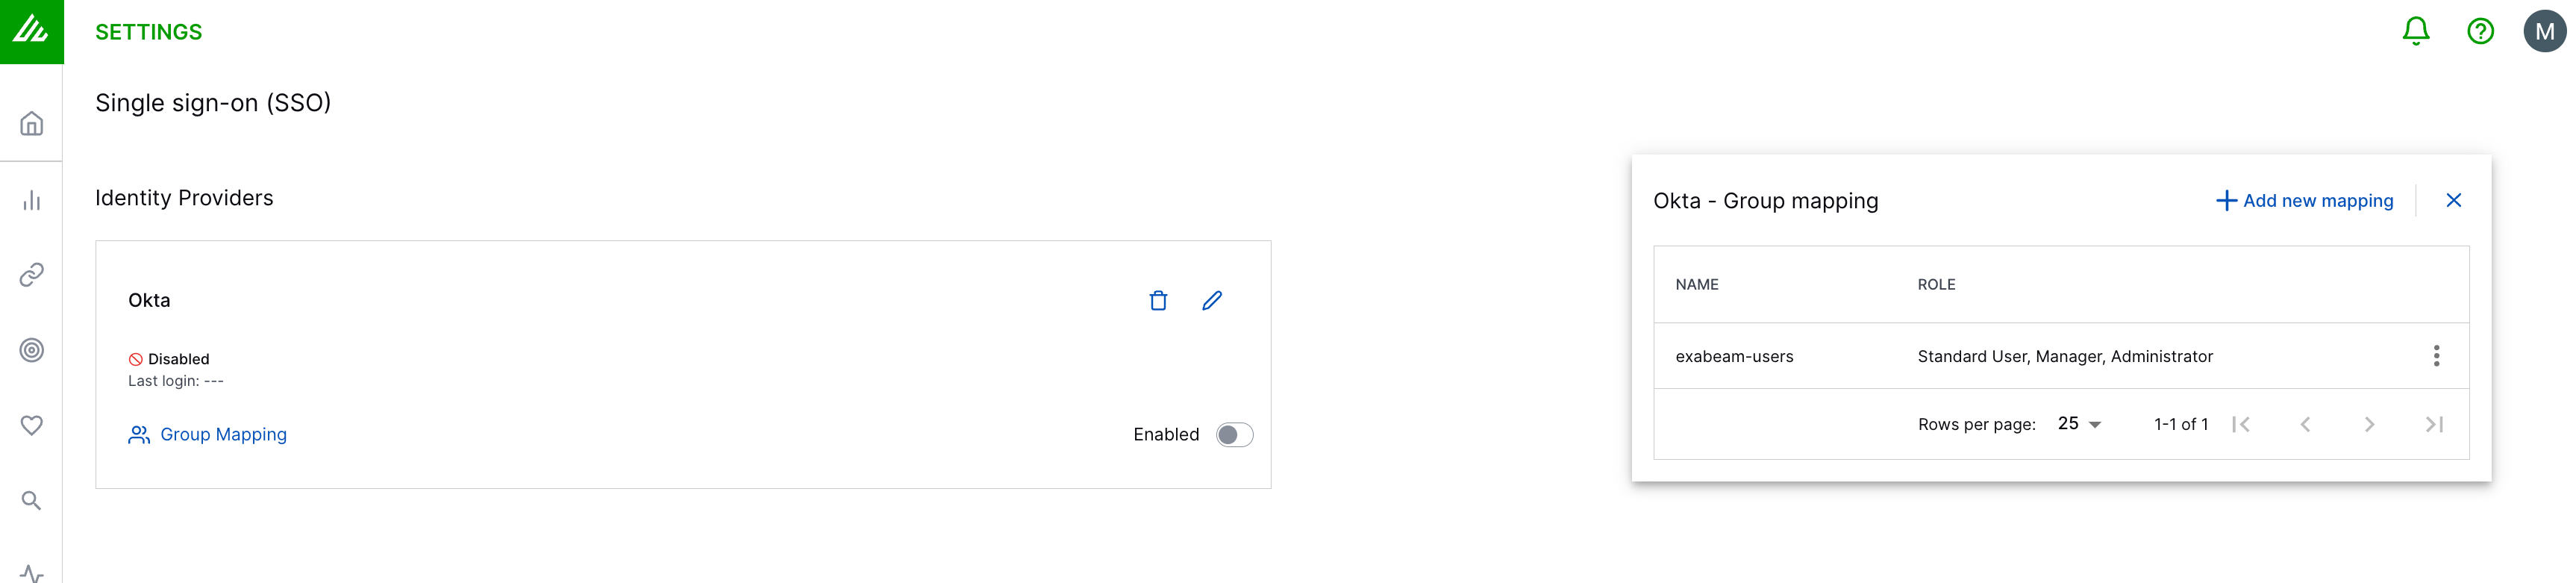
Supply the Object ID you noted earlier from Microsoft Entra ID when you created the group.

For more information on this step, see Step 5.
Test your login in to the New-Scale Security Operations Platform to make sure your users can now access using their Microsoft Entra ID credentials.