- Supported Cloud Connectors
- Armis Cloud Connector
- AWS Cloud Connector
- AWS Multi-Tenant Cloud Connector
- Azure Cloud Connector
- Azure Cloud Connector Overview
- Azure Audit Source and Event Support
- Prerequisites to Configure the Azure Cloud Connector
- Configure the Azure Cloud Connector
- Collect EventHub Information for Azure EventHub Endpoints
- Collect all Microsoft Defender ATP Events
- Configure Azure to Monitor Security Center Events in Azure VMs
- Bitglass Cloud Connector
- Box Cloud Connector
- Centrify Cloud Connector
- Cisco AMP for Endpoints Cloud Connector
- Cisco Meraki Cloud Connector
- Cisco Umbrella Cloud Connector
- Citrix ShareFile Cloud Connector
- Cloudflare Cloud Connector
- Code42 Incydr Cloud Connector
- CrowdStrike Falcon Cloud Connector
- Cybereason Cloud Connector
- CylanceProtect Cloud Connector
- Dropbox Business Cloud Connector
- Duo Security Cloud Connector
- Egnyte Cloud Connector
- Fidelis Cloud Connector
- GitHub Cloud Connector
- Google Cloud Platform (GCP) Cloud Connector
- Google Cloud Pub/Sub Cloud Connector
- Google Workspace (Formerly G Suite) Cloud Connector
- LastPass Enterprise Cloud Connector
- Mimecast Email Security Cloud Connector
- Netskope Cloud Connector
- Office 365 Cloud Connector
- Okta Cloud Connector
- OneLogin Cloud Connector
- Palo Alto Networks SaaS Security Cloud Connector
- Ping Identity Cloud Connector
- Proofpoint Cloud Connector
- Rapid7 InsightVM Cloud Connector
- Salesforce Cloud Connector
- SentinelOne Cloud Connector
- ServiceNow Cloud Connector
- Slack App Cloud Connector
- Slack Classic App Cloud Connector (Formerly known as Slack Enterprise Grid Cloud Connector)
- Snowflake Cloud Connector
- Sophos Central Cloud Connector
- Symantec CloudSOC Cloud Connector
- Symantec Endpoint Protection (SEP) Mobile Cloud Connector
- Symantec Email Security.cloud Cloud Connector
- Symantec WSS Cloud Connector
- Tenable.io Cloud Connector
- VMware Carbon Black Cloud Endpoint Standard Cloud Connector
- Workday Cloud Connector
- Zoom Cloud Connector
- Custom Cloud Connector
- Webhook Cloud Connector
Snowflake Cloud Connector
Prerequisites to Configure the Snowflake Connector
If you want to use the Exabeam Snowflake cloud connector for augmentation and for pulling logs and events from multiple datasets, you can create a separate warehouse to understand the costs associated with the integration. To start with, use the smallest warehouse.
Note
The Exabeam cloud connector for Snowflake augmentation use case is in early access phase. For more information contact Exabeam support.
The Snowflake cloud connector uses the JDBC driver to connect to the Snowflake database server. The Exabeam cloud connector supports the following authentication methods for Snowflake: Basic, JWT, and Key Pair authentication.
Each database in Snowflake has its own login and query history endpoints for each of the accounts. For example, if the Snowflake account has three datasets, each database in Snowflake has three login history and three query history endpoints, one for each account.
Before you configure the Snowflake cloud connector for augmentation of Snowflake with Exabeam Advanced Analytics (AA) capabilities, or for using Snowflake as a data source for internal Snowflake login and query activity, you must complete the following prerequisites:
Obtain the full account name for your account by contacting Snowflake support. The full account name may include the region and cloud platform where your account is hosted. You can find the account name by referring to your Snowflake URL. For example, if the Snowflake URL is https://xy12345.us-east-1.snowflakecomputing.com, the account name for configuring the cloud connector is xy12345.us-east-1.
Create a user specifically for Exabeam integration for the Snowflake account and provide a unique username for the user. Assign read permissions to the user to view all the datasets that are required to be pulled.
Create a password if you use the basic authentication method.
Create a JWT token if you want to use the JWT authentication method. For the procedure to create a JWT token see the Snowflake documentation.
Create a private key and public key to use the Key Pair authentication method by performing the following steps:
Note
For more information see Key Pair Authentication in the Snowflake documentation.
To generate the private key from terminal, use this command: openssl genrsa 2048 | openssl pkcs8 -topk8 -inform PEM -out rsa_key.p8 -nocrypt.
To generate the public key by referencing the private key, use this command on the terminal: openssl rsa -in rsa_key.p8 -pubout -out rsa_key.pub.
To assign the public key to a Snowflake user, on the Snowflake portal, use this command: alter user <username> set rsa_public_key='<public key>';.
For example, alter user test_user set rsa_public_key='MIIBIjANBgkqh...';
Understand the Dataset
Snowflake’s predefined audit tables, the login history table and the query history table contain logs related to internal snowflake activity. The audit tables have a predefined name and table structure. The cloud connector pulls the audit tables by default. Additionally, the Exabeam Cloud Connector for Snowflake can pull logs from any table or view if the tables follow the predefined format.
If you want to use the Exabeam cloud connector for Snowflake to augment the Snowflake with AA and pull additional datasets, ensure that the dataset has the following format:
Each table view must have only two columns.
Each table view must have a timestamp column. The timestamp column has one of these datatypes - TIMESTAMP_LTZ, TIMESTAMP_NTZ, and, TIMESTAMP_TZ. The timestamp column must contain the timestamp from the original event. If the ingestion time and the event occurrence time are very close, the timestamp column can contain the ingestion time. Specify any name for the column.
Each table must have a VARIANT/VARCHAR column that includes the event in its original form, JSON or string.
For every dataset that you want to send to the Exabeam Advanced Analytics to analyse, you must follow the format. The Exabeam cloud connector for Snowflake automatically scans the Snowflake account for all the datasets for which it has access to and creates an endpoint for every dataset that matches the given format and ignores any other datasets.
Snowflake Audit: Login History
The Exabeam cloud connector for Snowflake creates an endpoint that pulls data from the LOGIN_HISTORY table for each database discovered by the connector. For example: SNOWFLAKE_SAMPLE_DB.LOGIN_HISTORY
Snowflake Audit: Query History
The Exabeam cloud connector for Snowflake creates an endpoint that pulls data from QUERY_HISTORY table for each database discovered by the connector. For example: SNOWFLAKE_SAMPLE_DB.QUERY_HISTORY
Custom Table(s)
The Exabeam cloud connector for Snowflake ingests data from a table or a view in the following format in which each table contains only two columns:
Timestamp column (TIMESTAMP_LTZ, TIMESTAMP_NTZ, TIMESTAMP_TZ)
Textual data column (VARIANT/VARCHAR)
To create a view with a specific timestamp column and a specific textual column using an existing table run the following command:
CREATE OR REPLACE VIEW MY_VIEW AS select ts_col as timestamp_col, num_col || ',' || string_col || ',' || date_col as textual_col from tab;
The Exabeam cloud connector for Snowflake automatically discovers all the required tables and views after running the command. For examples, For the view defined in the MY_DB database, the connector creates the endpoint: MY_DB.PUBLIC.VIEWS.MY_VIEW.
Note
Enabling ingestion from a table or a view without specifying a timestamp and textual data column results in sync failure.
Configure the Snowflake Cloud Connector
Snowflake offers cloud data platform that powers the Data Cloud and provides solution for data warehousing, data engineering, data lakes, data science, data application development, and data sharing. The Snowflake data warehouse provided as Software-as-a-Service (SaaS), which is built on Amazon Web Services or Microsoft Azure cloud infrastructure, uses a new SQL database engine for the cloud. The Snowflake platform enables organizations to consolidate data into a single source to drive meaningful business insights, build data-driven applications, and share governed and secure data in real time. For more information see the Snowflake documentation.
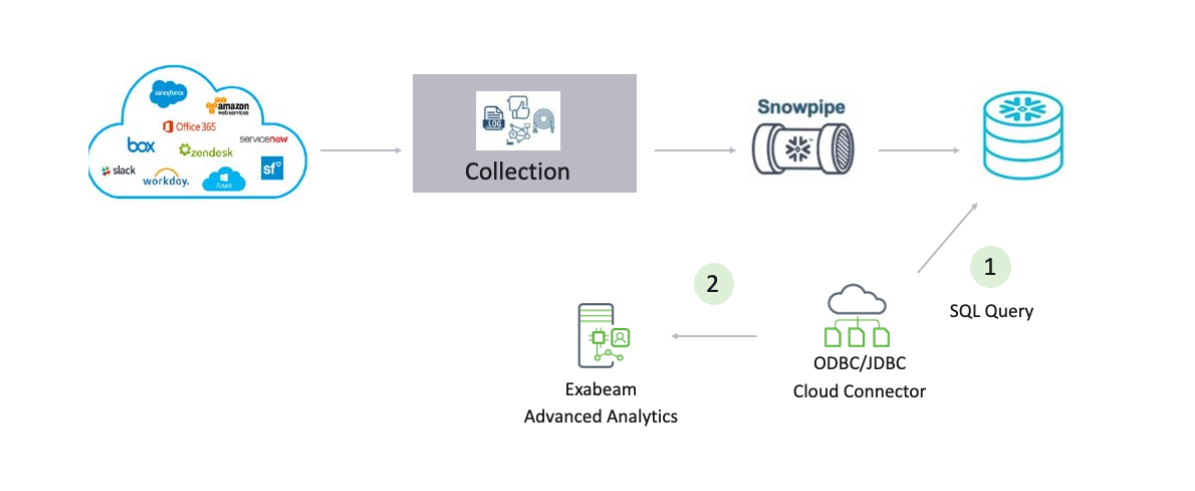
The Exabeam cloud connector for Snowflake collects data from the Snowflake instance and sends the data to Exabeam advanced analytics for augmentation. The Exabeam cloud connector queries the Snowflake tables that are exposed to its designated service account, periodically queries the data using the JDBC driver, and sends the data over to Exabeam Advanced Analytics for processing. The Exabeam cloud connector for Snowflake collects the internal Snowflake audit logs via the login history and query history tables. The Exabeam cloud connector can be configured to send the logs to Data Lake (DL) or Advanced Analytics (AA) based on the requirement.
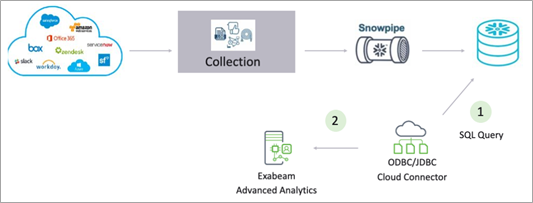
The following diagram represents the integration process for the augmentation use case.


The following table displays the audit source API and security events supported by the connector.
Data source | Service or Module, and Events |
|---|---|
Snowflake Audit: Login History | Login attempts by Snowflake users |
Snowflake Audit: Query History | Snowflake query history |
Custom Table(s) | Any table that contains logs to be ingested into Exabeam |
To configure the Snowflake connector to import data into the Exabeam Cloud Connector platform:
Complete the Prerequisites to Configure the Snowflake Connector.
Log in to the Exabeam Cloud Connectors platform with your registered credentials.
Navigate to Settings > Accounts > Add Account.
Click Select Service to Add, then select Snowflake from the list.

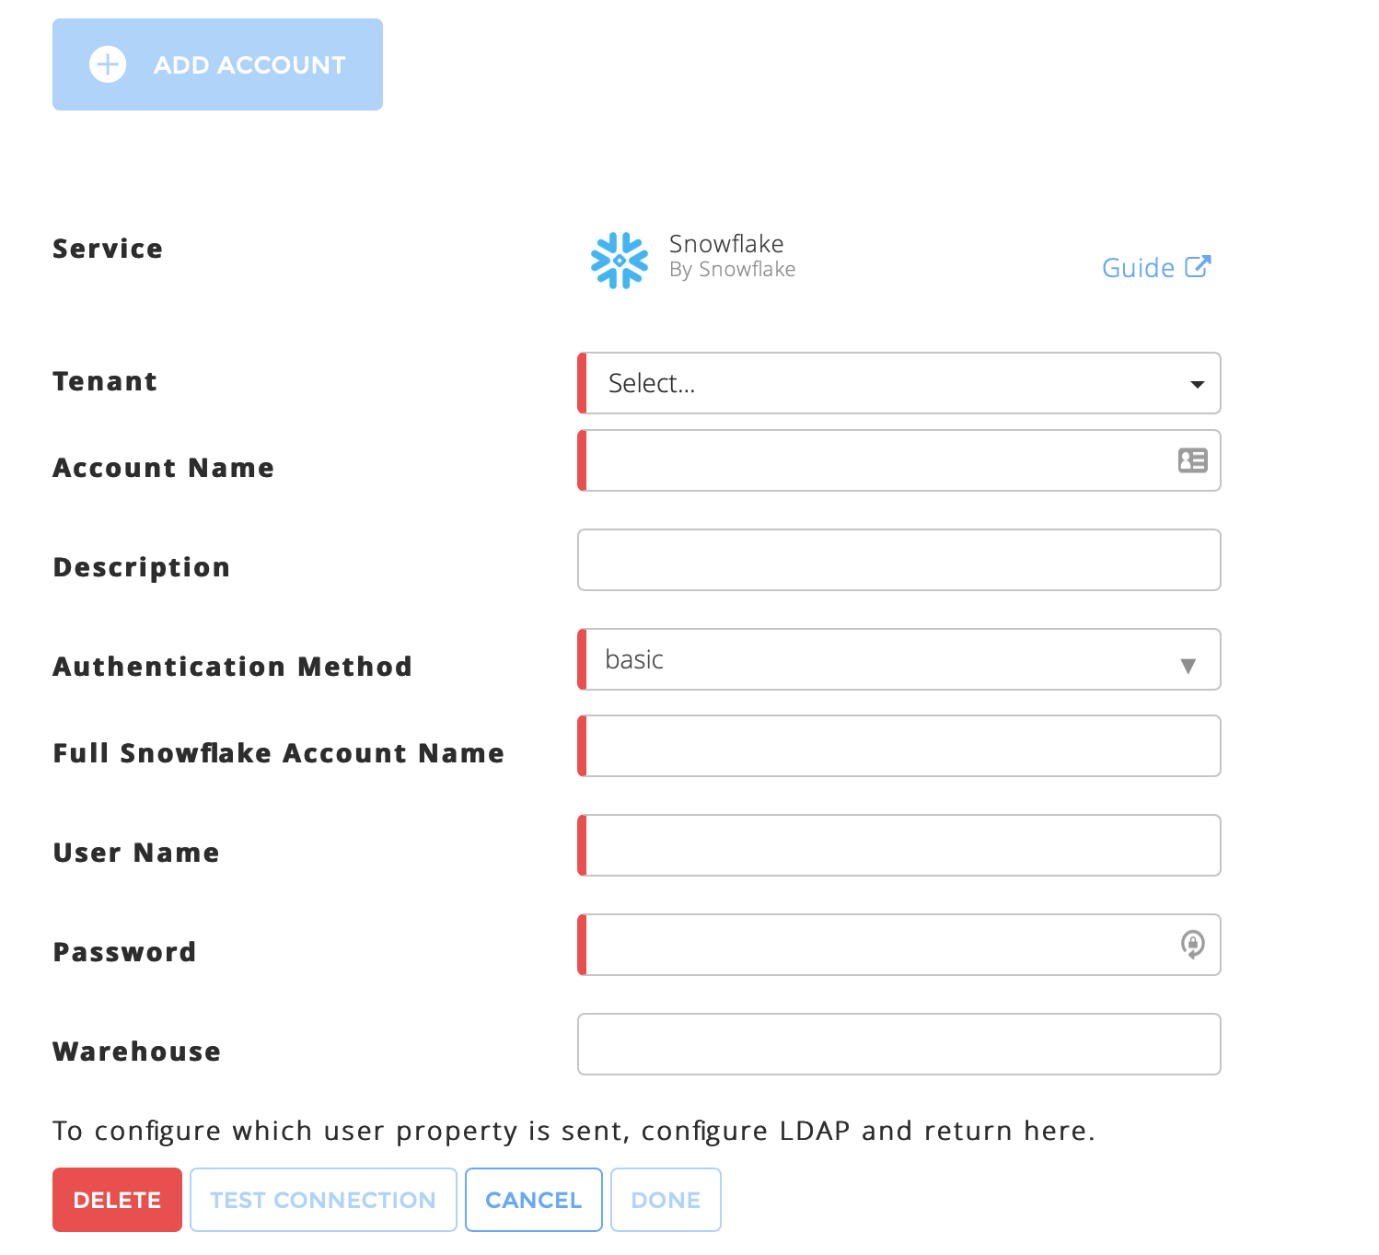
In the Accounts section, enter the required information. Required fields are indicated with a red bar.
Tenant – Select a tenant to attach to the connector if you are using a multi-tenant edition of Exabeam. Otherwise, select default.
Account Name – Specify a name for the Snowflake connector. For example, Snowflake data warehousing.
Description – Describe the Snowflake connector (optional). For example, Snowflake cloud data platform that powers the Data Cloud and provides solution for data warehousing.
Authentication Method – Select the authentication method: Basic, JWT, or Key Pair.
Full Snowflake Account Name – Enter the full Snowflake account name that you obtained while completing prerequisites.
User Name – Enter the username that you obtained while completing prerequisites.
Password/JWT – Enter the password or key based on the authentication method that you select.
Enter the password if you select the basic authentication method.
Enter the value for the JWT token that you obtained while completing prerequisites, for the JWT authentication method,
Enter the content of the private key file you obtained while completing prerequisites, for the Key Pair authentication method.
-----BEGIN PRIVATE KEY-----
**************
**************
**************
.....
-----END PRIVATE KEY-----
Warehouse – Select the warehouse that you want the Exabeam connector to use as the default warehouse while sending queries.
Log Source (optional) – Select the appropriate value for each discovered table and view.
To confirm that the Exabeam Cloud Connector platform communicates with the service, click Test Connection.
Click Done to save your changes. The cloud connector is now set up on the Exabeam Cloud Connector platform.
To ensure that the connector is ready to send and collect data, Start the connector and check that the status shows
OK.Click Status. A list of all the tables that the connector discovered appears. You can enable the endpoints that you want to use. For more information, refer to the description about Data Sources in the Prerequisites section.
Note
Based on its pricing model, Snowflake charges for storage and compute resources consumed. By default, the Exabeam cloud connector for Snowflake issues a query once every five minutes. If you want to change sync frequency for a specific dataset or endpoint, see Modify Account and Endpoint Sync Frequency. For more information about Snowflake pricing, see the Snowflake documentation.
To reduce the cost of pulling data from multiple datasets, you must minimize the amount of data to be red for each query and ensure that you use the smallest virtual warehouse. For example, if you want to read only a few GB data from a table with 1PB storage capacity, use a very small data warehouse. To improve performance of the connector, use clustering and materialized views.
The eviction policy or any policy for deleting the data applies to only a table. The connector reads data only in underlying table format.
The Index Timestamp field helps to make the data ordered by the timestamp. The data comes in timestamp order. As a user, no action is required from you to maximize connector performance and minimize cost. Snowflake uses pruning to read the data that is required to satisfy the query every time a timestamp range is used as a filter. If the data comes in random order, use Snowflake clustering to ensure that the data stays ordered for other log fields that are used as filters.
