- Search Overview
- Search Home Page
- Performing Searches
- Basic Search
- Advanced Search
- Advanced Search Building Blocks
- Running an Advanced Search Query
- Query Syntax
- Query by Subject
- Query by Vendor and Product
- Query by Field and Value
- Query by Context Table
- Query Using Regex
- Query Using Wildcards
- Free Text Search
- Query Using Advanced Query Language Operators
- Query Using Aggregation Functions
- Query Using Structured Fields
- Dynamic Field Extraction
- Natural Language Search
- Anomaly Search
- Refine a Search
- Context Tables in Search
- Search Best Practices
- Search Results
- Histogram View of Search Results
- Search Results Navigation Bar
- Timeline View of Search Results
- List View of Search Results
- Table View of Search Results
- Aggregated Search Results
- Event Details
- Detection Details
- Entity Details
- Data Insights
- Export Search Results
- View and Download Exported Search Result Files
- Dashboard Visualizations
Search Bar
At the center top of the Search home page is a search bar where you enter and run search queries. To start entering a query, first use the Search mode drop down menu, on the left just below the search bar, to select a search mode. The search bar appearance will change depending on which of the following modes you select:
Basic – Use the prebuilt lists of subjects, vendors, products, and fields to build a query that will search your data. If your query string extends beyond the length of the search bar, the text will wrap to the next row. You can remove a query term by clicking the cancel icon on the term. For more information, see Basic Search.

Advanced – Use the Exabeam Query Language (EQL) syntax and operators to construct your own complex queries. For readability when creating complex queries, white space characters (such as spaces, tabs, and line breaks) can be used between query syntax terms. Line numbering is displayed for queries that are formatted on multiple lines. Warnings and syntax validation errors are displayed per line. Color-coding is also used to increase syntax readability. For more information, see Advanced Search.

Natural Language – Use plain language to enter a search prompt. The plain language prompt is automatically translated into Exabeam Query Language syntax, which is displayed beneath the original prompt. You can edit the query by changing either the language prompt or the query syntax. For more information, see Natural Language Search.

In addition to allowing you to select a search mode and enter queries, the search bar also contains the following controls:
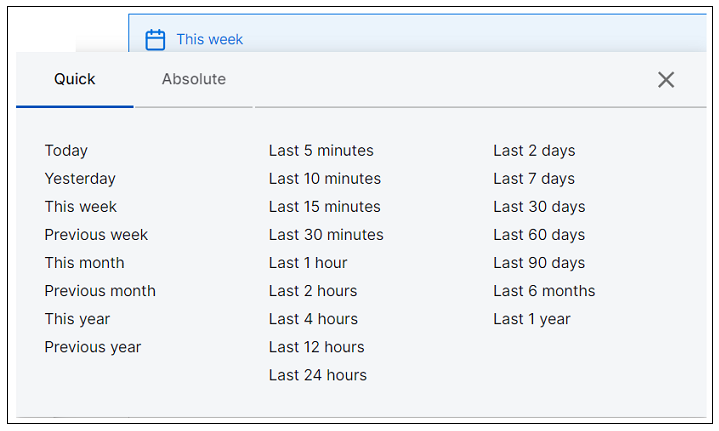
 Time Range Selector – In the upper-left corner, the search bar includes a time range selector. Click the time range icon to open a dialog box where you can select a Quick, Relative, or Absolute time range for the search query.
 Sort Order Selector – In the upper left corner, next to the time range selector, the search bar includes a sort order selector. Click the sort order icon to select a chronological sort order for the search results. Options include Recent First and Oldest First.
 The sort happens on the server side and returns either the most recent or oldest results from the entire results set. To change the sort order after the search has returned results, click the toggle and select a different sort option. Then rerun the search to display a new set of results.
Note
This option may be unavailable in Advanced or Natural Language search modes if your search query includes syntax that precludes the server-side order selection.
 Run Query – In the upper-right corner, click the search icon to run the search query currently entered in the search bar.
 Clear Query – In the upper-right corner, click the cancel icon to clear the search query currently entered in the search bar. This icon appears when you enter a query and you can also use it to halt a search you initiated in error or that has run for a long period without timing out.
Additional option for interacting with a search query are available below the search bar itself. Options include:
Save – save searches for re-use. This function saves both the query string and the currently selected index pattern.
Convert to Correlation Rule – Opens the Correlation Rule Builder application, allowing you to turn your search into a rule that generates automated alerts.
Saved Searches – Opens a dialog box that contains all of your saved searches. Clicking on a saved search will populate the search bar with the saved query.
More / Copy Search – Copies the selected search syntax to the clipboard.
More / Downloads – Opens a dialog box that contains a list of downloaded search queries.
