- Search Overview
- Search Home Page
- Performing Searches
- Basic Search
- Advanced Search
- Advanced Search Building Blocks
- Running an Advanced Search Query
- Query Syntax
- Query by Subject
- Query by Vendor and Product
- Query by Field and Value
- Query by Context Table
- Query Using Regex
- Query Using Wildcards
- Free Text Search
- Query Using Advanced Query Language Operators
- Query Using Aggregation Functions
- Query Using Structured Fields
- Dynamic Field Extraction
- Natural Language Search
- Anomaly Search
- Refine a Search
- Context Tables in Search
- Search Best Practices
- Search Results
- Histogram View of Search Results
- Search Results Navigation Bar
- Timeline View of Search Results
- List View of Search Results
- Table View of Search Results
- Aggregated Search Results
- Event Details
- Detection Details
- Entity Details
- Data Insights
- Export Search Results
- View and Download Exported Search Result Files
- Dashboard Visualizations
Add Selective Retention Policies
To begin adding a selective retention policy, do one of the following:
If no policies have been created yet, click Add policy in the Add your first selective retention policy step in the bottom panel of the Selective Log Retention settings page.
If policies have already been created, click the Add new policy button to the right of the search bar in the middle panel of the Selective Log Retention settings page.
The New selective retention policy dialog box opens.
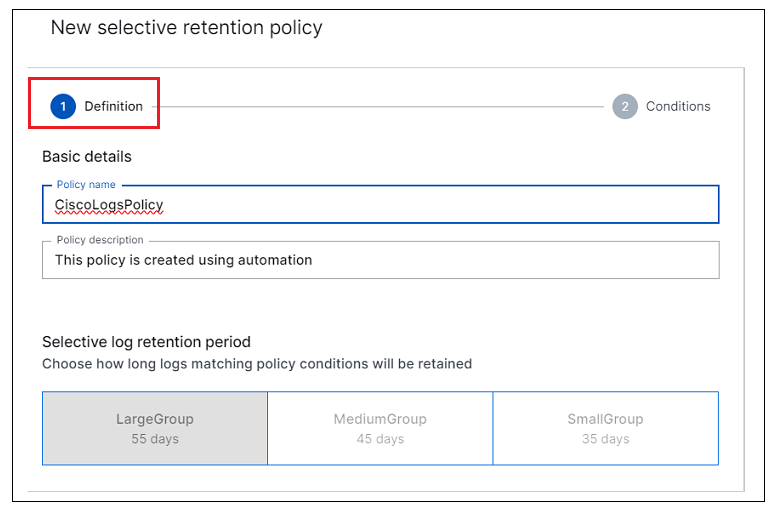
On the Definition tab of the dialog box, enter the following information:
Policy name – Enter a name for the policy that is descriptive of the log data it will store.
Policy description – Enter an optional description of the policy.
Log retention tier – Choose which of your selective retention tiers you want to apply to the data that will be stored according to this policy.

Click Next to open the Conditions tab of the dialog box.
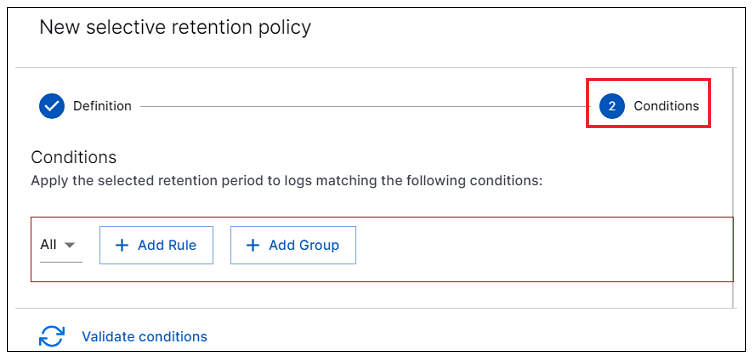
On the Conditions tab, define the filter rules that you want to apply to incoming log data so that logs are tagged for this policy. When a log matches the conditions, it is tagged for retention according to the selective retention tier this policy is associated with.

To add filter rules:
Click + Add Rule. A row is added to the conditions table. It has the following three columns: fields, operators, value.
To define the rule condition, enter information in each of the following columns on the row. The red X icon (
 ) serves as a warning that you have not made a selection or entered a value in a specific column. It disappears when you make the appropriate entry.
fields – Click the dropdown arrow next to the fields column on the left and select a field to filter on.
operators – Click the dropdown arrow next to the operators column in the middle and select from the following operators:
contains,startsWith,endsWith,exists.value – Click on the space in the value column on the right and enter a value to filter on. This width of the space will expand as you type.

If you want to add more conditions, click the + Add Rule again to add a new row to the table. Define the fields, operators, and value for the new condition. Repeat until you've defined all the necessary conditions.
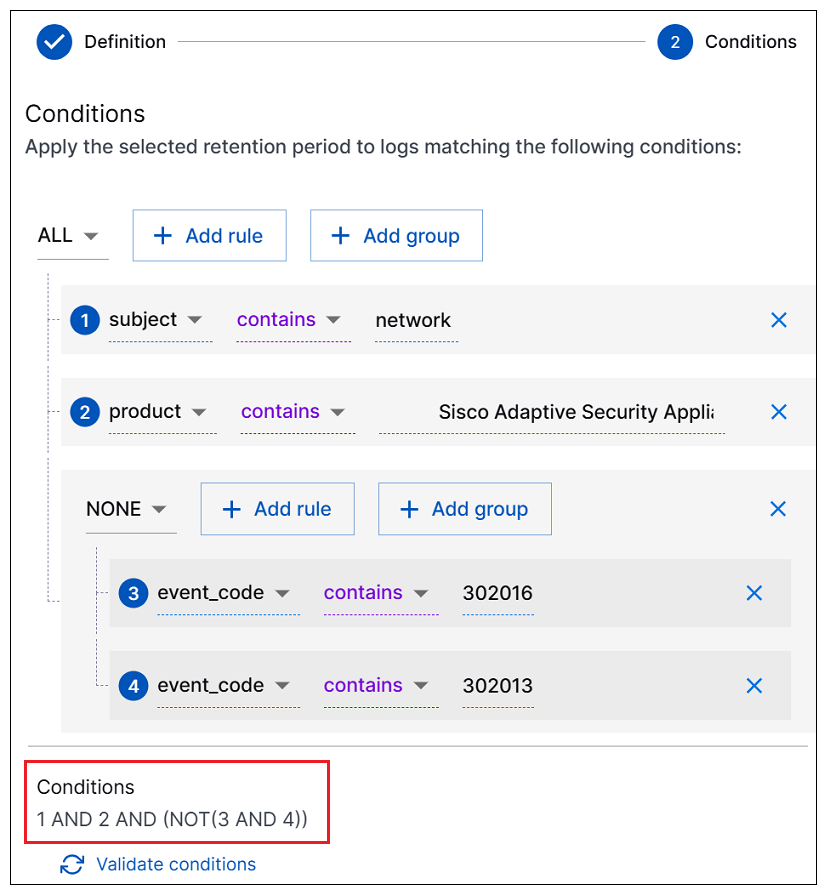
Decide how you want the conditions in the filter rows to act together. Depending on how you want the filter rules to include or exclude logs for retention, select a logic option from the drop down menu at the top left of the conditions table. Options include Any, All, Not All, None, which mean the following:
ANY – The conditions are joined with an OR connection between each condition row. A log satisfies the policy if any one of the defined conditions is met.
ALL – The conditions are joined with an AND connection between each condition row. A log satisfies the policy only if all of the defined conditions are met.
Not All – The conditions are joined such that a log satisfies the policy if at least one of the conditions is not met.
None – The conditions are joined such that a log satisfies the policy only if none of the conditions are met.
To add a new group of conditions within your set of rule conditions, click + Add Group. A new condition group is added and a new rule row is automatically created. Define the field, operator, and value for the new rule.
Continue adding condition rows to the group until all of the necessary conditions are defined. Depending on how you want the conditions in the group to be related to each other, select a logic option from the drop down menu at the top left of the group. Options include Any, All, Not All, None.
Notice that each condition rule is numbered and as you add rules and groups, the logical relationships between them are displayed in the Conditions section at the bottom of the dialog box.

When you have created all the desired conditions, but before you create the policy, click Validate conditions. The Search application opens in a new window and populates the search bar with a query based on the filter conditions you've defined in the New selective retention policy dialog box.
Run the search and review the log results to ensure your policy conditions are capturing the appropriate data.
Modify the conditions in the New selective retention policy dialog box as necessary and revalidate.
When you're satisfied that the conditions capture the appropriate data, click Save in the bottom right corner of the New selective retention policy dialog box. The new policy is created and is visible in the bottom panel of the Selective Log Retention settings page.
Note
When you create a log retention policy, it can be applied only to newly ingested logs. Any existing logs retain their current retention settings.
