- Search Overview
- Search Home Page
- Performing Searches
- Basic Search
- Advanced Search
- Advanced Search Building Blocks
- Running an Advanced Search Query
- Query Syntax
- Query by Subject
- Query by Vendor and Product
- Query by Field and Value
- Query by Context Table
- Query Using Regex
- Query Using Wildcards
- Free Text Search
- Query Using Advanced Query Language Operators
- Query Using Aggregation Functions
- Query Using Structured Fields
- Dynamic Field Extraction
- Natural Language Search
- Anomaly Search
- Refine a Search
- Context Tables in Search
- Search Best Practices
- Search Results
- Histogram View of Search Results
- Search Results Navigation Bar
- Timeline View of Search Results
- List View of Search Results
- Table View of Search Results
- Aggregated Search Results
- Event Details
- Detection Details
- Entity Details
- Data Insights
- Export Search Results
- View and Download Exported Search Result Files
- Dashboard Visualizations
Basic Search
In the Basic search mode, you can select search terms and fields from prebuilt lists to build a query that will search your data. You can remove a query term by clicking the cancel icon on the term.
Pre-built Basic Search Lists
The following pre-built search lists are available:
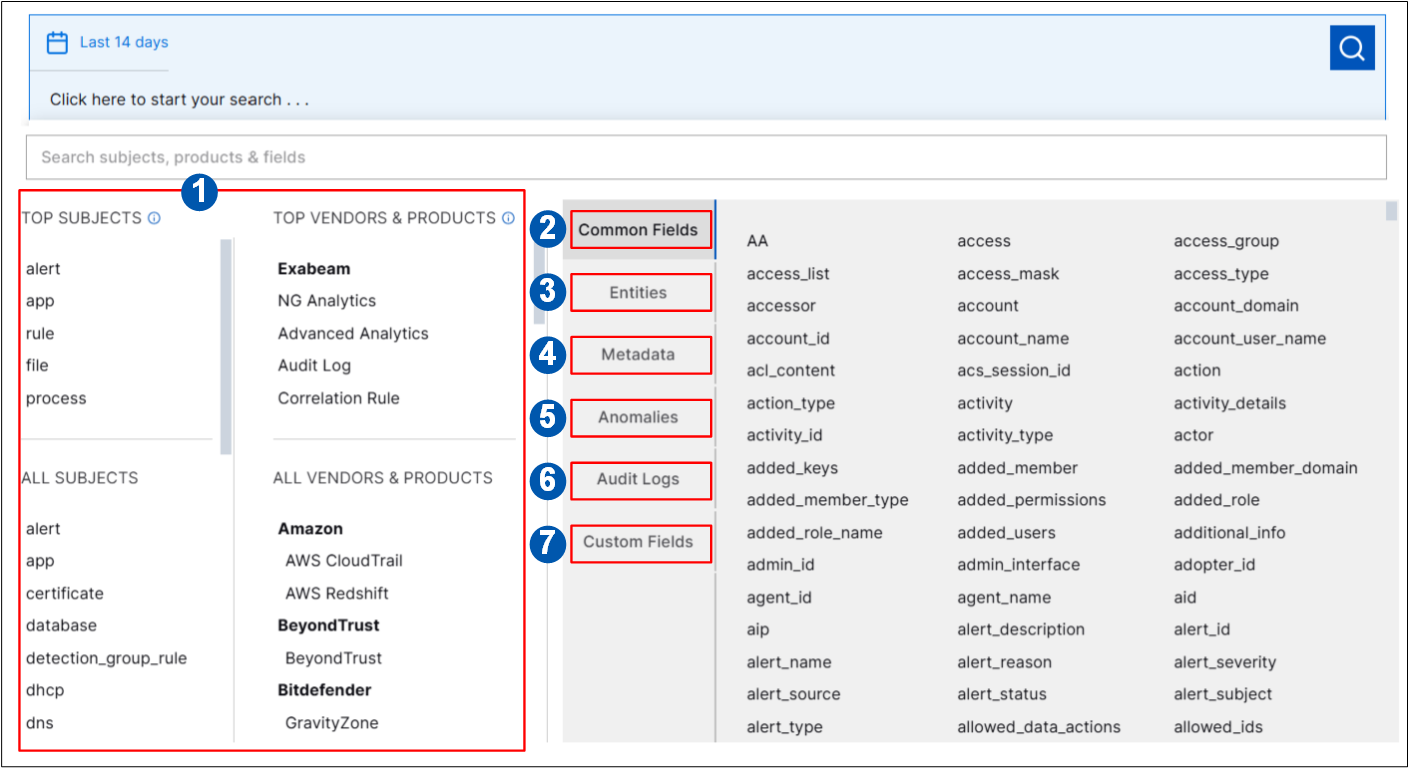
Subjects / Vendors and Products — These lists show the top subjects and top vendors and products that are specific to your environment. If you do not have any logs from a particular vendor, you will not see that vendor in the list.
Common Fields — This is a list of all default Common Information Model fields that are most used across the Exabeam customer base. When you click on this tab on the left, the available fields are displayed in the right panel.
Entities — This is a list of user or account entities, specific to your environment, that can be selected for search. Entity search options include the following:
User Entity – This option leverages the Exabeam True Identity functionality. It consolidates all of the identifiers associated with a user account and allows you to search all of them at once. When you select this option, you can enter a full first and last name, a username, or an email address to find the desired user. In addition, the results will include all of the identifiers that are associated with the user in your environment, including the full name, any usernames, and any email addresses. For more information about managing and viewing entities in your environment, see the Attack Surface Insights guide.
When you have added the user entity to your query, you can click on the tooltip next to it and display a list of all the usernames and emails associated with the user entity. This list reflects all of the user identifiers you will find in the search results.
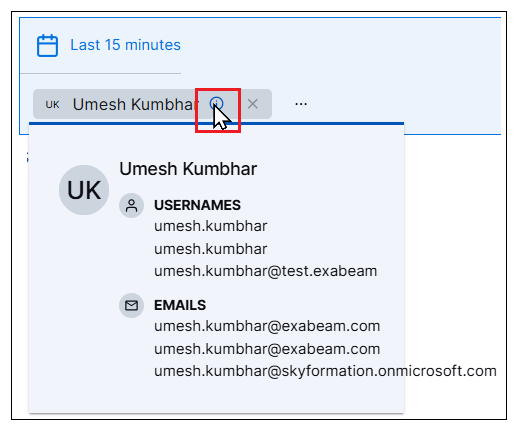
Username – This option allows you to search for a user by a specific username associated with that user's account.
Email – This option allows you to search for a user by a specific email address associated with that user's account.
Note
License Requirement for Entities Search
Currently, searching by the Entities tab is available only if you have either the New-Scale Analytics license or the New-Scale Fusion license. For more information about these licenses,see New-Scale Security Operations Portfolio Licenses.
For more information about managing and viewing entities in your environment, see the Attack Surface Insights guide.
Metadata — These fields are specific to your environment and are added during collection and parsing. All metadata fields start with an
m_.Anomalies — These fields are specific to your environment, and are a result of anomalies that have been detected.
Audit Logs — Audit logs are activity logs for user and asset activity in your organization. Specific activities related to Exabeam product administrators and users are logged, including activities within the UI as well as configuration and server changes. In Basic search mode, you can search these audit logs for key attributes. To search within the Exabeam Audit Logs, first select Audit Log under Exabeam, in the Vendors & Products section, and then select fields from the Audit Logs list. This list is not specific to your environment.
Custom fields — These fields are specific to you, and are a result of a custom parser applied to the ingested logs. These fields start with a
c_and can be used in searches the same way any Common Information Model field would be used. For more information, see Create a Custom Parser in the Log Stream Guide.Note
Search supports only custom fields with with data type string.
Building a Basic Search
To build a Basic search:
From the Search Mode drop down menu under the search bar, select the Basic option.

To start building your search, click in the search bar. A dialog box opens displaying lists of search terms and fields.
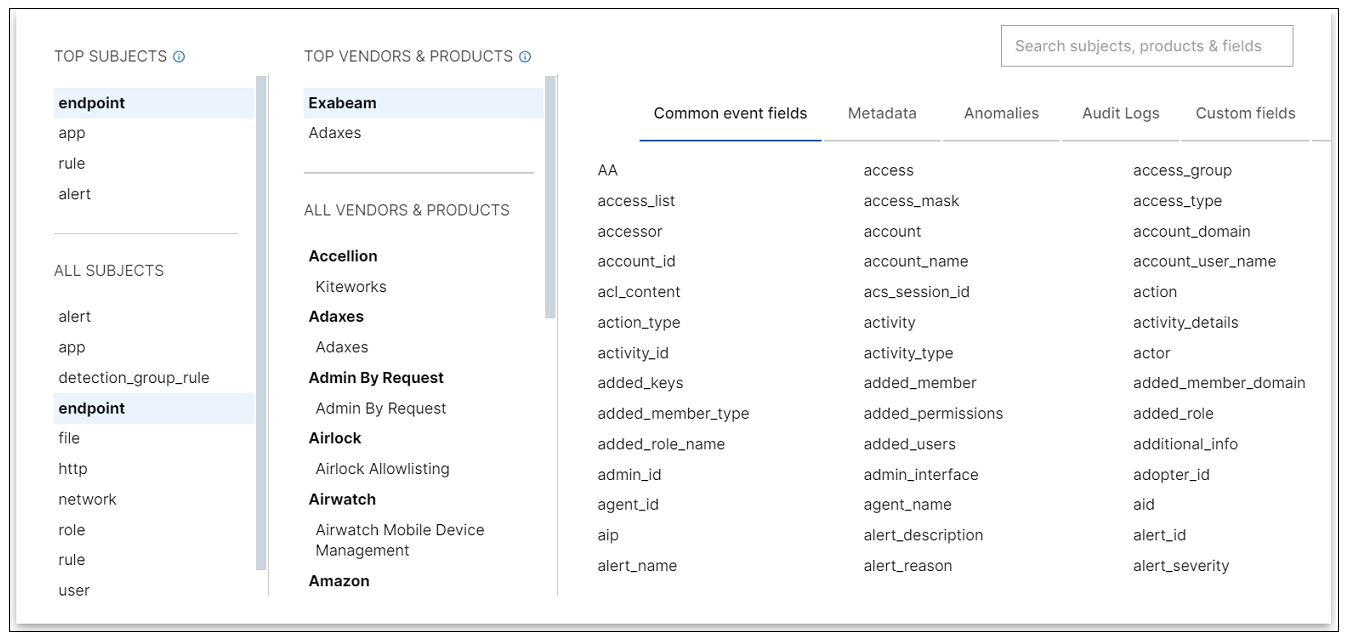
Use the search box across the top of the panel to search across the top subjects and top products and vendors on the left, or the fields on the right.
Select from the available lists to build your query, as described in the points below.
Note
Hover your curser over any Common Information Model subject or field name to view information about the field, such as data type and description.
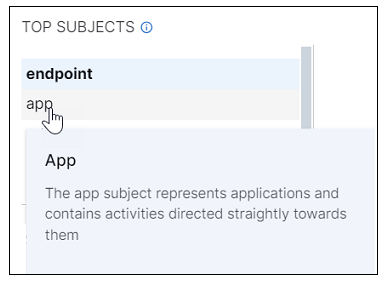
Click on Subject, Vendor, or Product terms in the left two columns to add those terms to your query in the search bar. If you select multiple terms, they are joined in the query with an
ANDoperator. You can then click theANDoperator and select a different connector option from the drop down menu.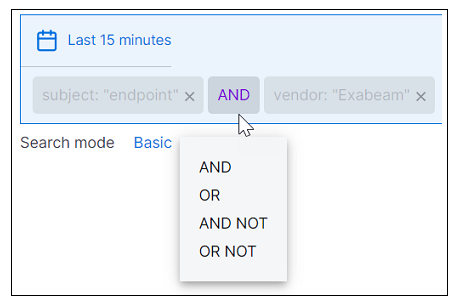
Find a field name from the tabbed lists on the right. To select from a specific category of fields on the right, click on one of the following category tabs: Common Fields, Entities, Metadata, Anomalies, Audit Logs, Custom Fields. The display in the right panel changes to display fields for each category. You can also use the search bar across the top of the panel to quickly find a specific field name.
Tip
If you search for
geo,rule, ormitrefield names, you can find certain structured fields represented by dot notation, such asgeo_dest_ip.country,rules.rule_source, orrules.mitre_labels_technique.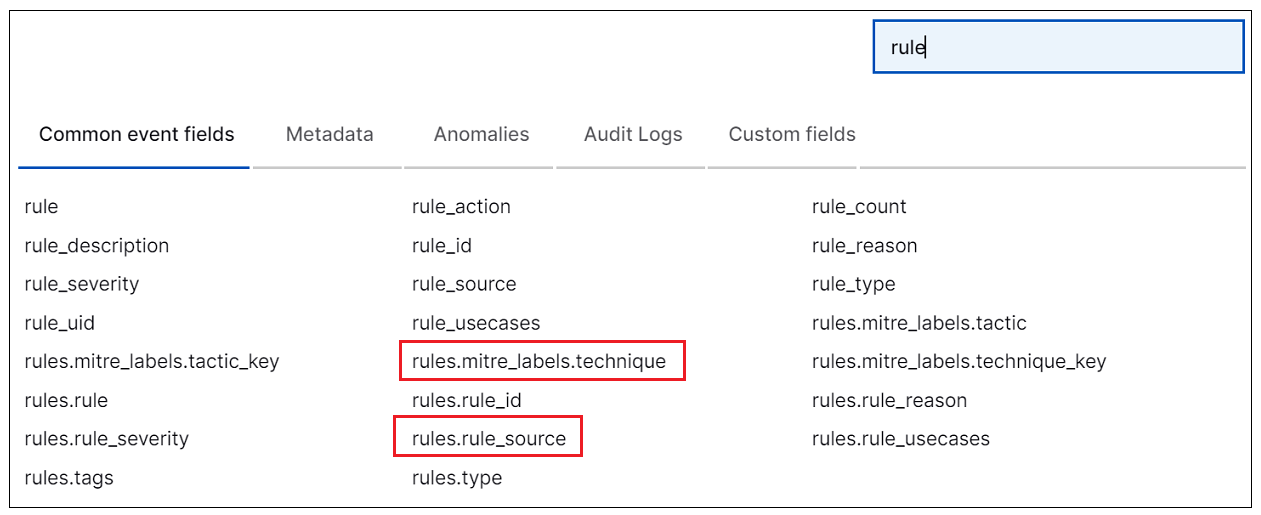
Click the field name and a panel opens where you can define a value and a connection operator as follows:
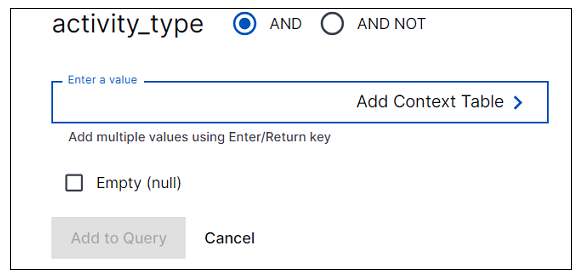
Select an AND or AND NOT connection operator to define how the selected field will be joined to the query you are building.
To search for fields with a specific value, that are not in a context table, click Matches Value (the default option) and enter one or more values for the selected field. To enter multiple values, click Enter on your keyboard after each value. If you want to search for values that are missing, click the Empty (null) check box. Or conversely, find values that are not null by using the AND NOT option in combination with the check box.
Note
If you type in the value "null" instead of selecting the check box, the query treats the value as a string and the search returns only fields where there is a literal value of "null". Ex.:
activity_type: "null"If you use the Empty (null) check box, the search returns fields where the value is empty. Ex.:
activity_type: nullTo search for values that are located in a specific context table, click In Context Table. Two selection drop down menus are displayed where you can select both a context table and any single table column to add to the query. You can add a maximum of two context tables to the query and one column for each table. For more information, see Context Tables in Search.
Click Add to Query to add the selected fields and values to the query in the search bar.
When you are satisfied with your query, click outside of the panel to dismiss the Basic search panel. Click in an empty section of the search bar at any time to return to the Basic search panel.
After your query has been built, it can still be edited.
To delete a term or field from the query, click the X next to it.
To change the operators used in the query, click on the operator in the search bar and select the operator you want to use (
AND,OR,AND NOT,OR NOT).
Note
In the search bar you can only delete sections and change operators, you cannot edit the values you have assigned to fields. To do this, you must delete that field from the query, return to the Basic search panel, and re-add that field with your desired value.
Select a time range for the search results by clicking the time range icon (
 ) in the top left corner of the search bar. A dialog box opens where you can select various Quick, Relative, or Absolute time ranges.
Click the sort order icon (
 ) to select a chronological sort order for the search results. Options include Recent First and Oldest First. The sort happens on the server side and returns either the most recent or oldest results from the entire results set. To change the sort order after the search has returned results, click the toggle and select a different sort option. Then rerun the search to display a new set of results.
Click the Search icon (
 ) to launch your query.