- Site Collector Overview
- Get Started with Site Collectors
- Install Site Collector
- Set Up Collectors
- Sign Up for the Early Access Program: Site Collectors
- Choose the Right Collector based on Data Sources
- Set Up Archive Windows Collector
- Set Up Archive Linux Collector
- Set Up EStreamer Collector
- Set Up Fortinet Collector
- Set Up IBM Security QRadar Collector
- Set Up Kafka Collector
- Set Up Splunk Collector
- Set Up Linux File Collector
- Set Up Microsoft SQL Collector
- Set Up MySQL Collector
- Set Up Oracle Collector
- Set Up Syslog Collector
- Set Up Windows Active Directory Collector
- Set Up Windows Event Log Collector
- Set Up Windows File Collector
- Manage Site Collectors
- Apply Antivirus Exclusions
- Migrate to the New-Scale Site Collectors Service
- Modify Collector Configuration
- Modify a Site Collector Instance
- Manage Templates
- Monitor Log Sources
- Add Filters to Set Egress Log Filtering Conditions
- New Site Collector Management Service NGSCD
- Regenerate Certificates for Collectors
- Upgrade the Site Collector
- Upgrade the Site Collector Specifications
- Vulnerability Remediation Policy
- Site Collector Monitoring
- Troubleshoot the Site Collector
- Pre-checks failed during Site Collector installation and upgrade
- Site Collector UI shows the status INSTALLATION_ERROR
- Download Support Packages for Troubleshooting
- How to reboot the Virtual Machine (VM) successfully to apply security updates?
- What information must be added while creating a support ticket to resolve an issue?
- Site Collector UI is not displaying the heartbeats
- Splunk Collector can't be set up
- Splunk Collector is set up however, logs are not reaching DL/AA
- Only a few of the installed Splunk Collectors are processing logs or EPS has dropped by 50% as compared to last hour
- The Windows Active Directory Collector (formerly known as LDAP Collector) is set up, however, the context data is not reaching DL/AA
- The Windows Active Directory Collector (formerly known as LDAP Collector) is stuck in the ‘Update’ mode after deployment
- Installation is initiated; however, the collector shows the status as ‘Setting Up’ for some time
- Data Lake and Advanced Analytics Does Not Show Context Data
- Context Data from Windows Active Directory Collector is Segmented
- Minifi Permission Denied - Logback.xml File Missing and Config File Update - Failed Error Occurred while Installing the Windows Event Log Collector
- Where should I upload proxy certificates if I am running proxy with TLS interception?
- How to upgrade Linux collector instance?
Set up Azure VM for Site Collector Installation
To set up the Azure VM for installing Site Collector:
Complete the environment requirements and prerequisites.
Log in to the Azure portal with your registered credentials.
Select the Azure project for which you want to create the virtual machine (VM).
Click Virtual Machines.
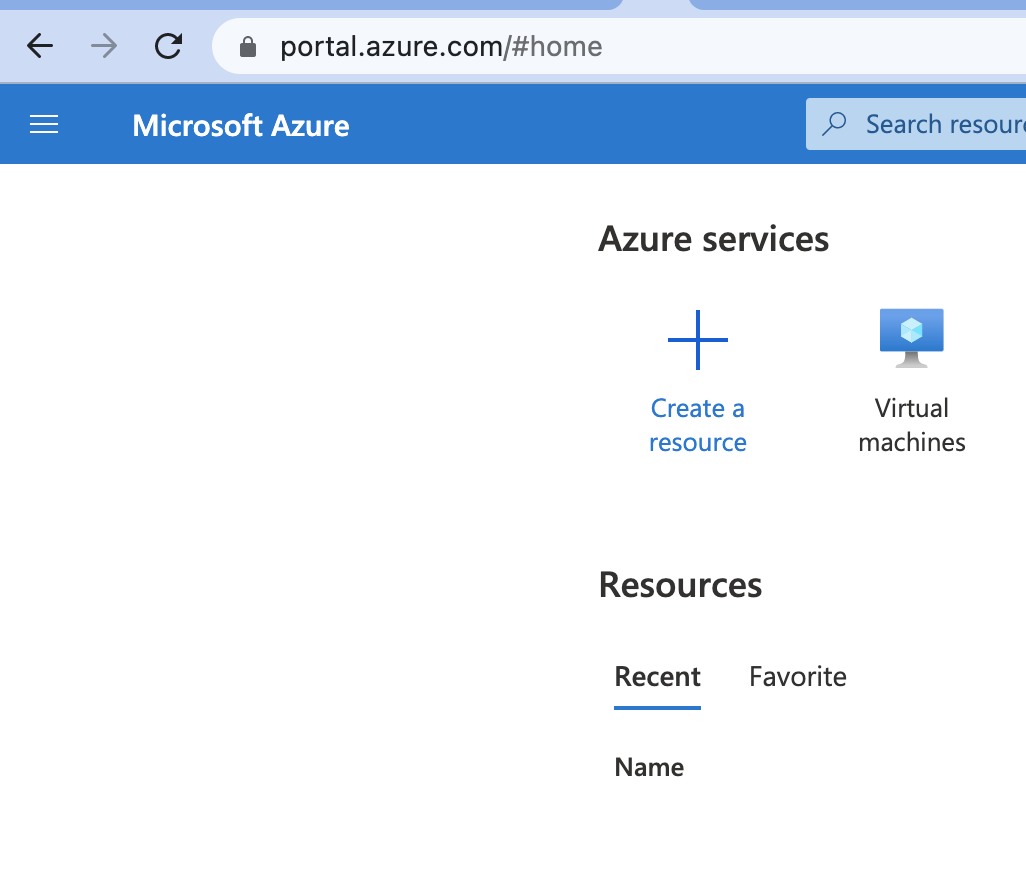
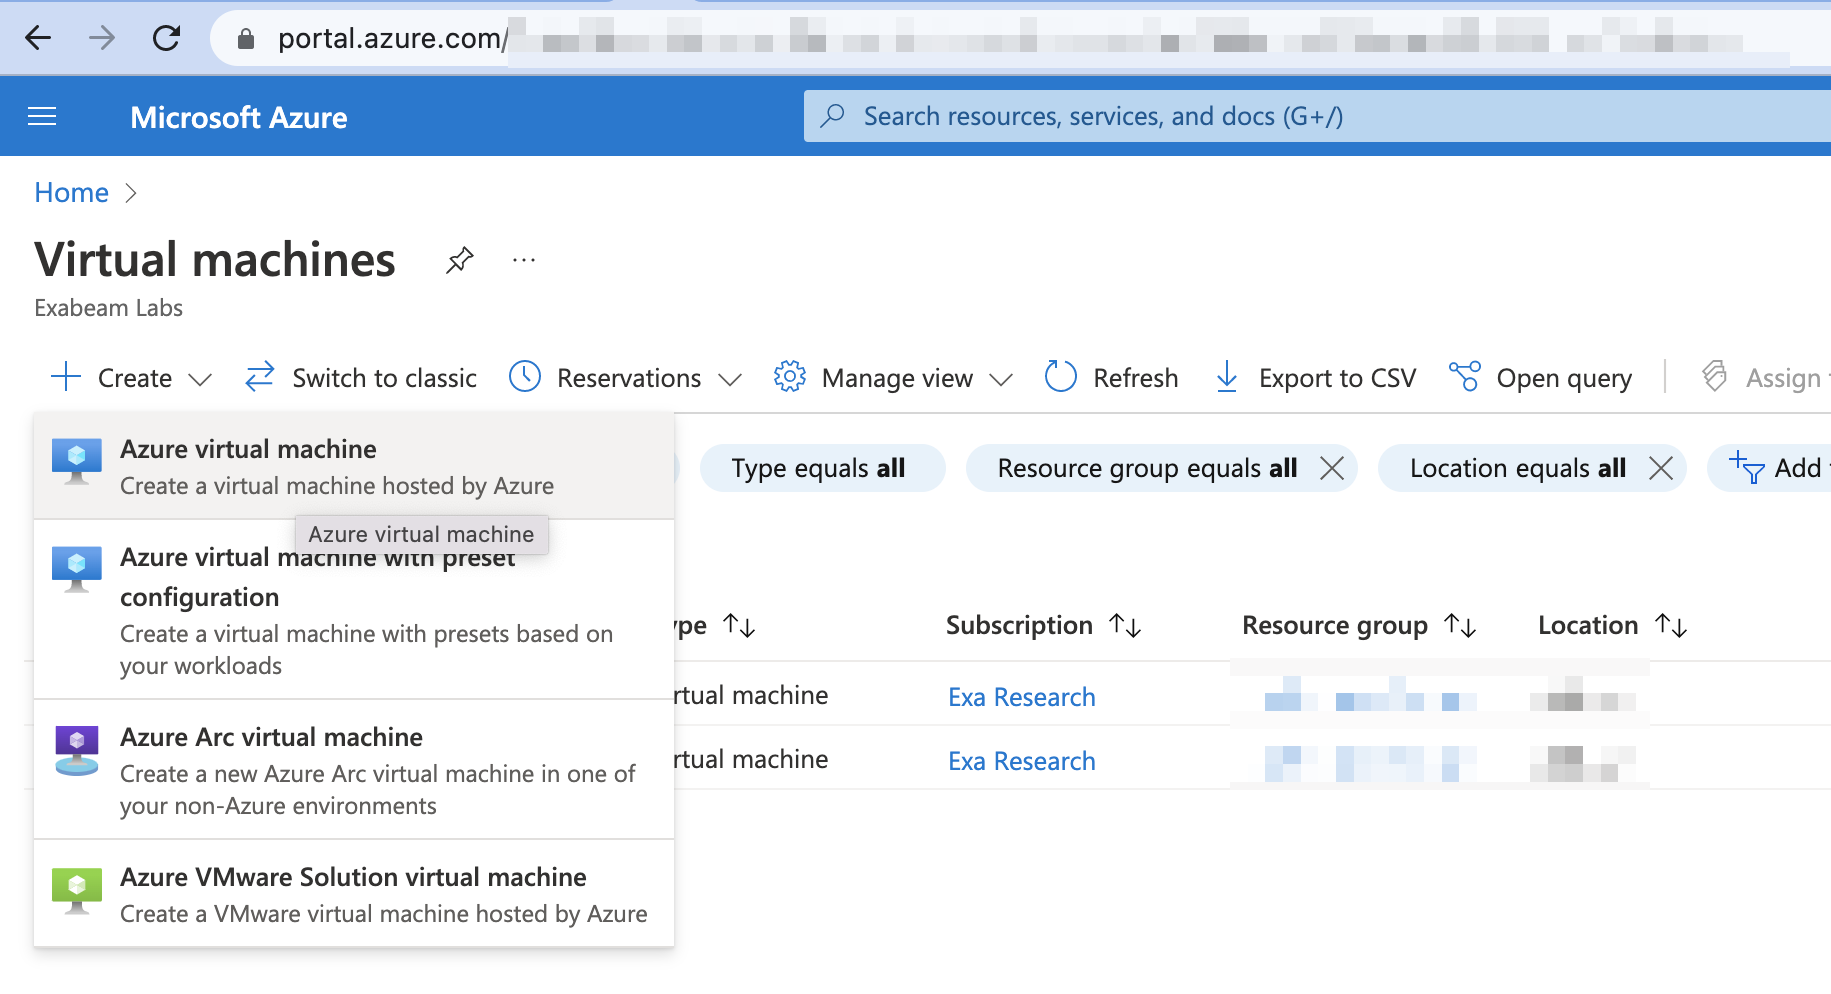
On the Virtual Machines page, Click Create.

Select Azure virtual machine.
On the Create a virtual machine page, enter the following information:
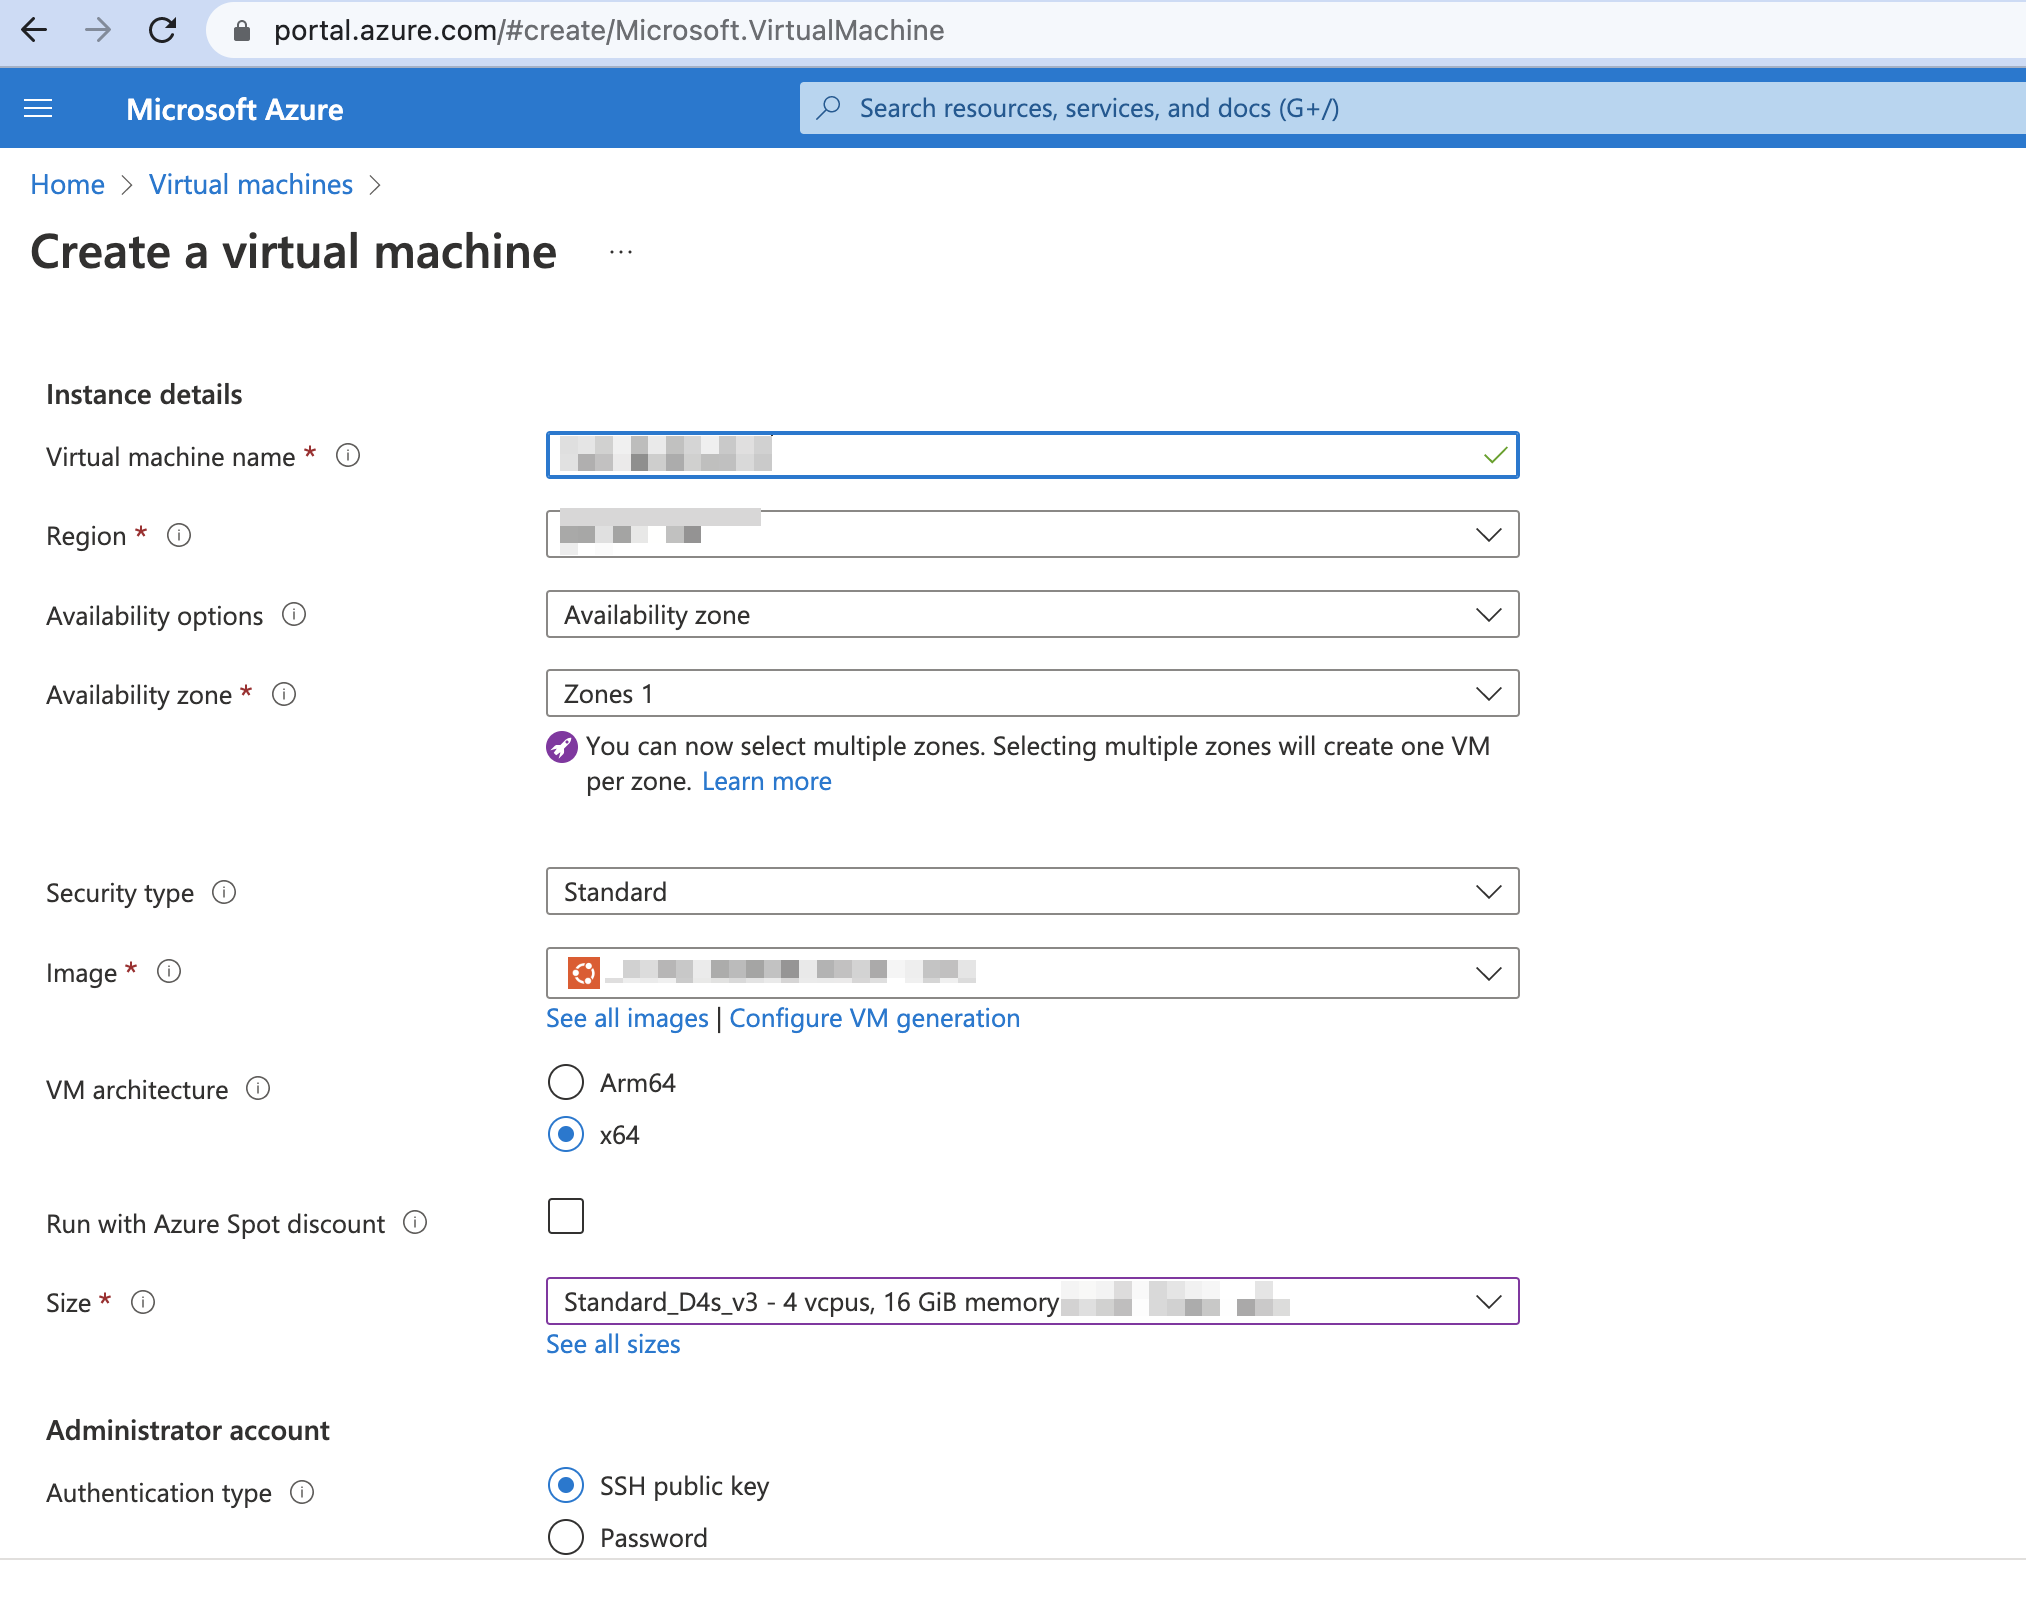
Virtual machine name – Enter a name for your VM.
Region – Select the region. For example, (US) East US.
Image – Select the image. For example, Ubuntu Server 20.04
Size – Select the size based on specifications. For example, Standard D4s v3 - 4vcups, 16 GiB memory. You need a minimum of 4vCPU and 16gb of memory to ensure good performance.
Authentication Type – Select SSH public key.
Click Create new SSH key pair.
In the Administrator account section, update the username and key pair name.
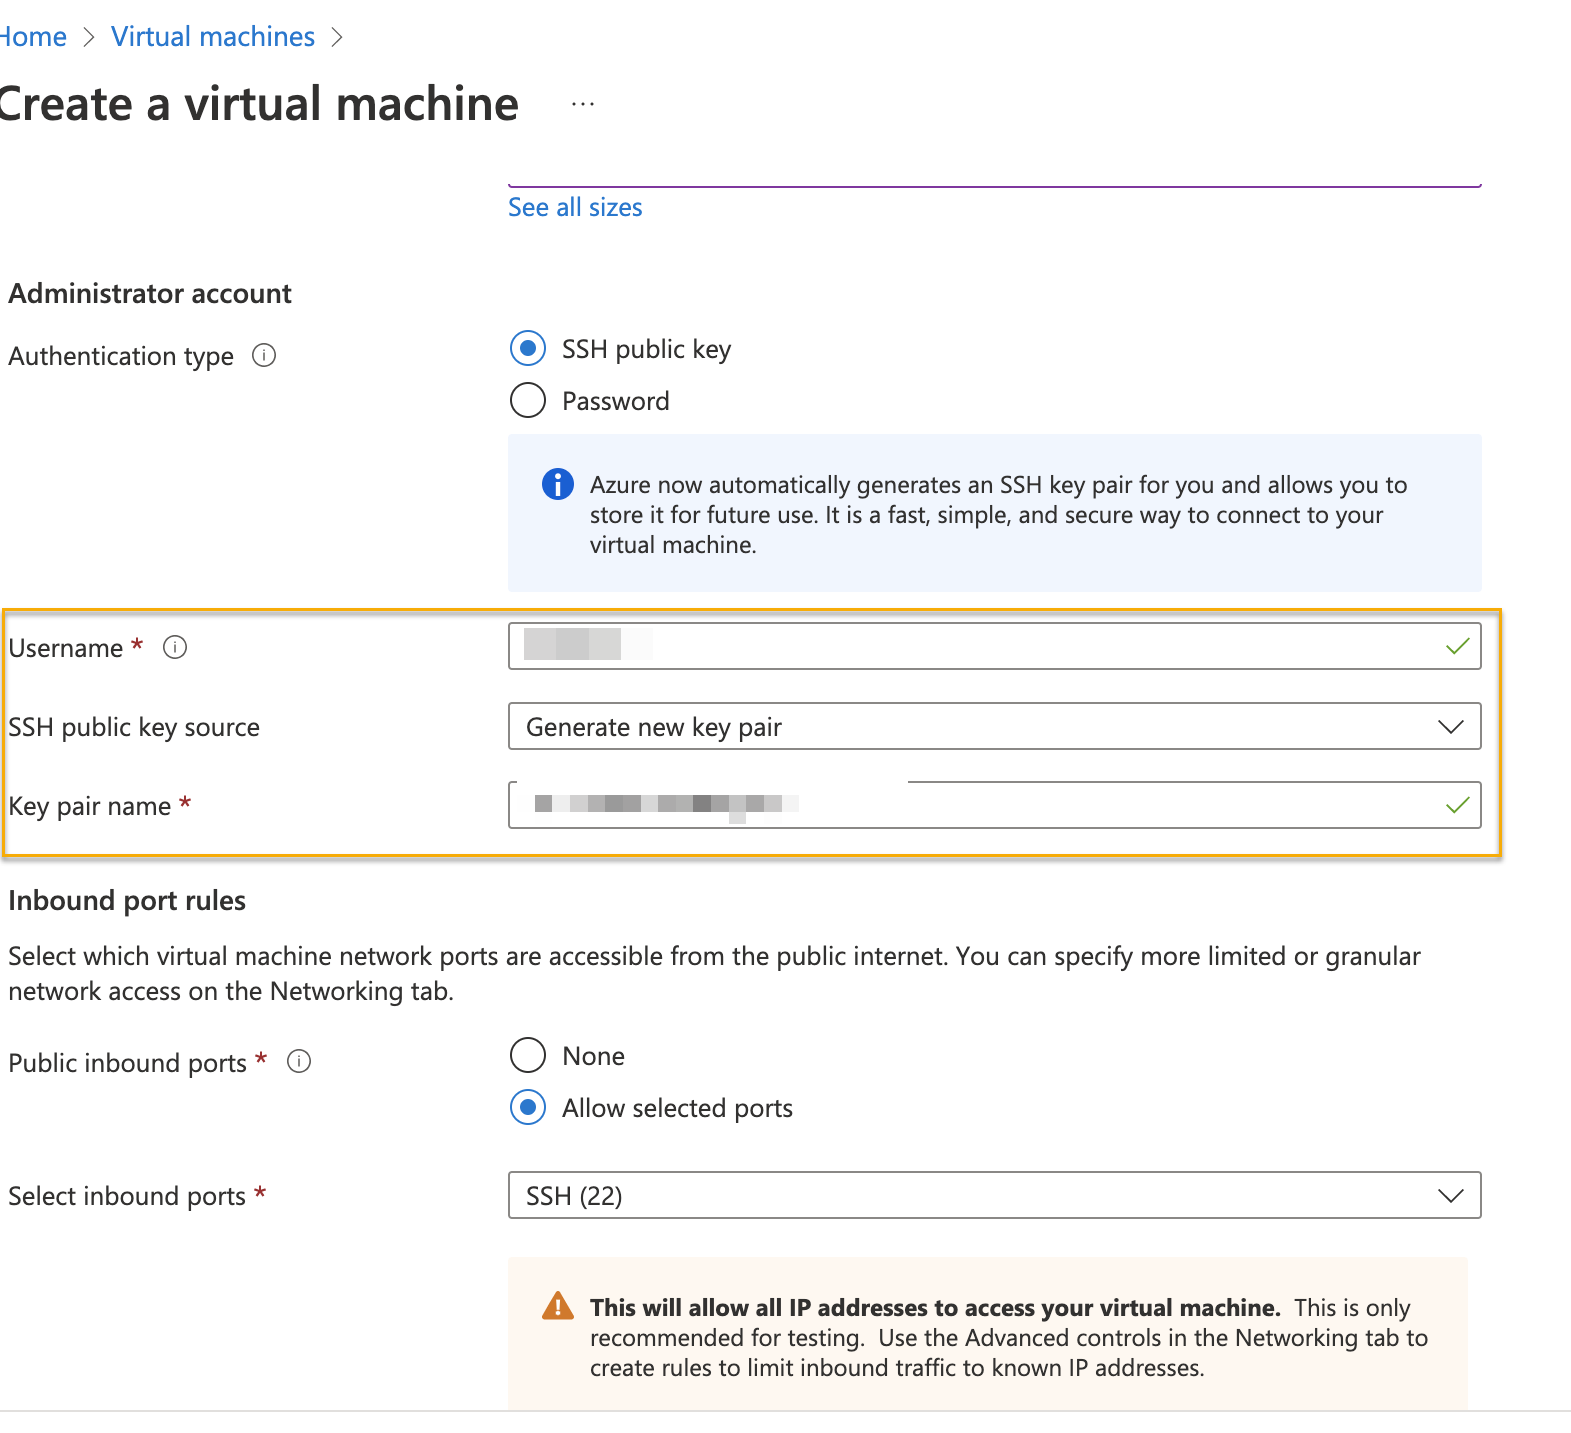

If there is an existing key in Azure, you can use the existing key.
Click Next: Disks.
Click Create and attach a new disk.
On the Create a new disk page, change the size to 128Gib.
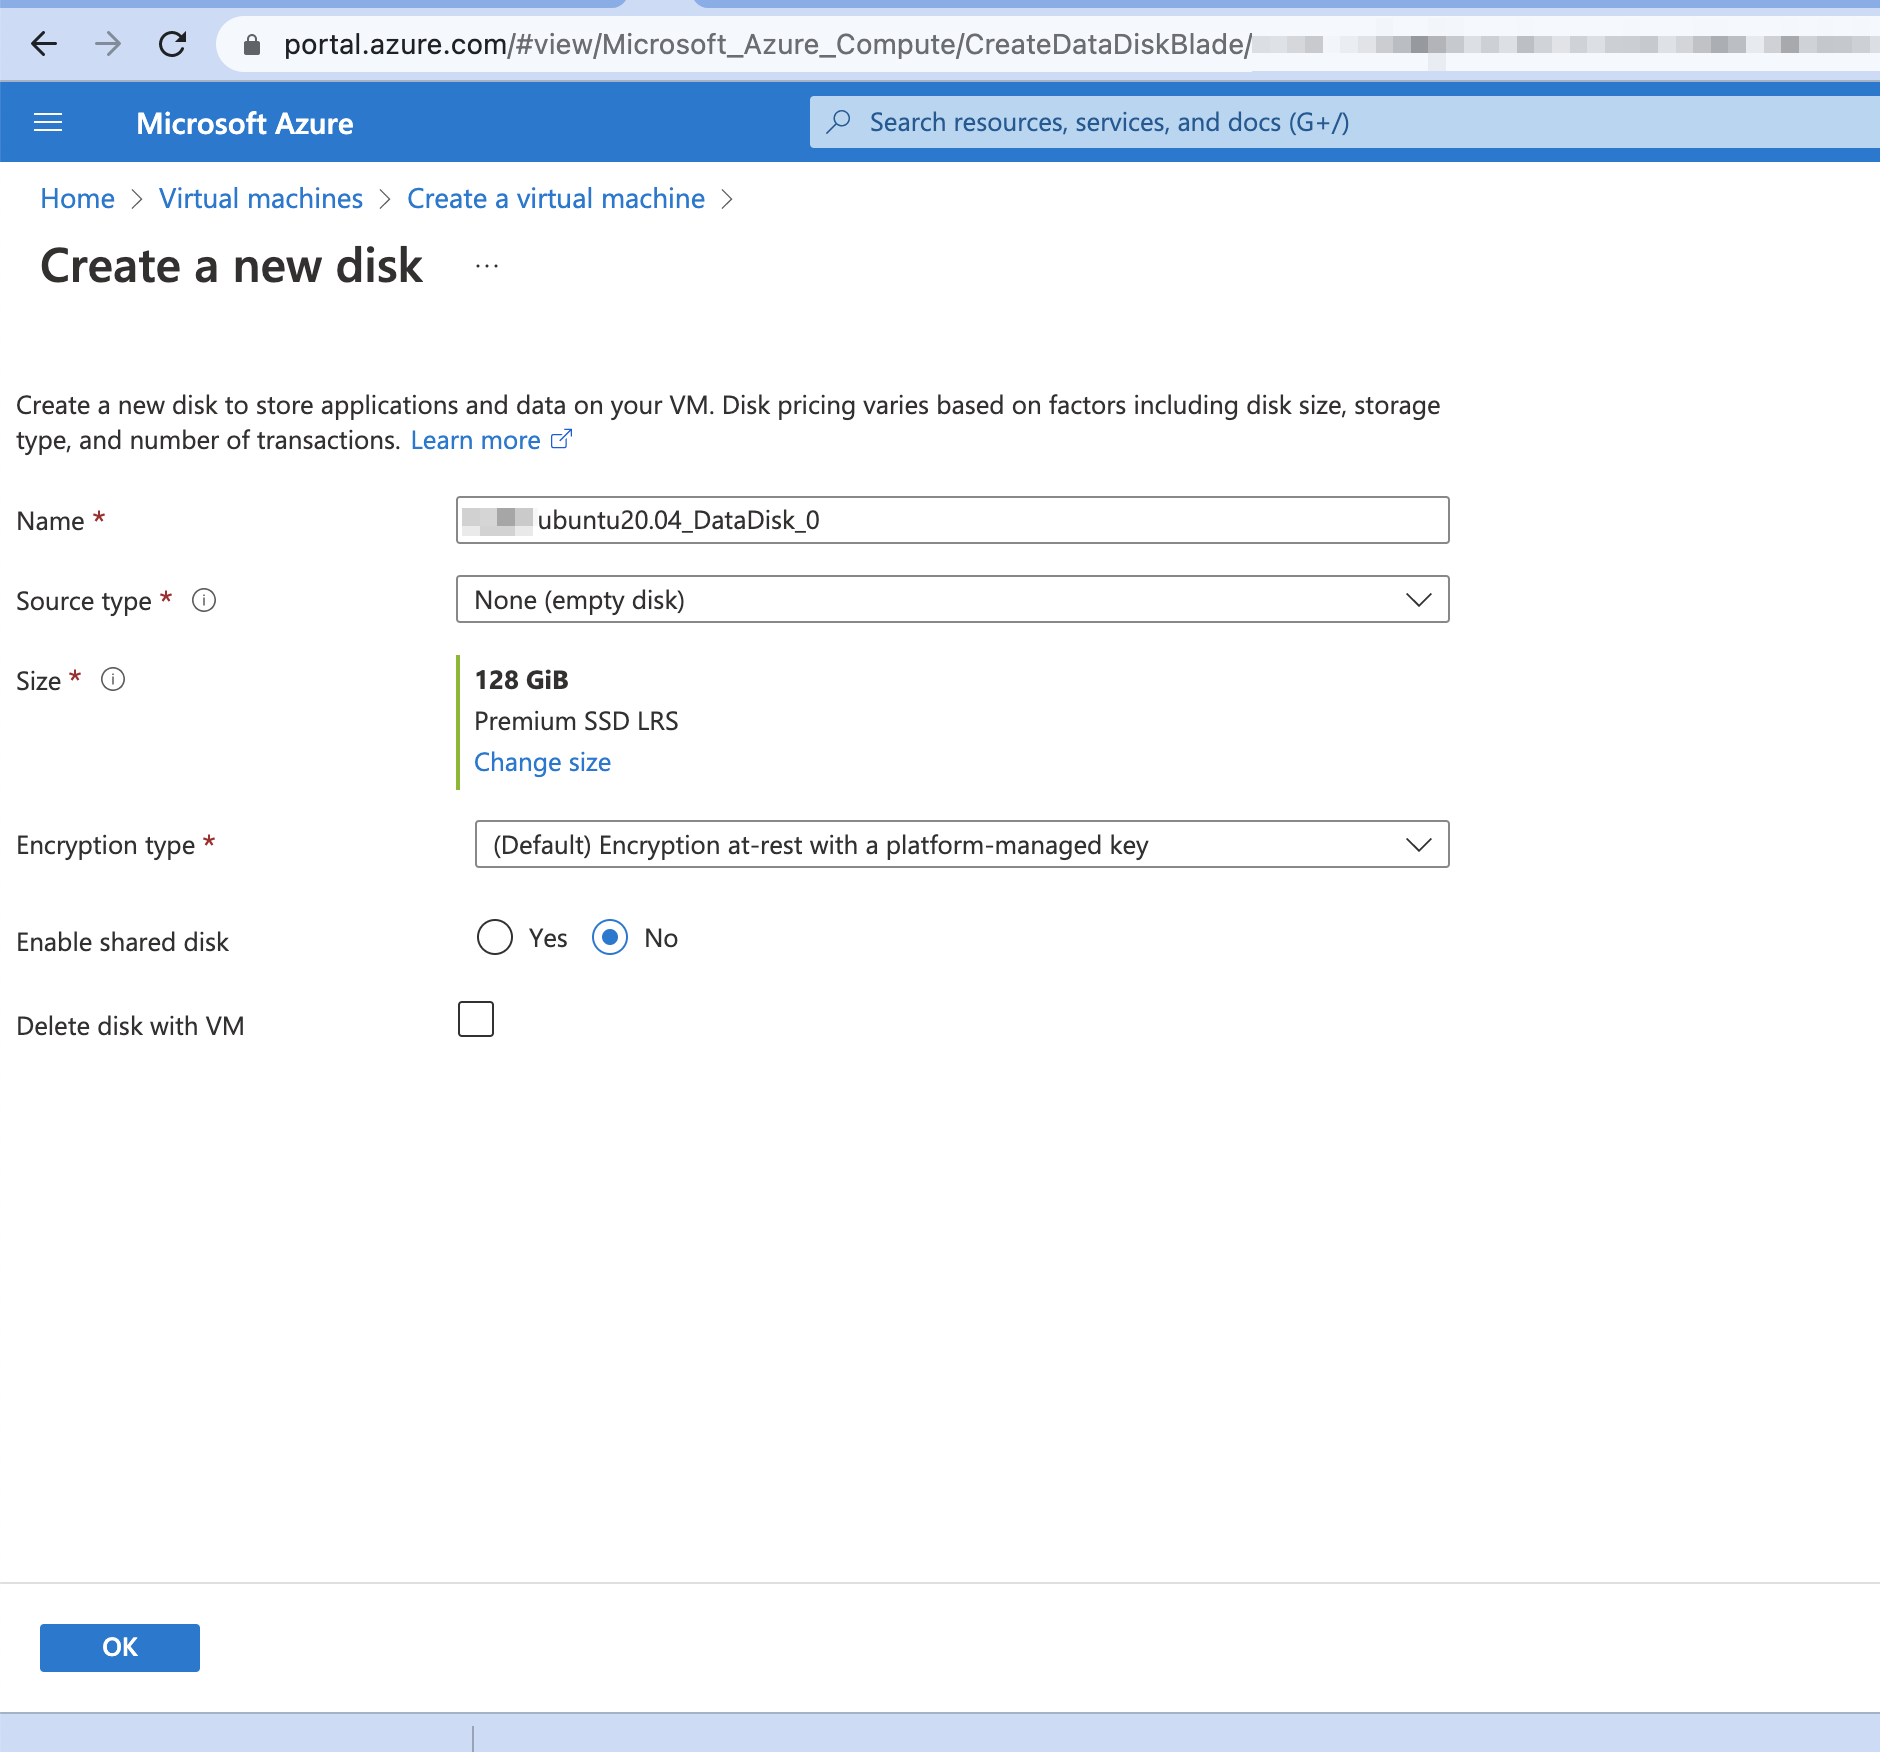
Add three new disks that are required for Site Collector installation as follows.
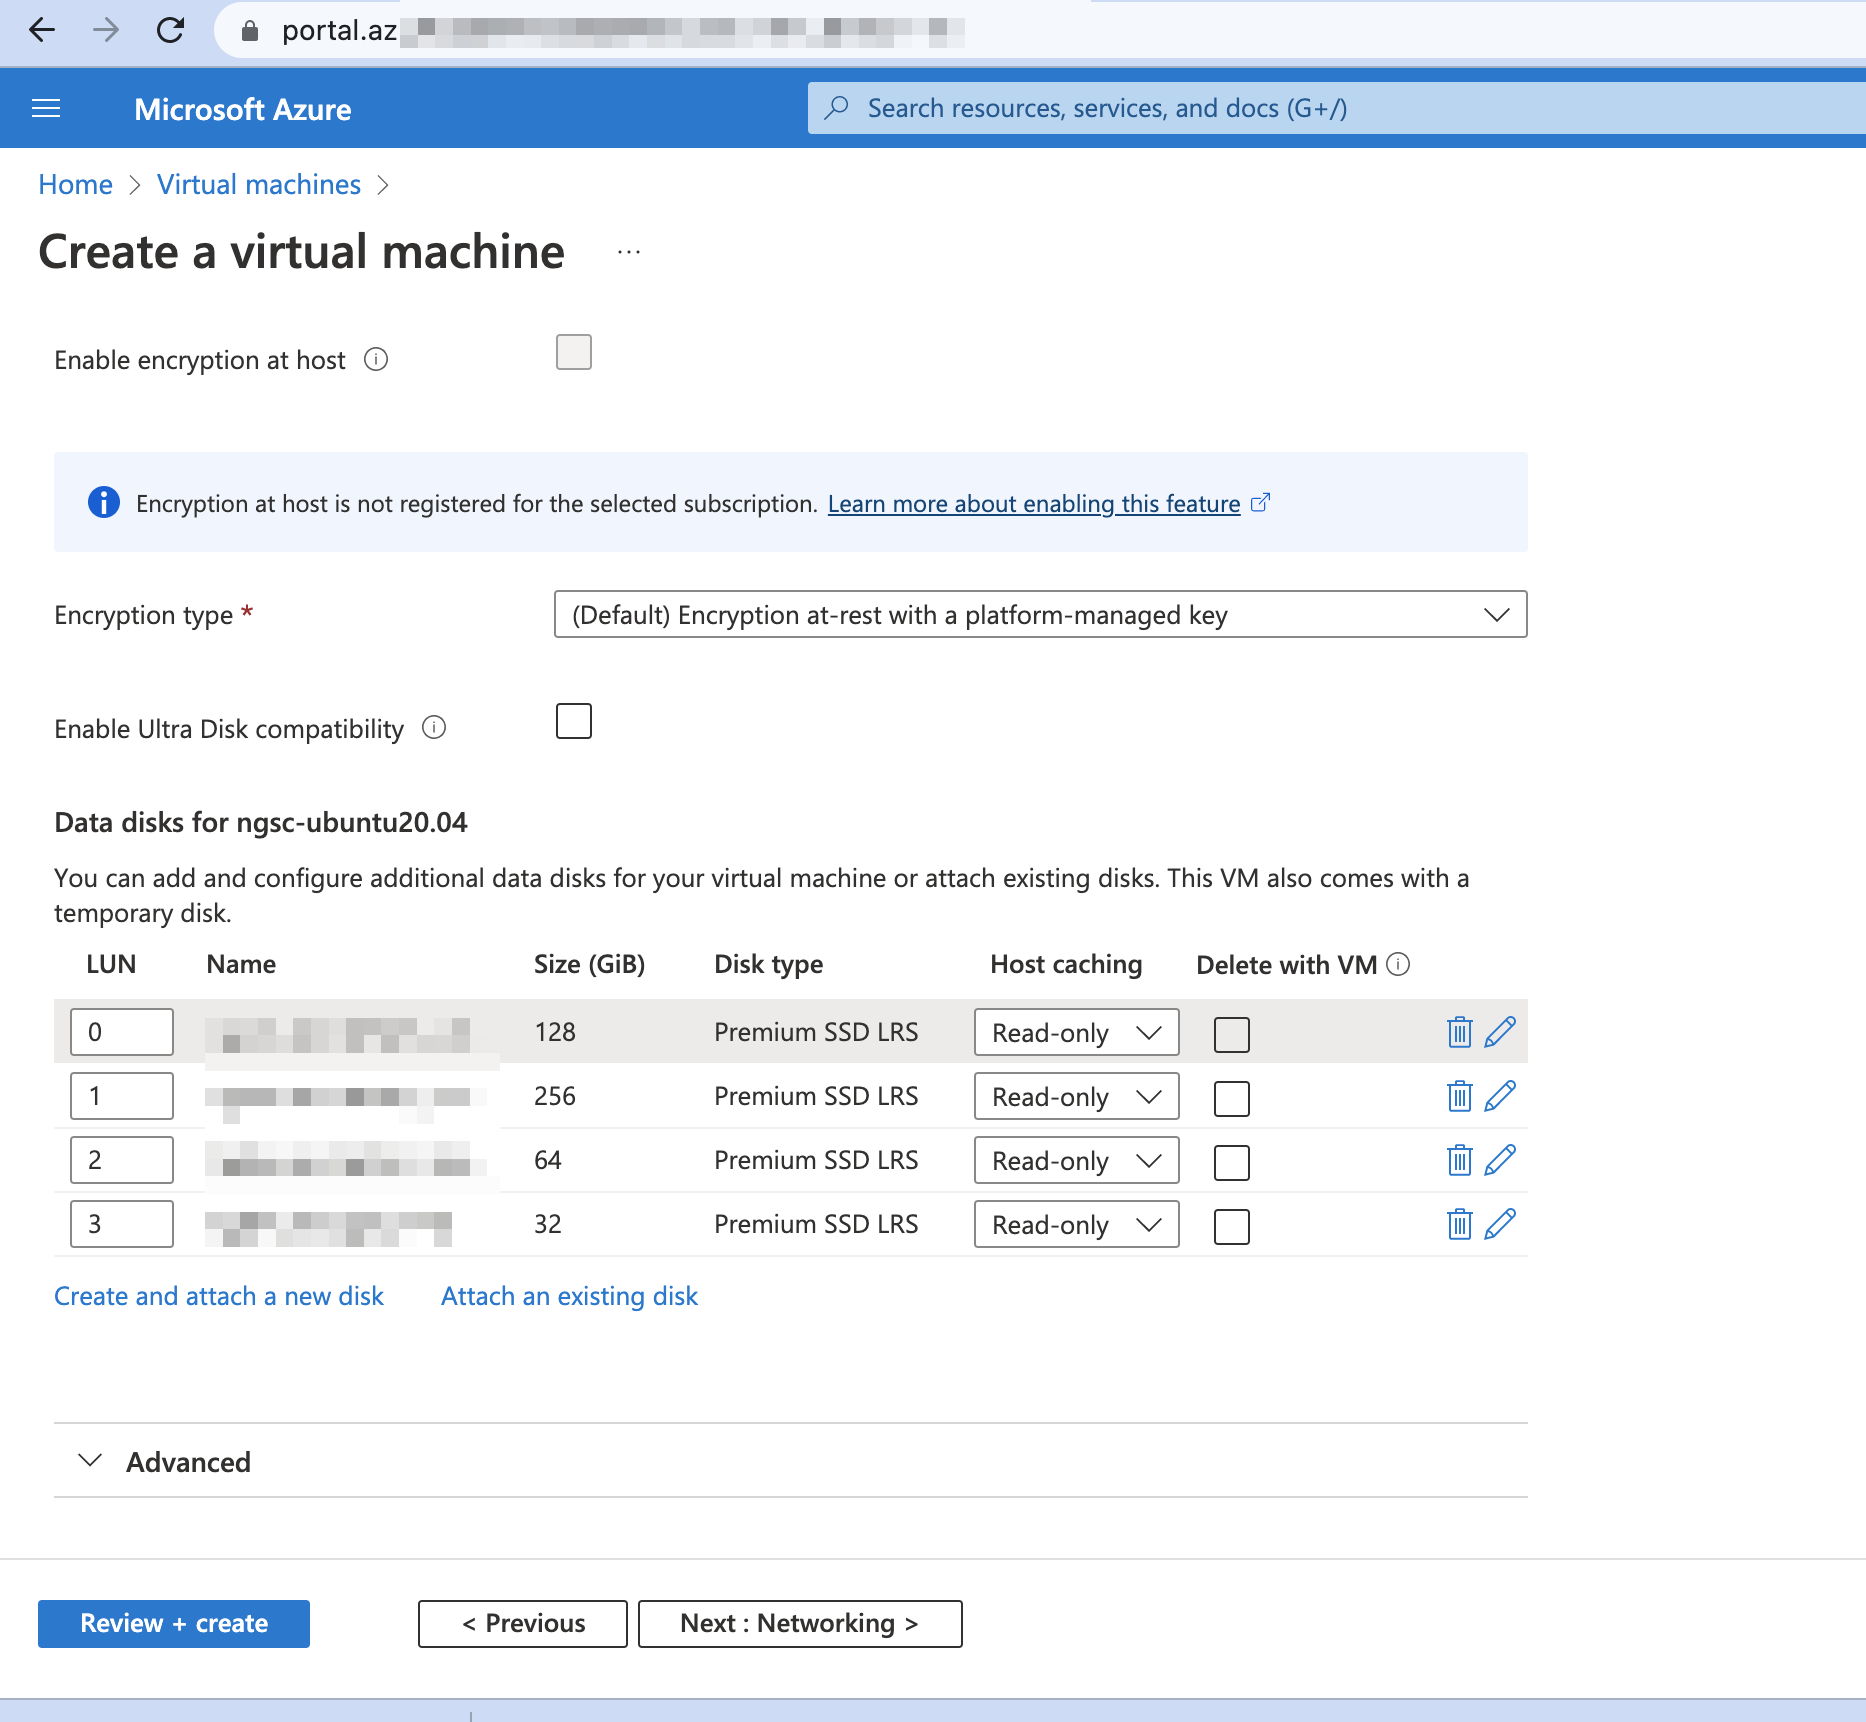
/content_repository: 256 Gb
/provenance_repository: 64 Gb
/flowfile_repository: 32 Gb
Click Next-Networking.
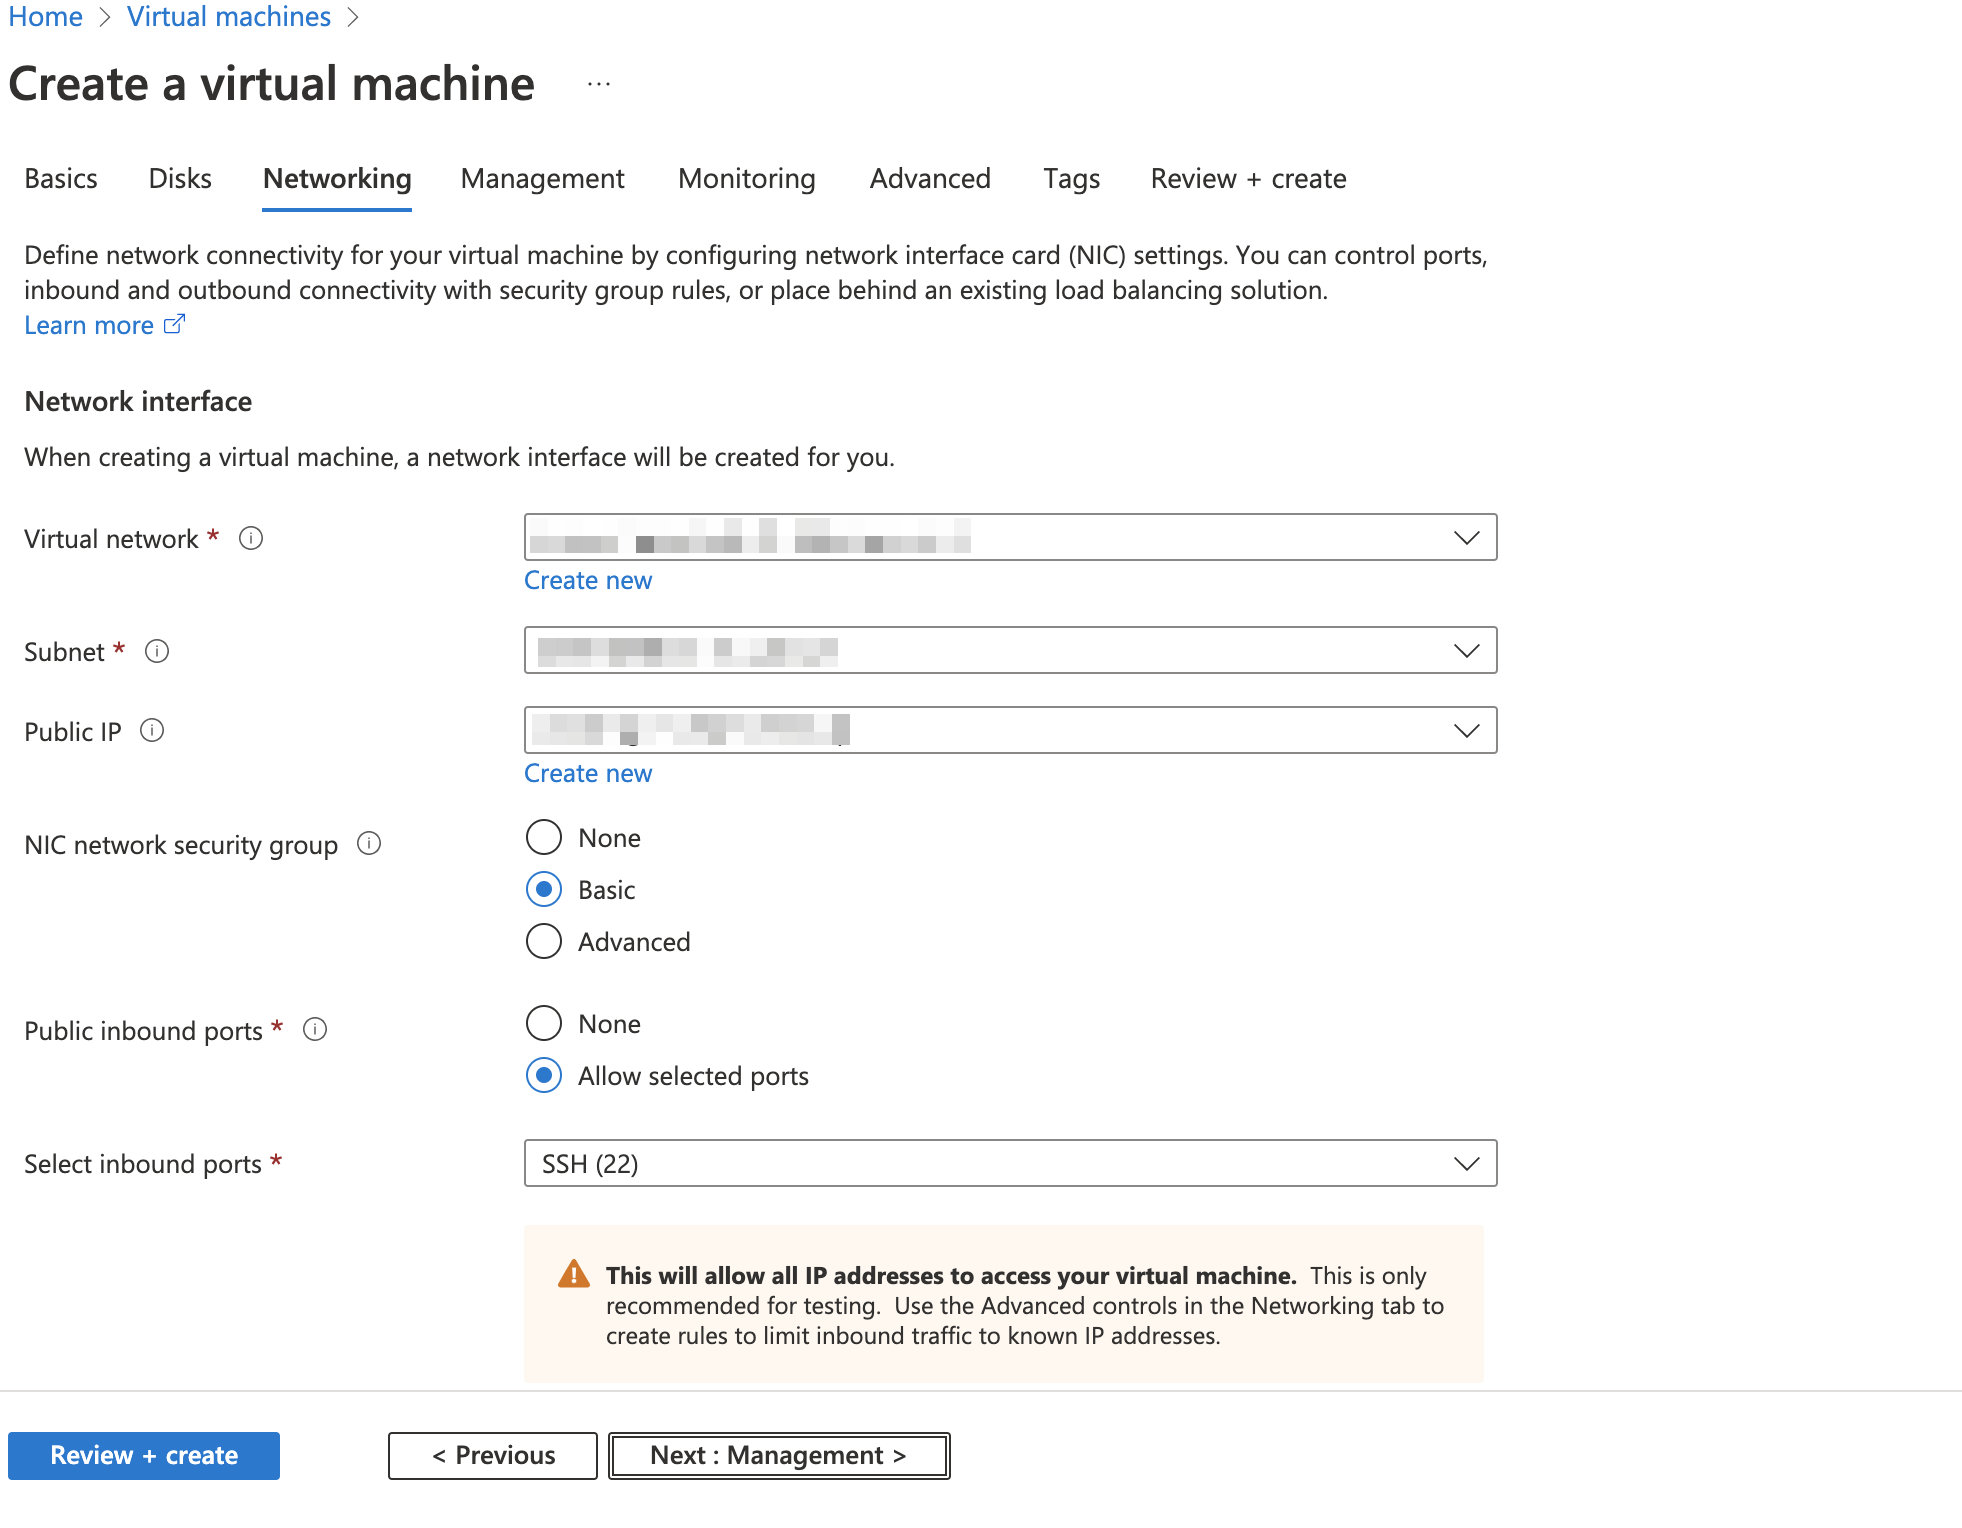
In the Network interface section, select Virtual network, Subnet, and NIC Network security group. Additionally, select Allow selected ports and SSH (22) as inbound ports. Before using the default settings, contact your network security officer.
Click Next:Management.
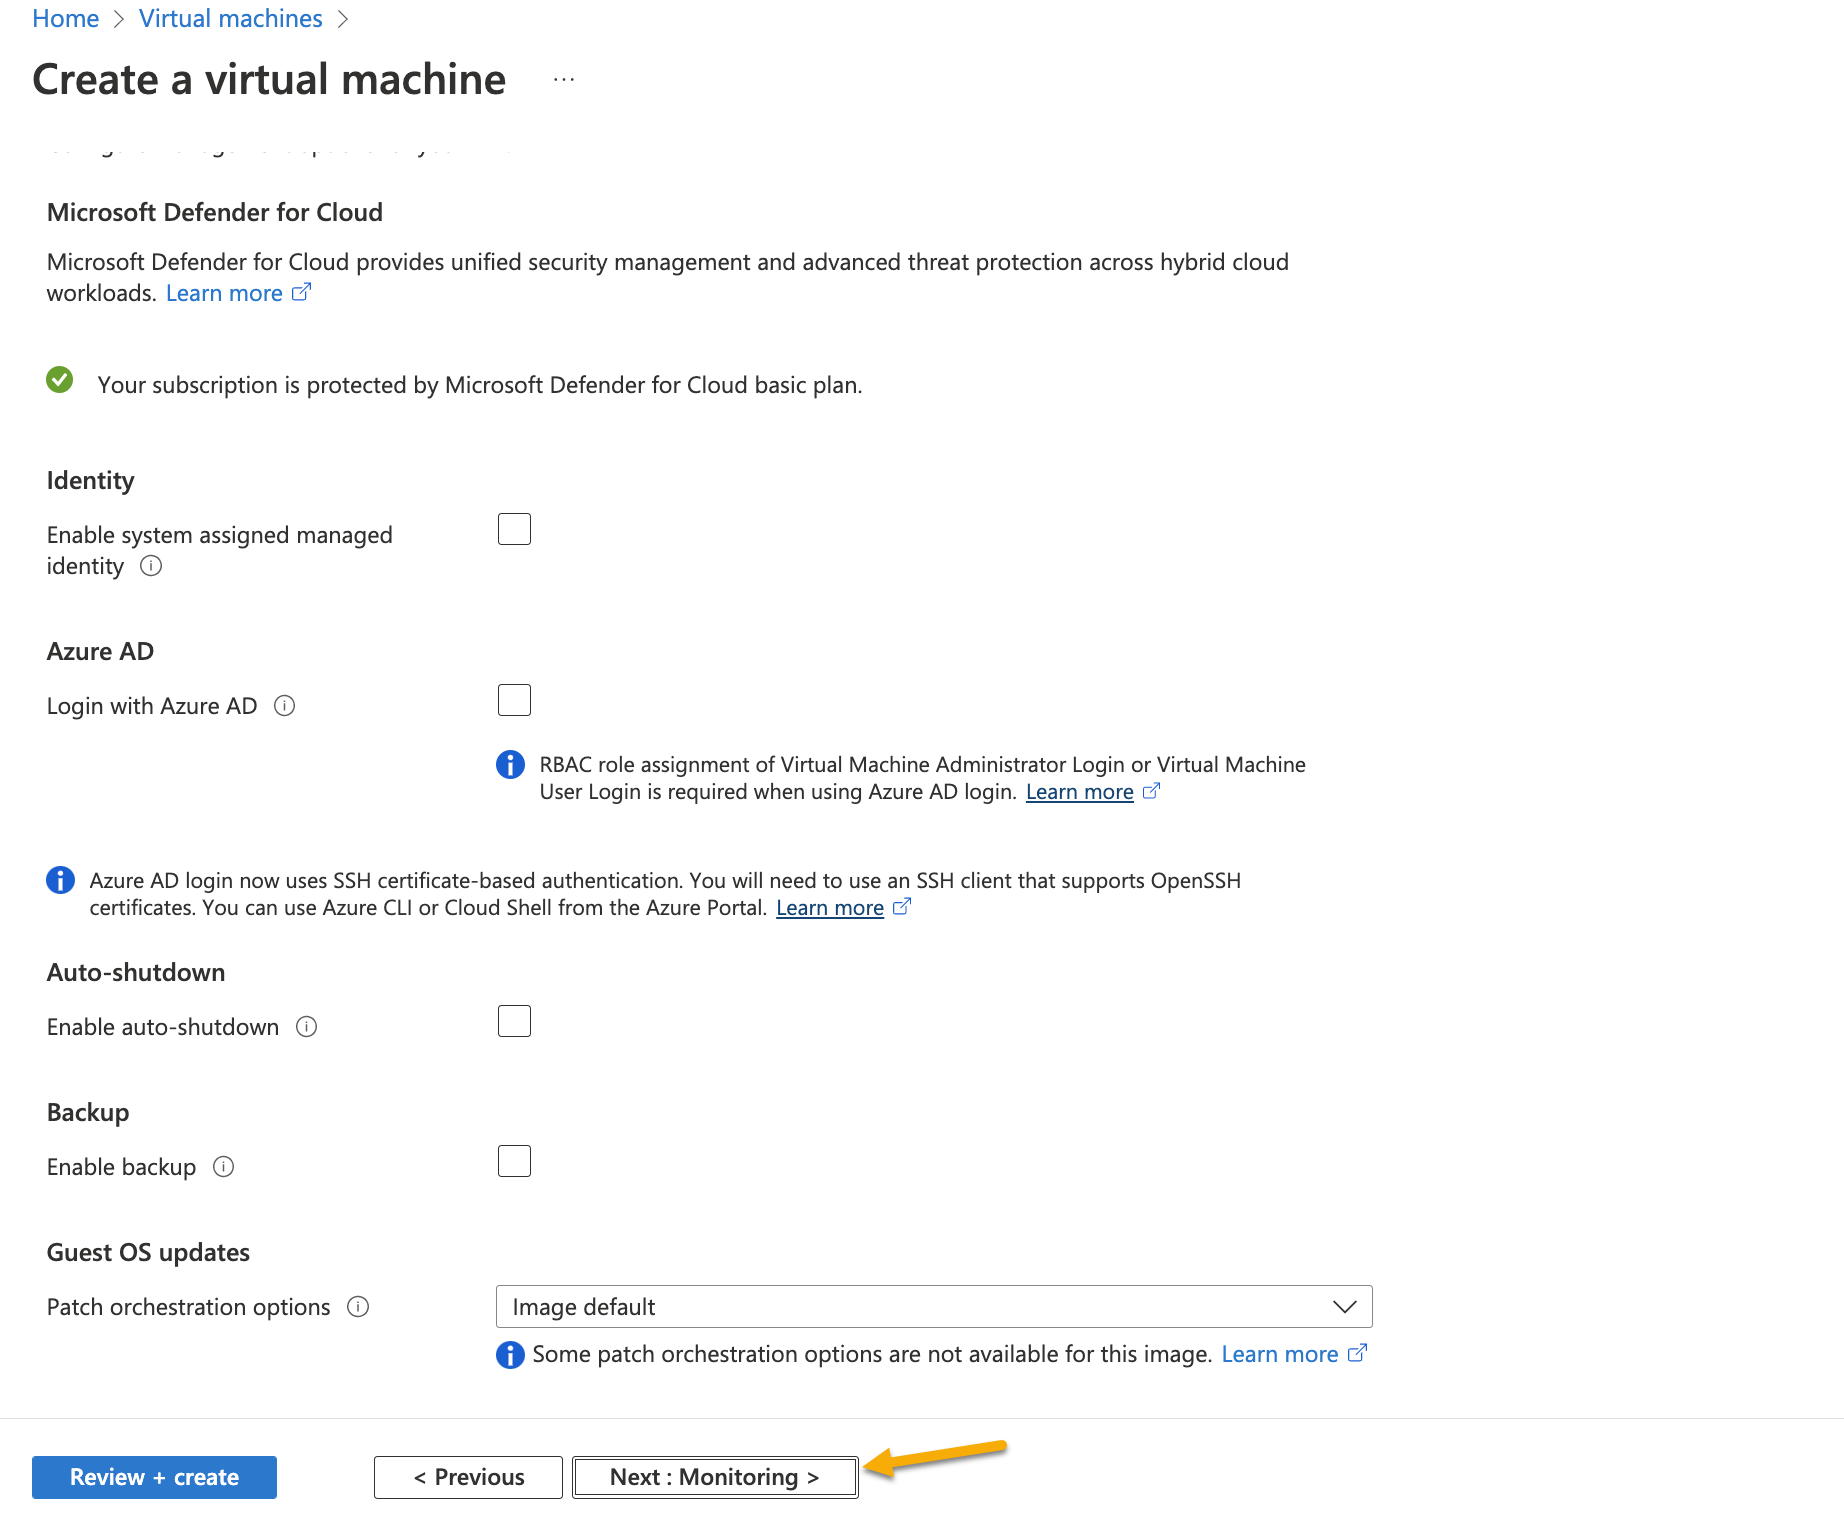
Click Next:Monitoring.
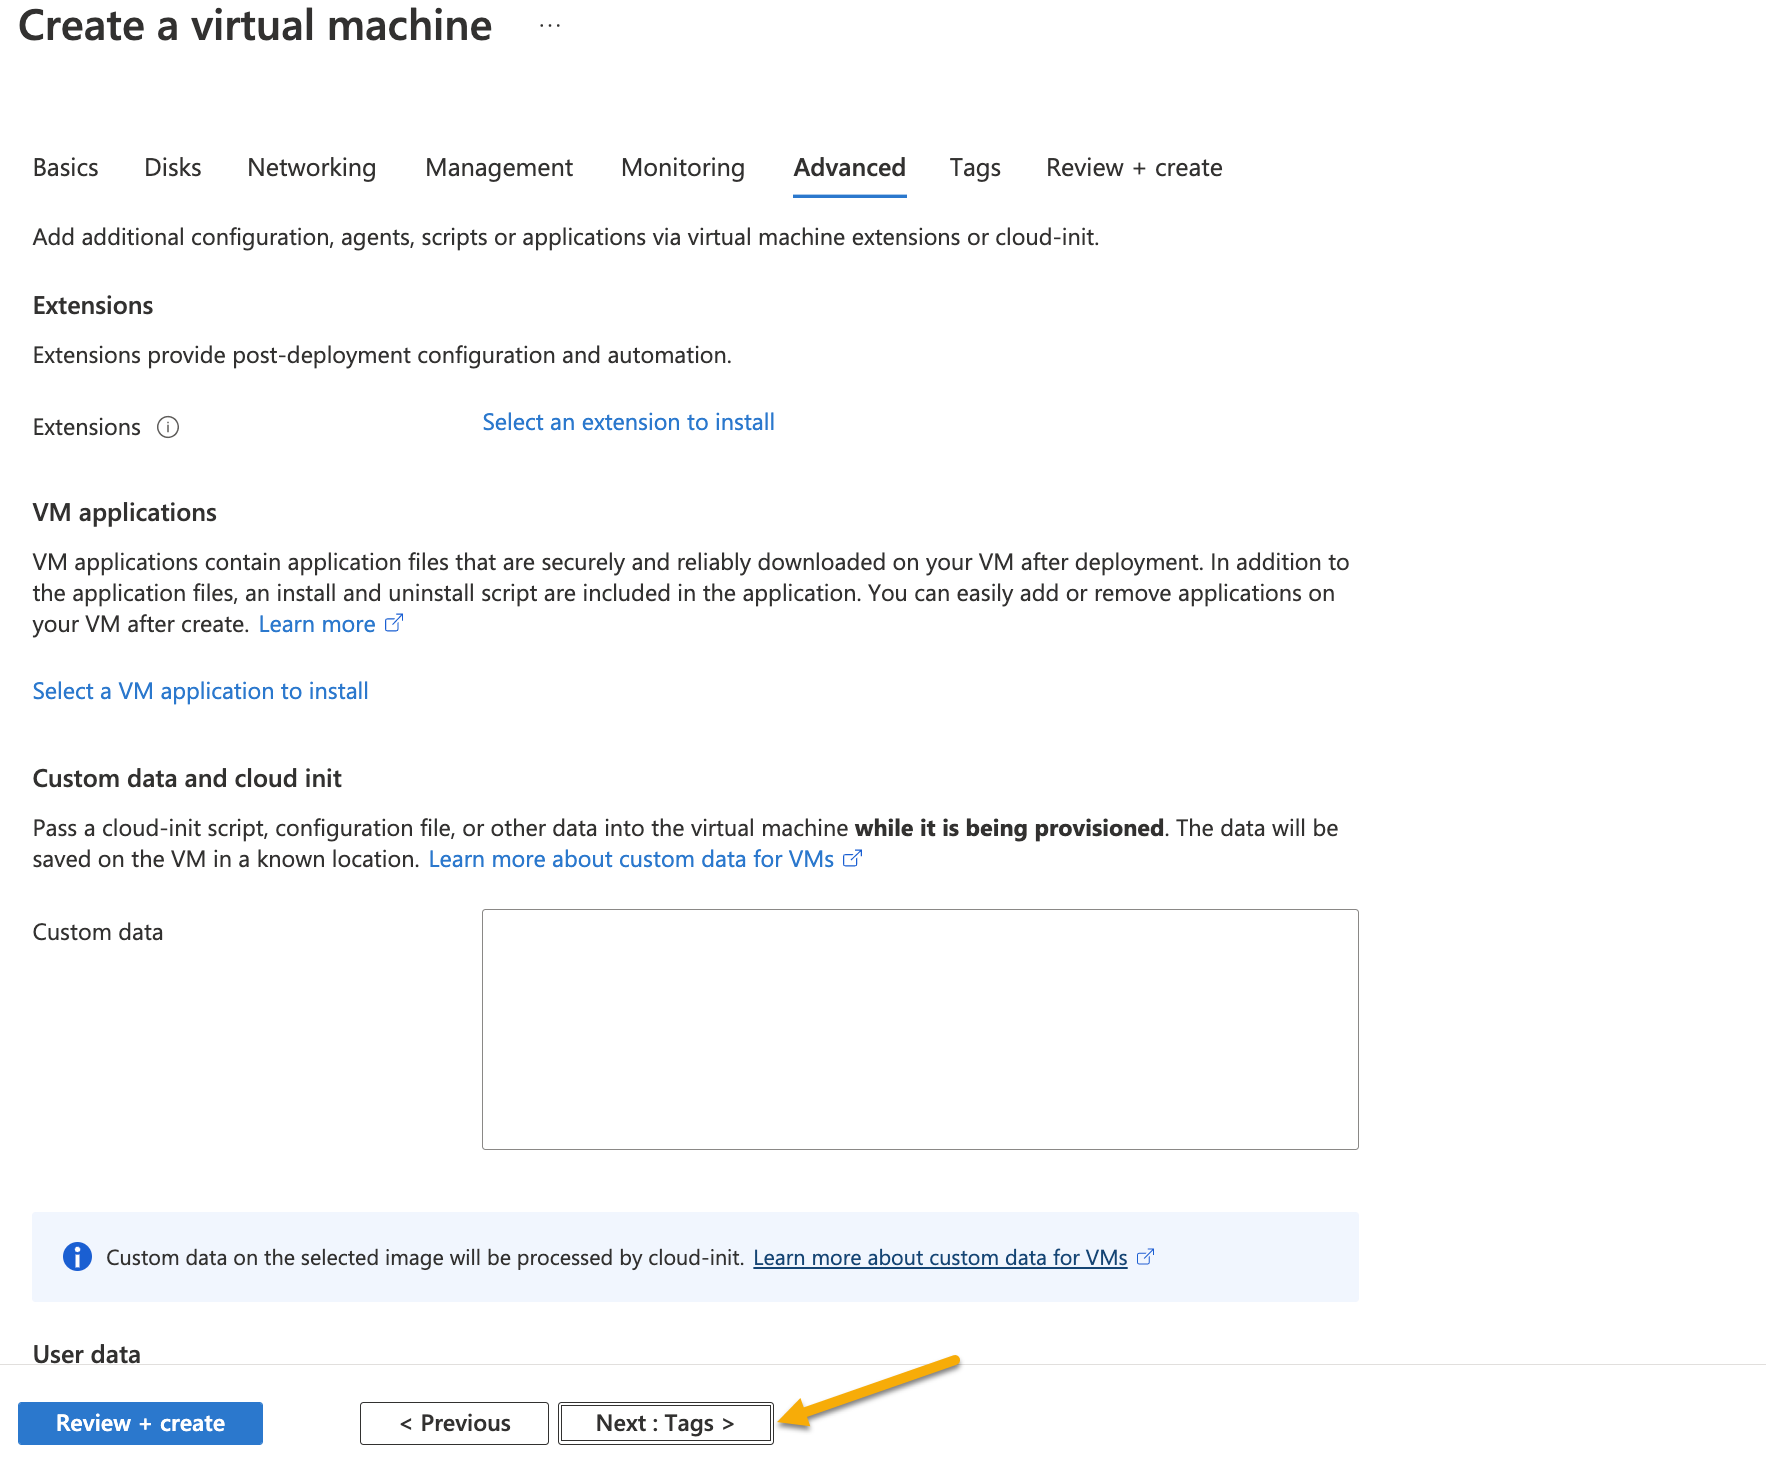
Click Next:Advanced.
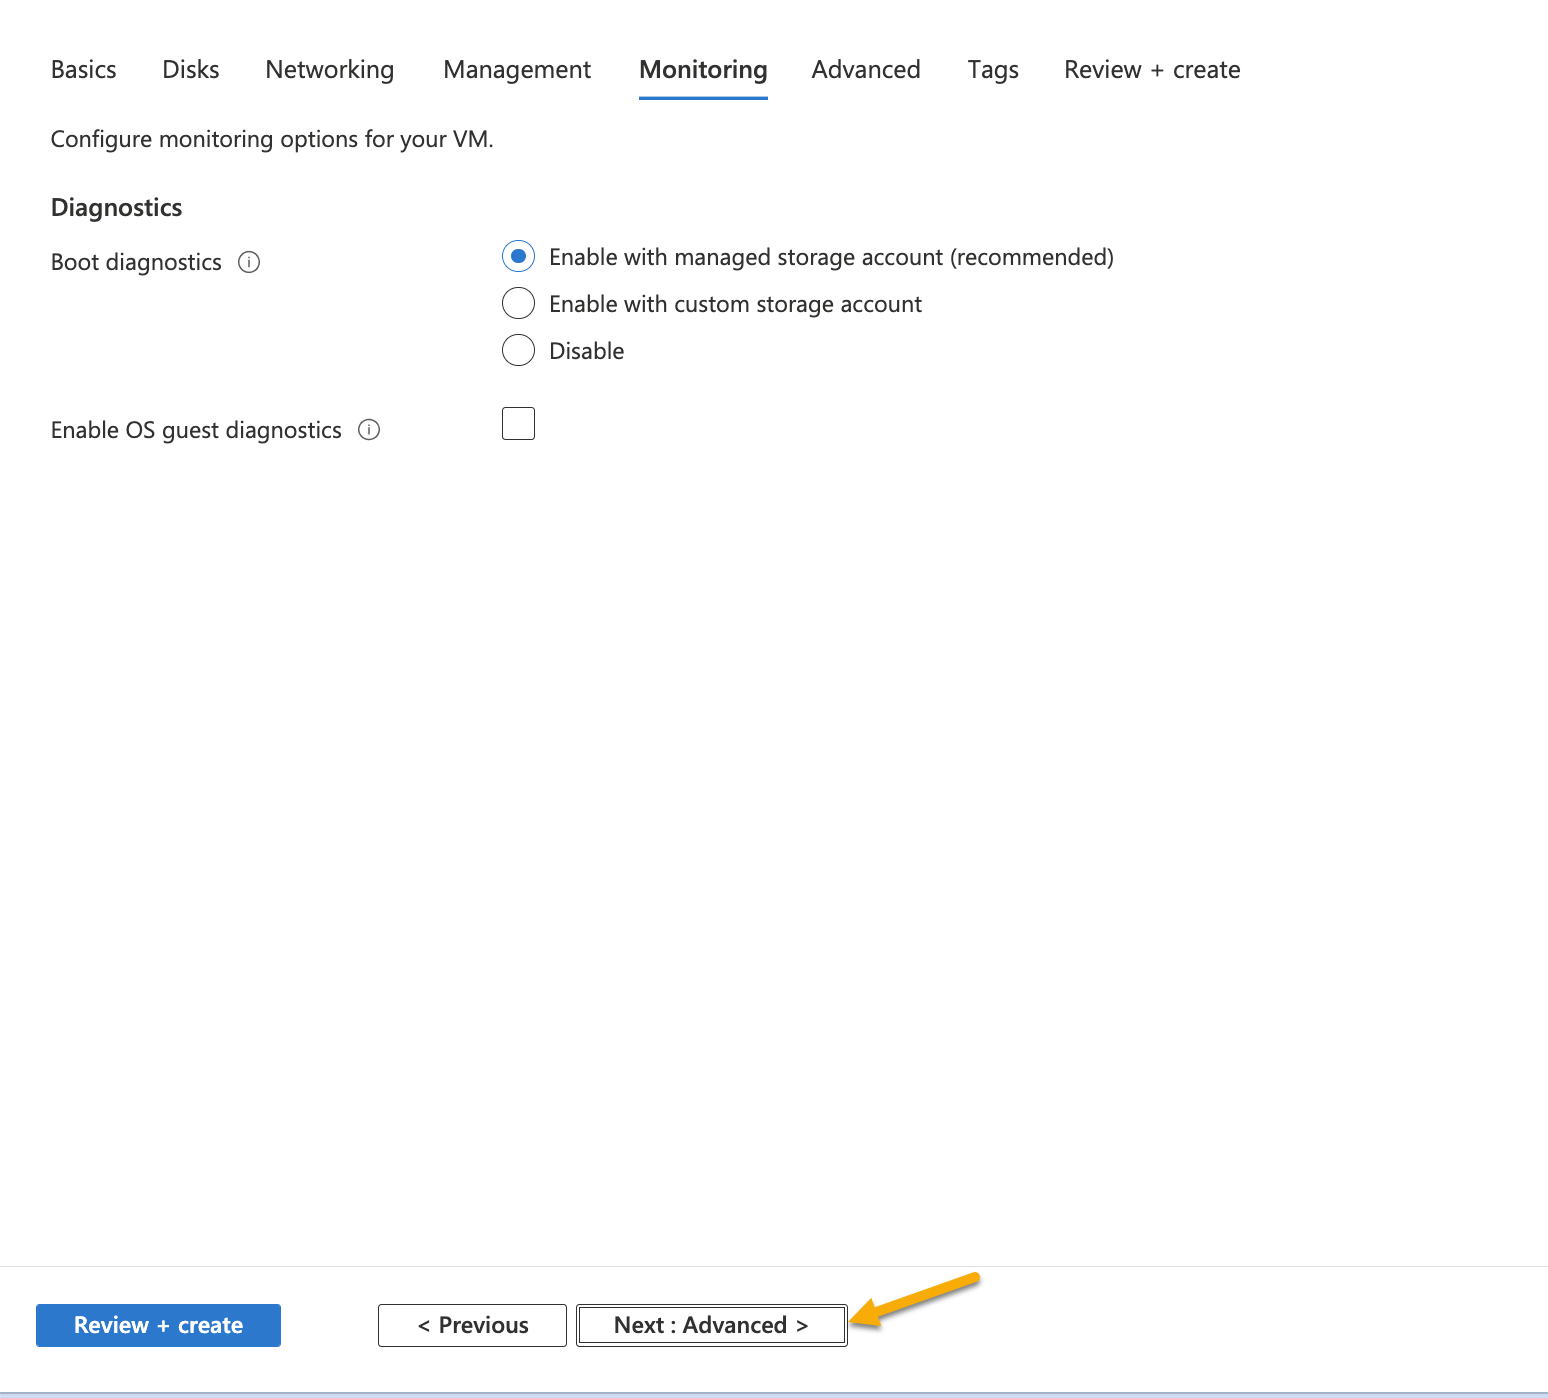
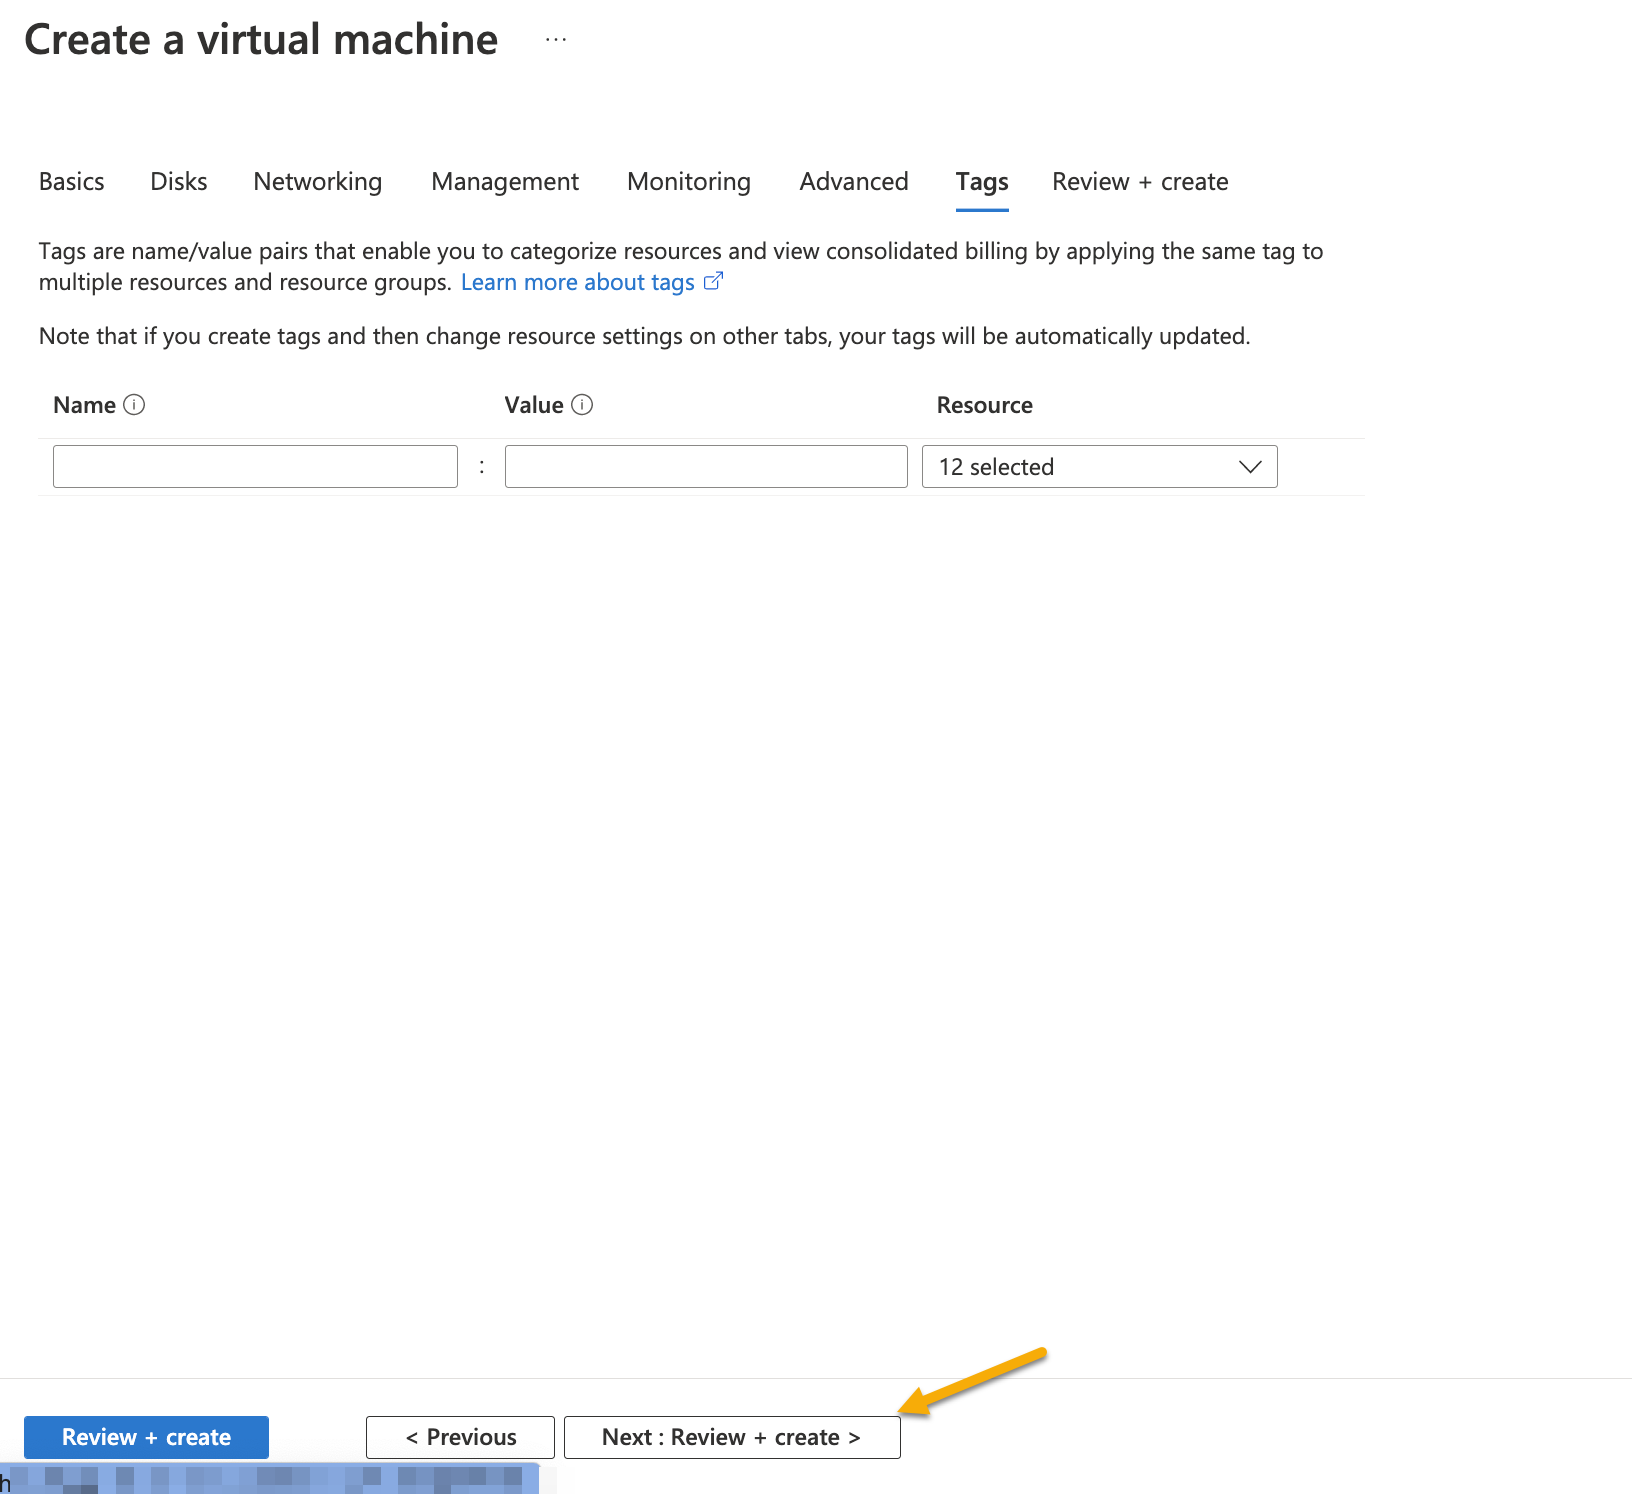
Click Next:Tags.
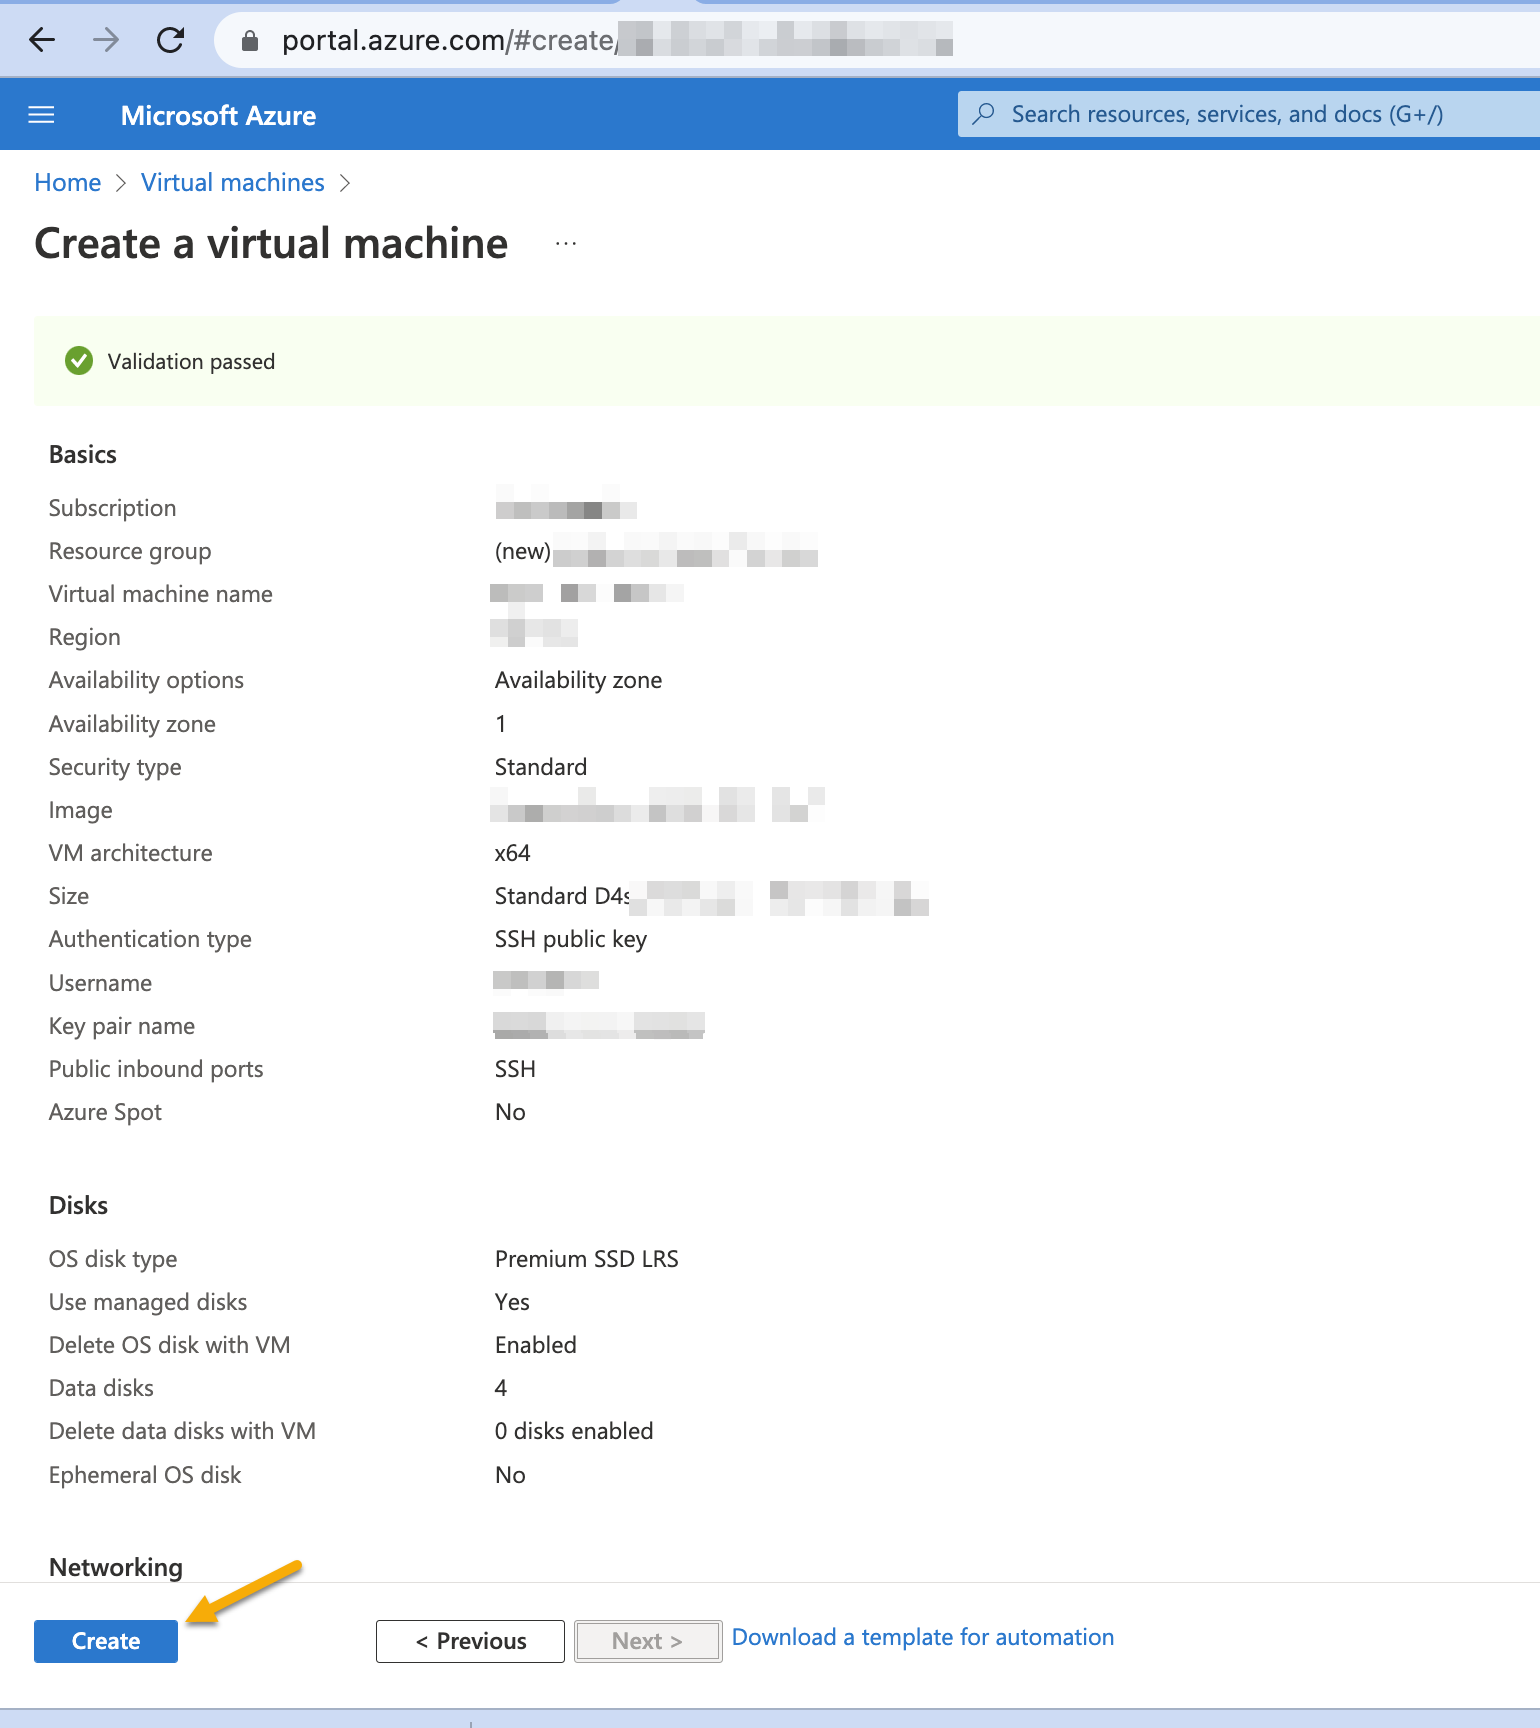
Click Next:Review+create.
Review the information and click Create.
Click Download private key and create resource.
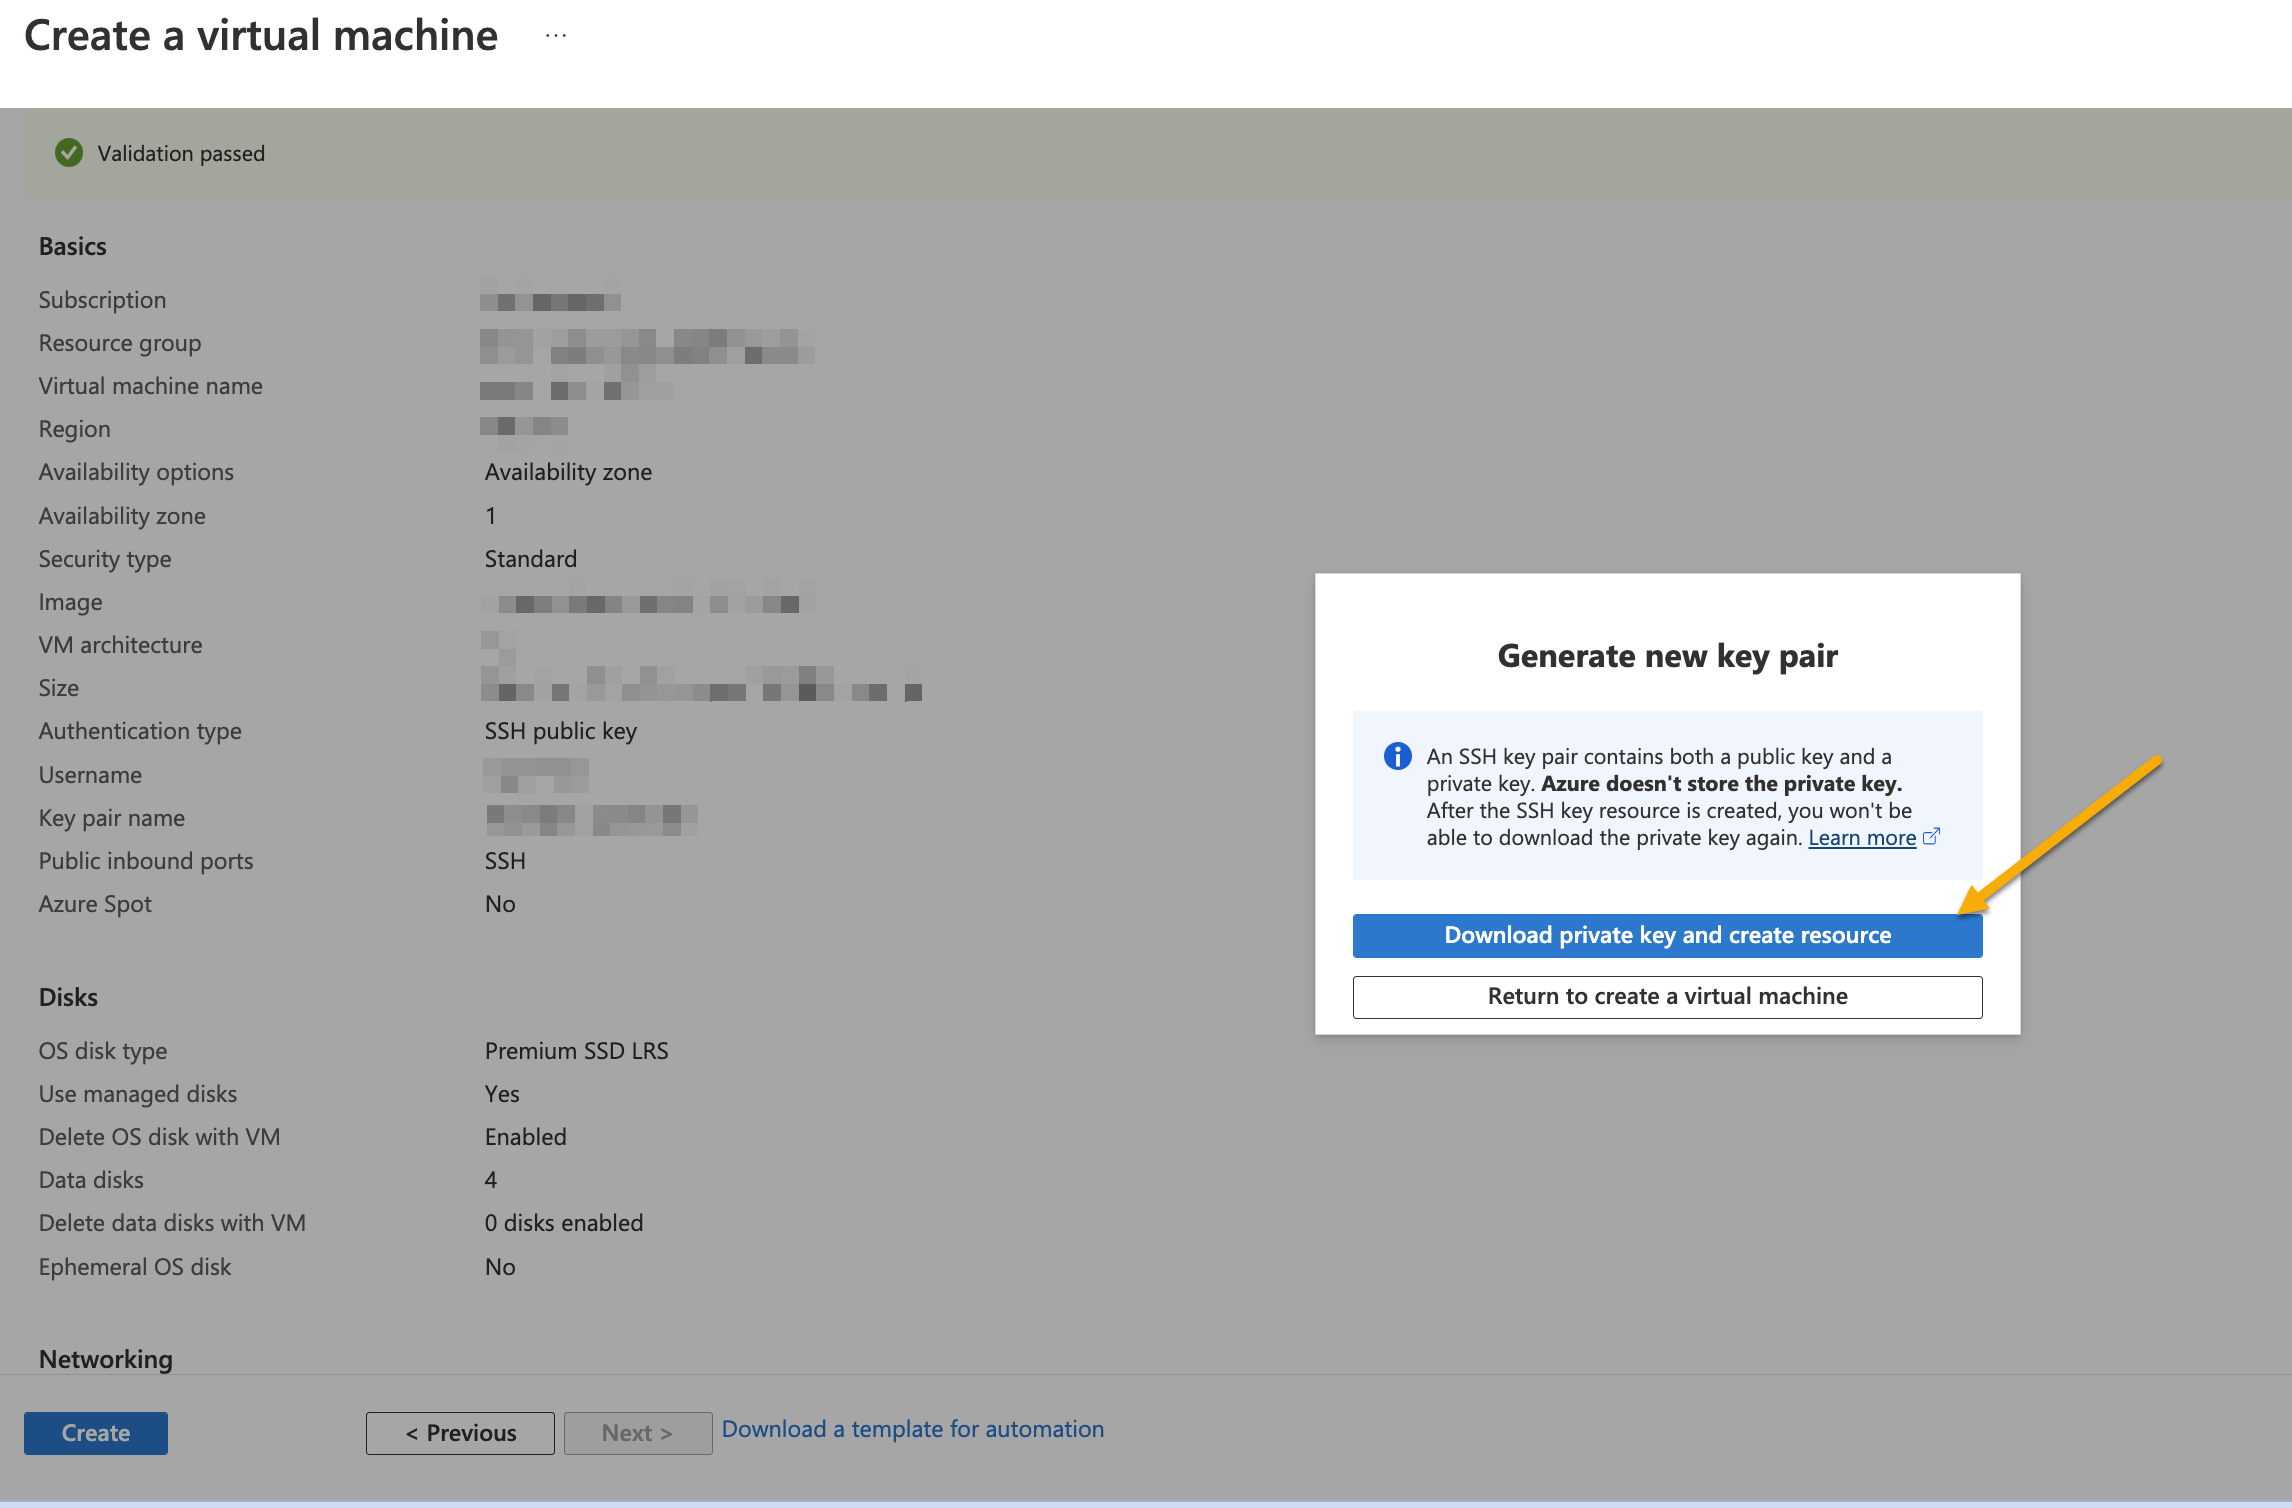
Note
Save the key file for example: abc_azure.pem.pem to the folder .ssh to use the key to connect to the VM.
Use the ssh key for allowing the user to remotely access the VM: cd .ssh
Use the following command to allow the system to read the file: chmod 400 abc_azure.pem.pem
The VM creation process is in progress.
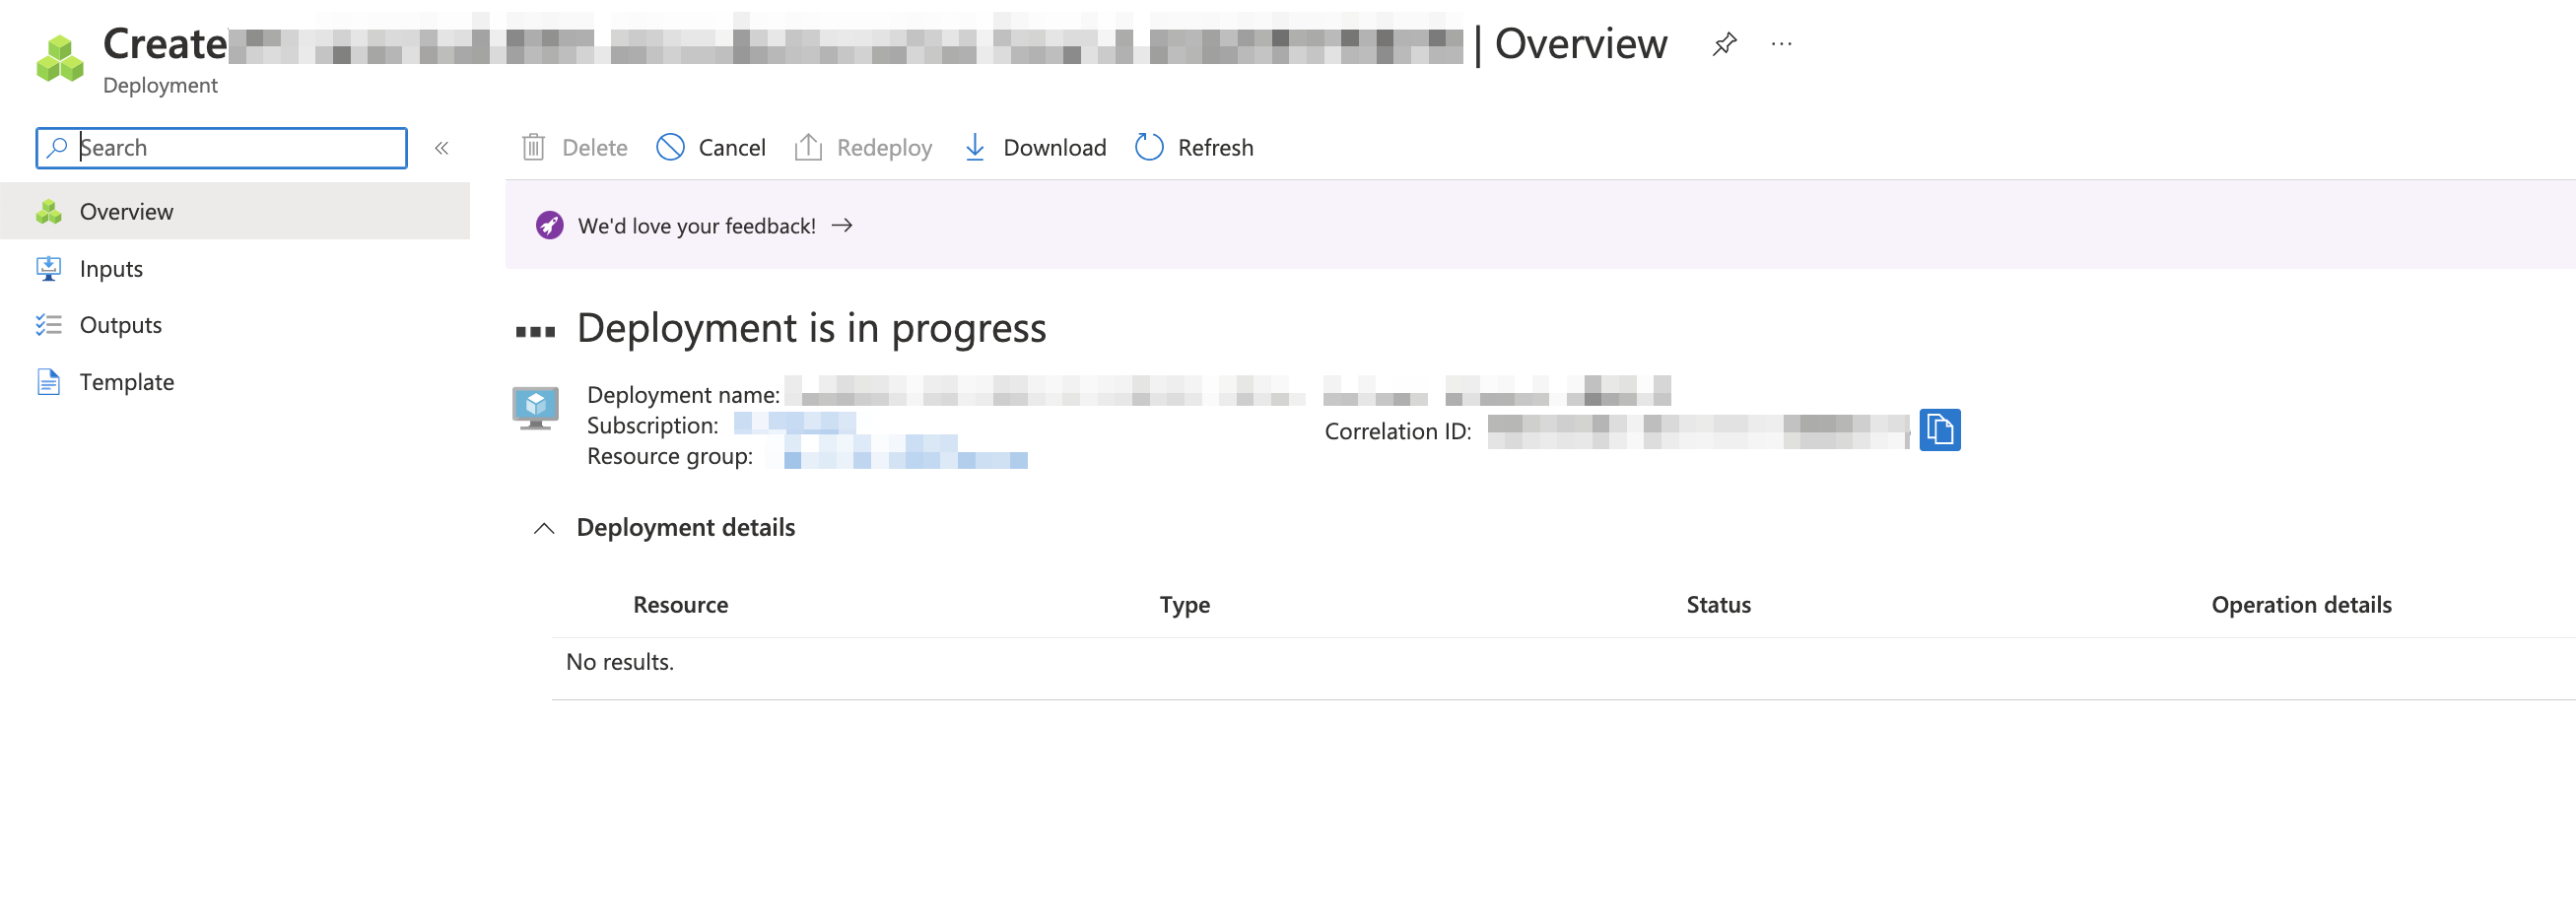

After the VM is created, the VM goes to Running state.

Copy the public IP address for the VM from the Public IP address column.
Connect to the host by running the following command.
ssh -i <key file name> <username>@<host>
You have defined the username and key file name in step 9 in the Administrator Account section.
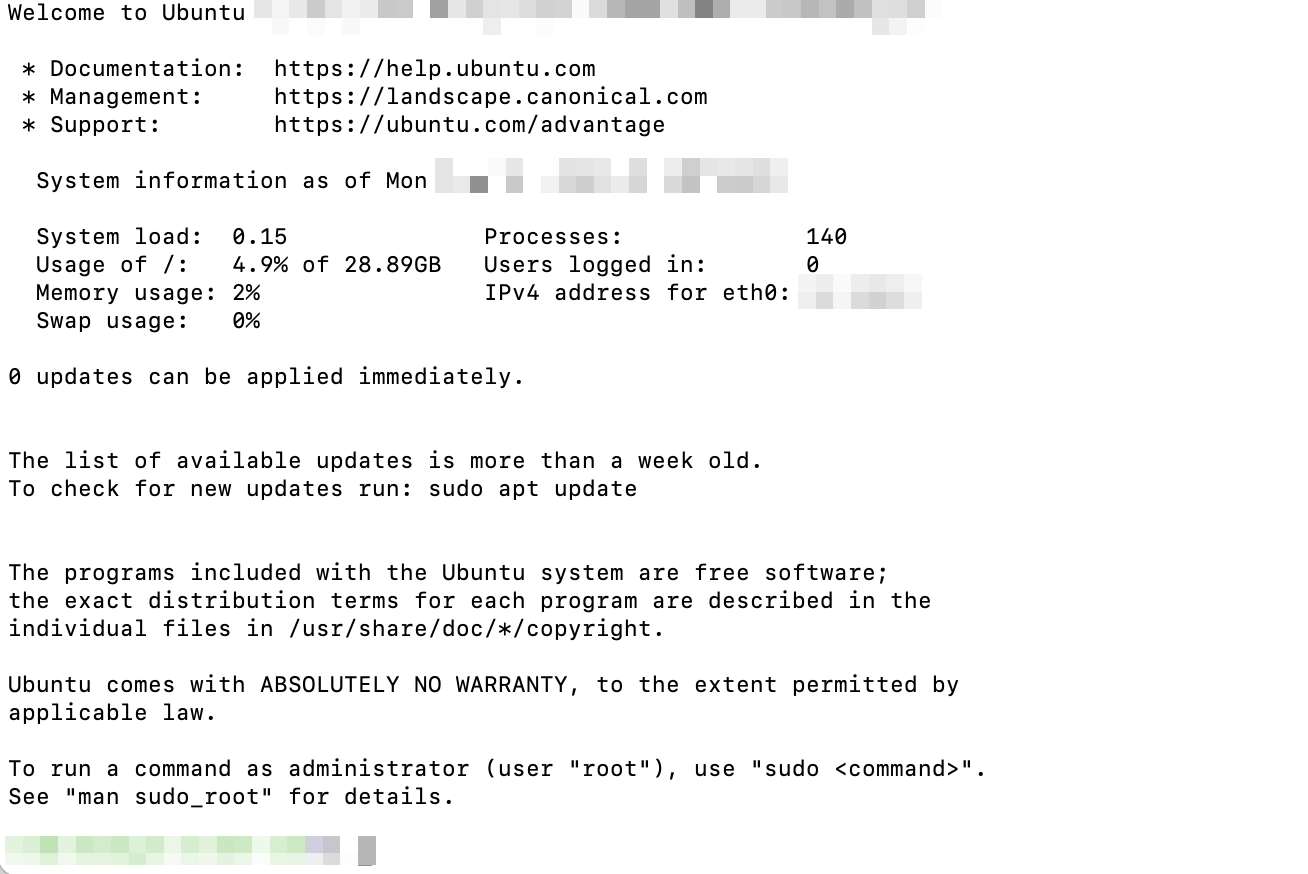
The following screenshot displays that you are connected to the VM.
Use the following commands to SSH to your VM and install the required packages for RedHat 7 - in this case, CentOS.
# install packages
sudo yum update -y
sudo yum install -y jq rsync screen curl openssl gawk ntp ntpstat

# enable NTP
sudo systemctl start ntpd
sudo systemctl enable ntpd

# install docker
sudo yum install -y yum-utils
sudo yum-config-manager \
    --add-repo \
    https://download.docker.com/linux/centos/docker-ce.repo

sudo yum install -y docker-ce docker-ce-cli containerd.io
# If docker-compose-plugin is not installed as part of docker-ce, run the following command:
sudo yum install -y docker-compose-plugin


sudo systemctl start docker
sudo systemctl enable docker

# verify that the docker is installed correctly
sudo docker run hello-world

# install tmux
curl --silent https://storage.googleapis.com/ngsc_update/exa-cloud-prod/tmux_install.sh | sudo bash
Use the following commands to SSH to your VM and install the required packages for RedHat 8 and 9.
# install packages
sudo dnf install https://dl.fedoraproject.org/pub/epel/epel-release-latest-8.noarch.rpm
sudo dnf install 'dnf-command(upgrade)'

sudo yum update -y
sudo yum install -y jq rsync screen curl openssl gawk
sudo yum install -y chrony

# install docker
sudo yum install -y yum-utils
sudo yum-config-manager \
    --add-repo \
    https://download.docker.com/linux/centos/docker-ce.repo

sudo yum install -y docker-ce docker-ce-cli containerd.io
# NGSC v1.10+ will also require docker-compose-plugin
sudo yum install -y docker-compose-plugin

sudo systemctl start docker
sudo systemctl enable docker

# verify that the docker is installed correctly
sudo docker run hello-world

# install docker-compose
sudo curl -L "https://github.com/docker/compose/releases/download/1.23.2/docker-compose-$(uname -s)-$(uname -m)" -o /usr/bin/docker-compose
sudo chmod +x /usr/bin/docker-compose
# verify that the docker-compose is installed correctly
docker-compose -v

# install tmux
curl --silent https://storage.googleapis.com/ngsc_update/exa-cloud-prod/tmux_install.sh | sudo bash
Use the following commands to SSH to your VM and install the required packages for Ubuntu.
# install package
sudo apt-get update
sudo apt-get install -y ca-certificates curl gnupg lsb-release jq rsync screen curl openssl gawk ntp ntpstat

# enable NTP
sudo systemctl start ntp
sudo systemctl enable ntp

# install docker
curl -fsSL https://download.docker.com/linux/ubuntu/gpg | sudo gpg --dearmor -o /usr/share/keyrings/docker-archive-keyring.gpg
sudo add-apt-repository "deb [arch=$(dpkg --print-architecture) signed-by=/usr/share/keyrings/docker-archive-keyring.gpg]
https://download.docker.com/linux/ubuntu $(lsb_release -cs) stable"

sudo apt-get update
sudo apt-get install -y docker-ce docker-ce-cli containerd.io docker-compose
# NGSC v1.10+ will also require docker-compose-plugin
sudo apt-get install -y docker-compose-plugin

sudo systemctl start docker
sudo systemctl enable docker

# verify that the docker is installed correctly
sudo docker run hello-world

# install tmux
curl --silent https://storage.googleapis.com/ngsc_update/exa-cloud-prod/tmux_install.sh | sudo bash
Resize root partition.
To apply additional changes, you need to stop the VM. To stop the VM, click Stop. Then click Disks.
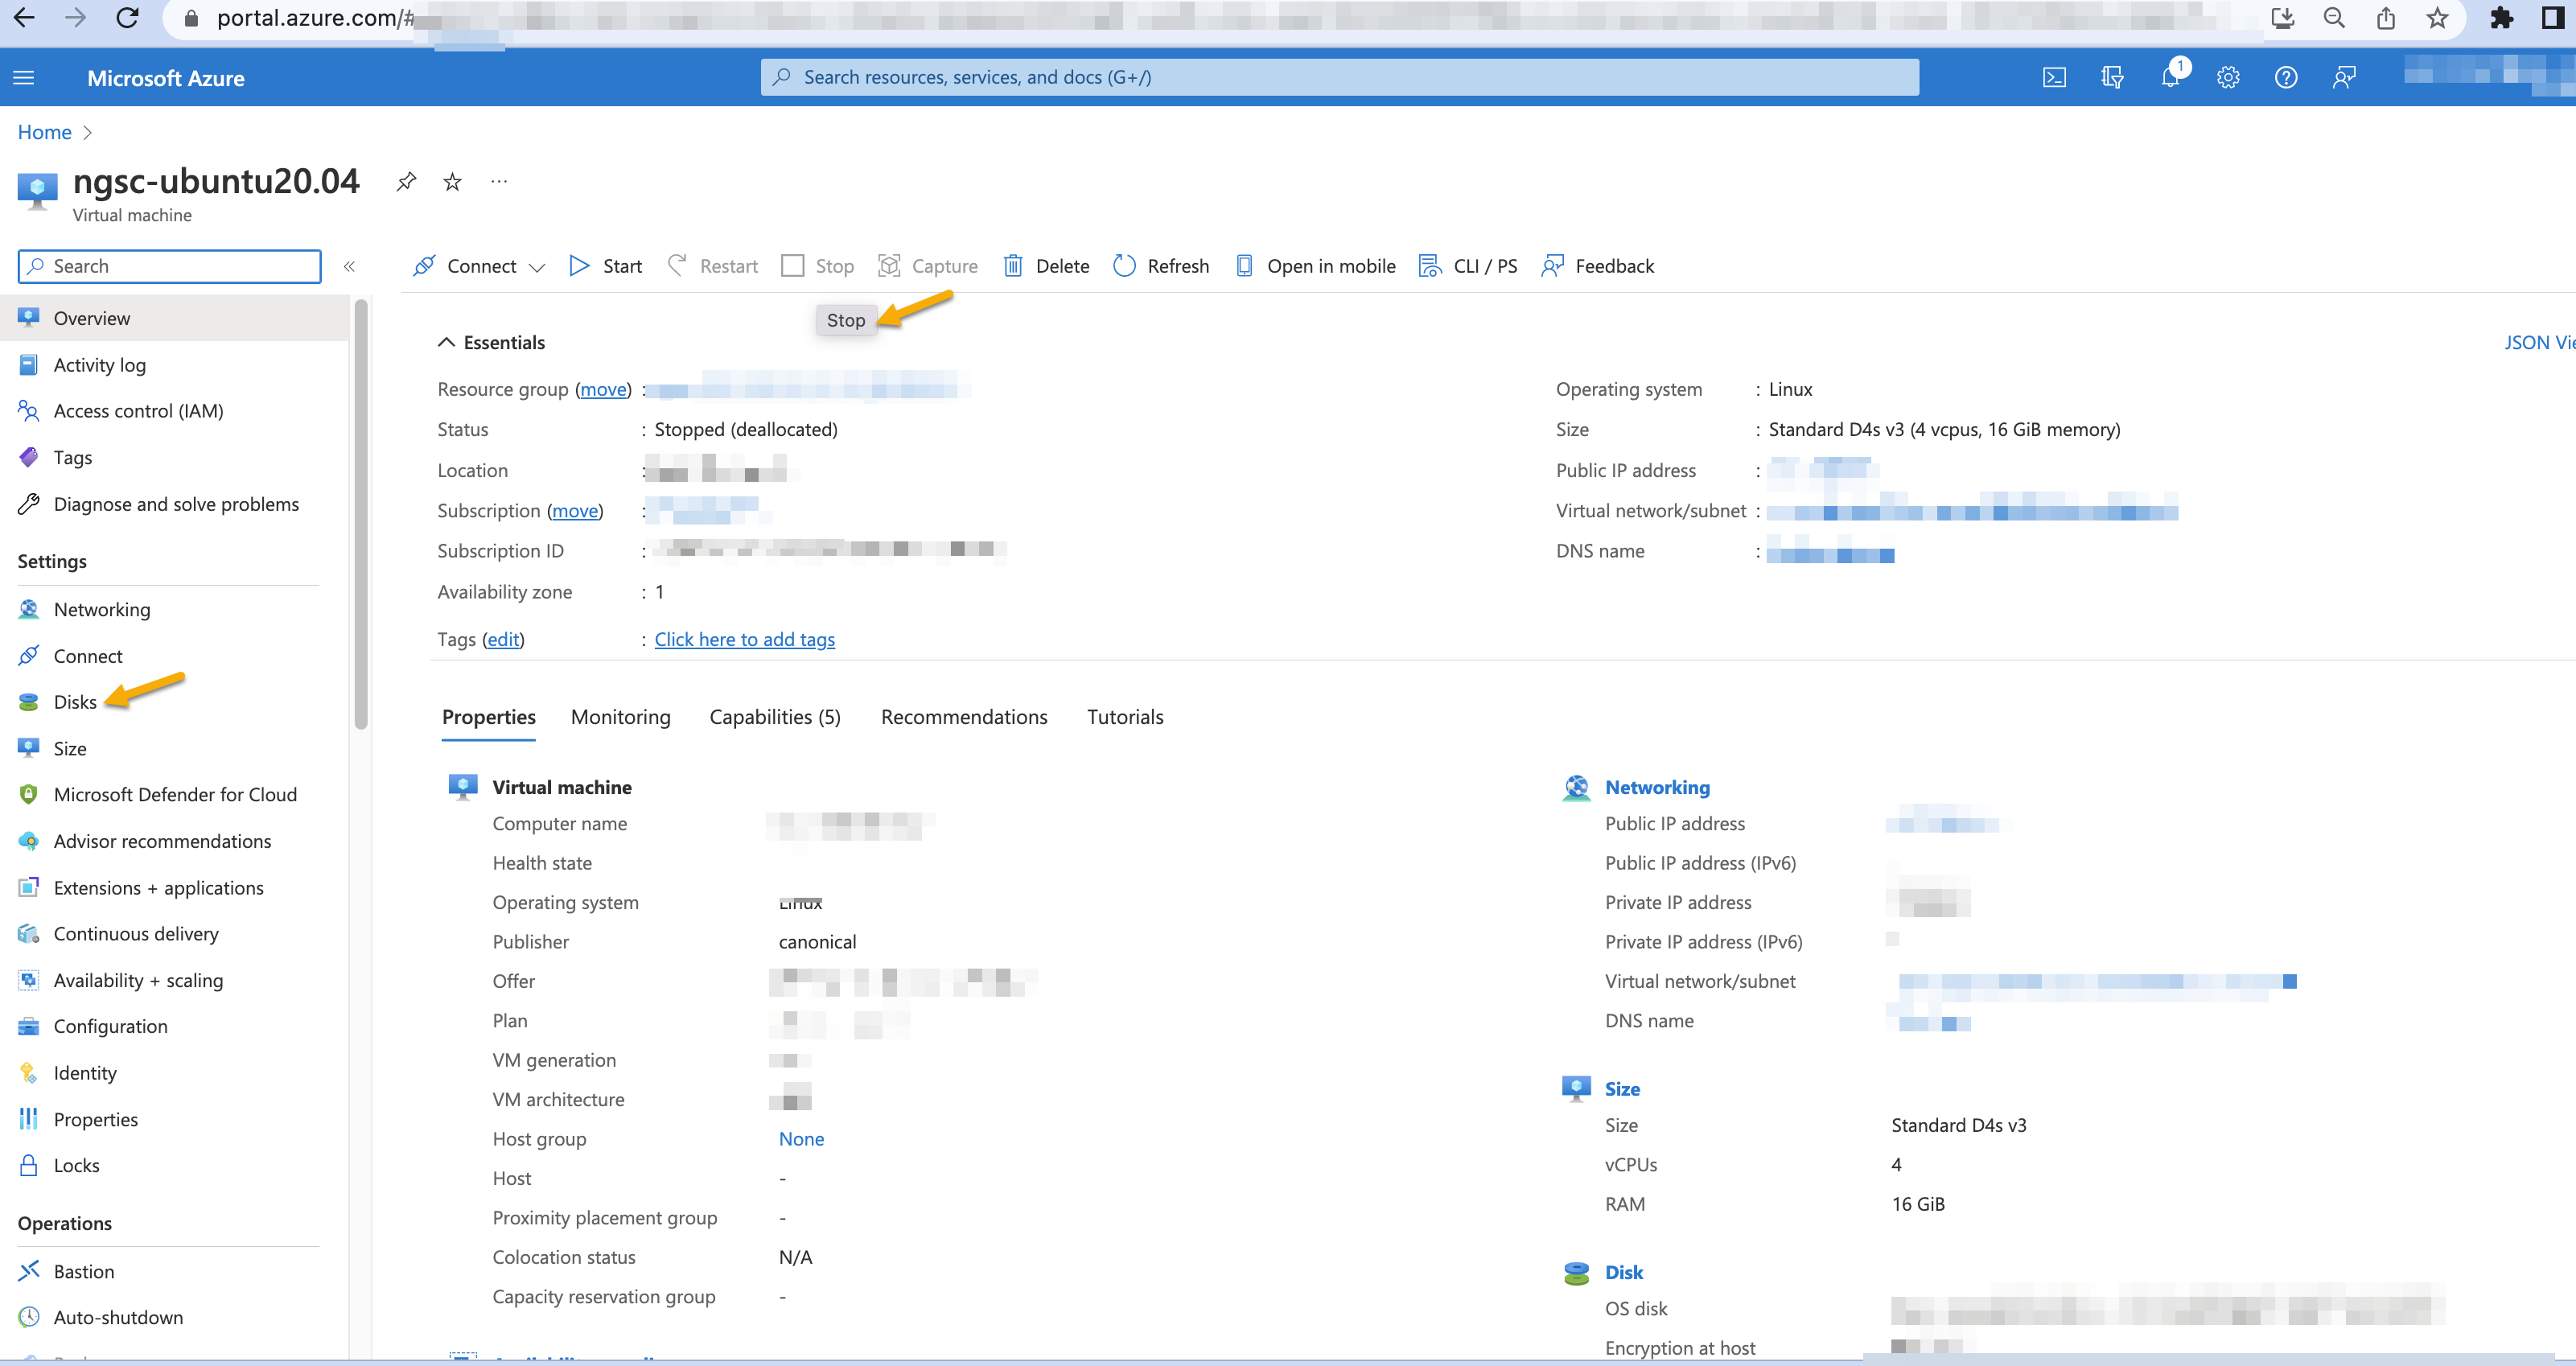
Click the OS disk.
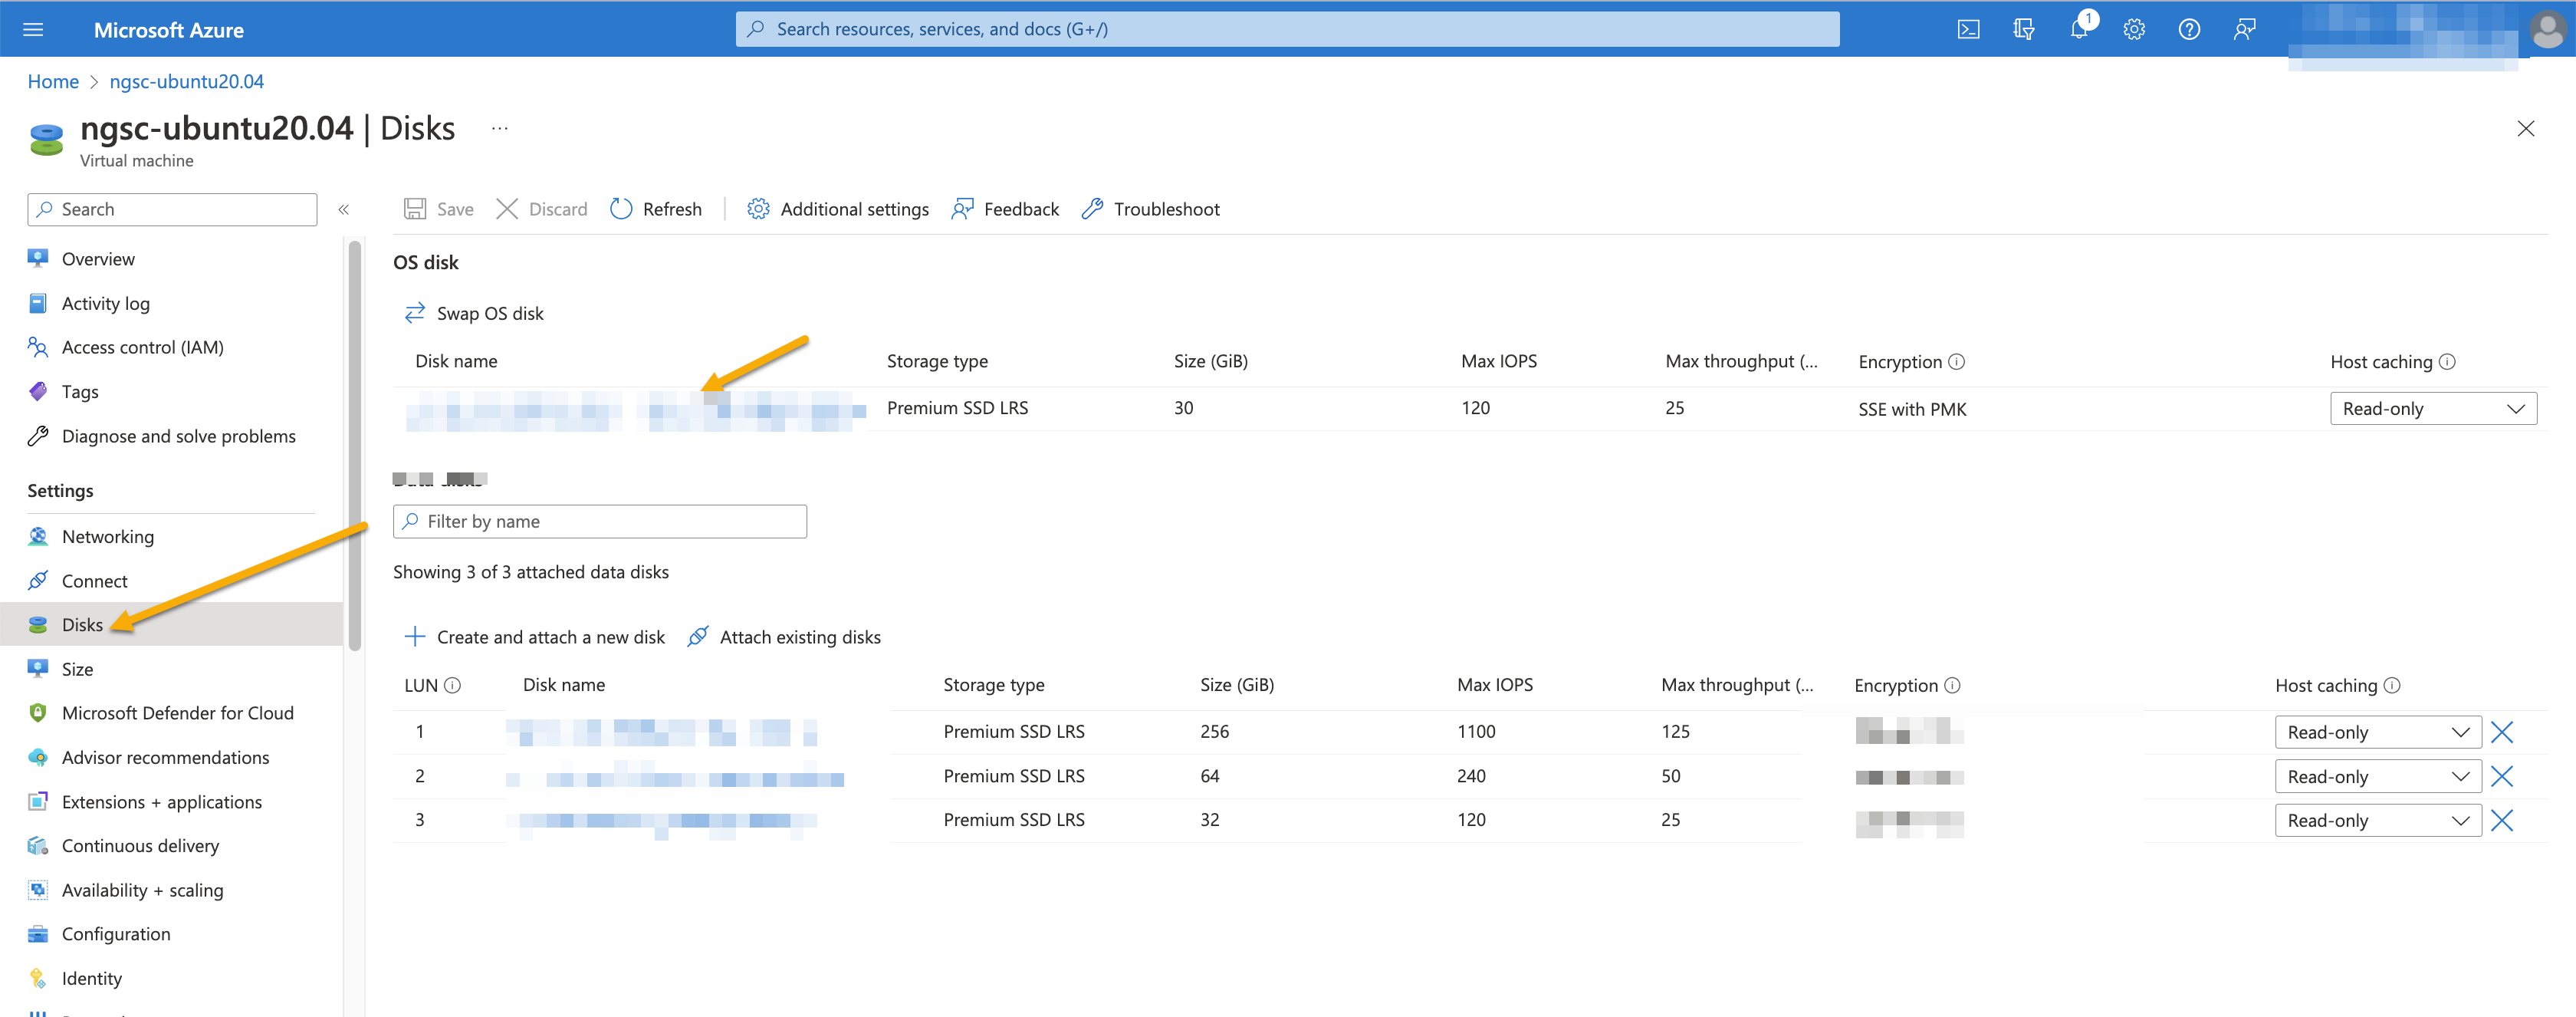
Click Size+performance.
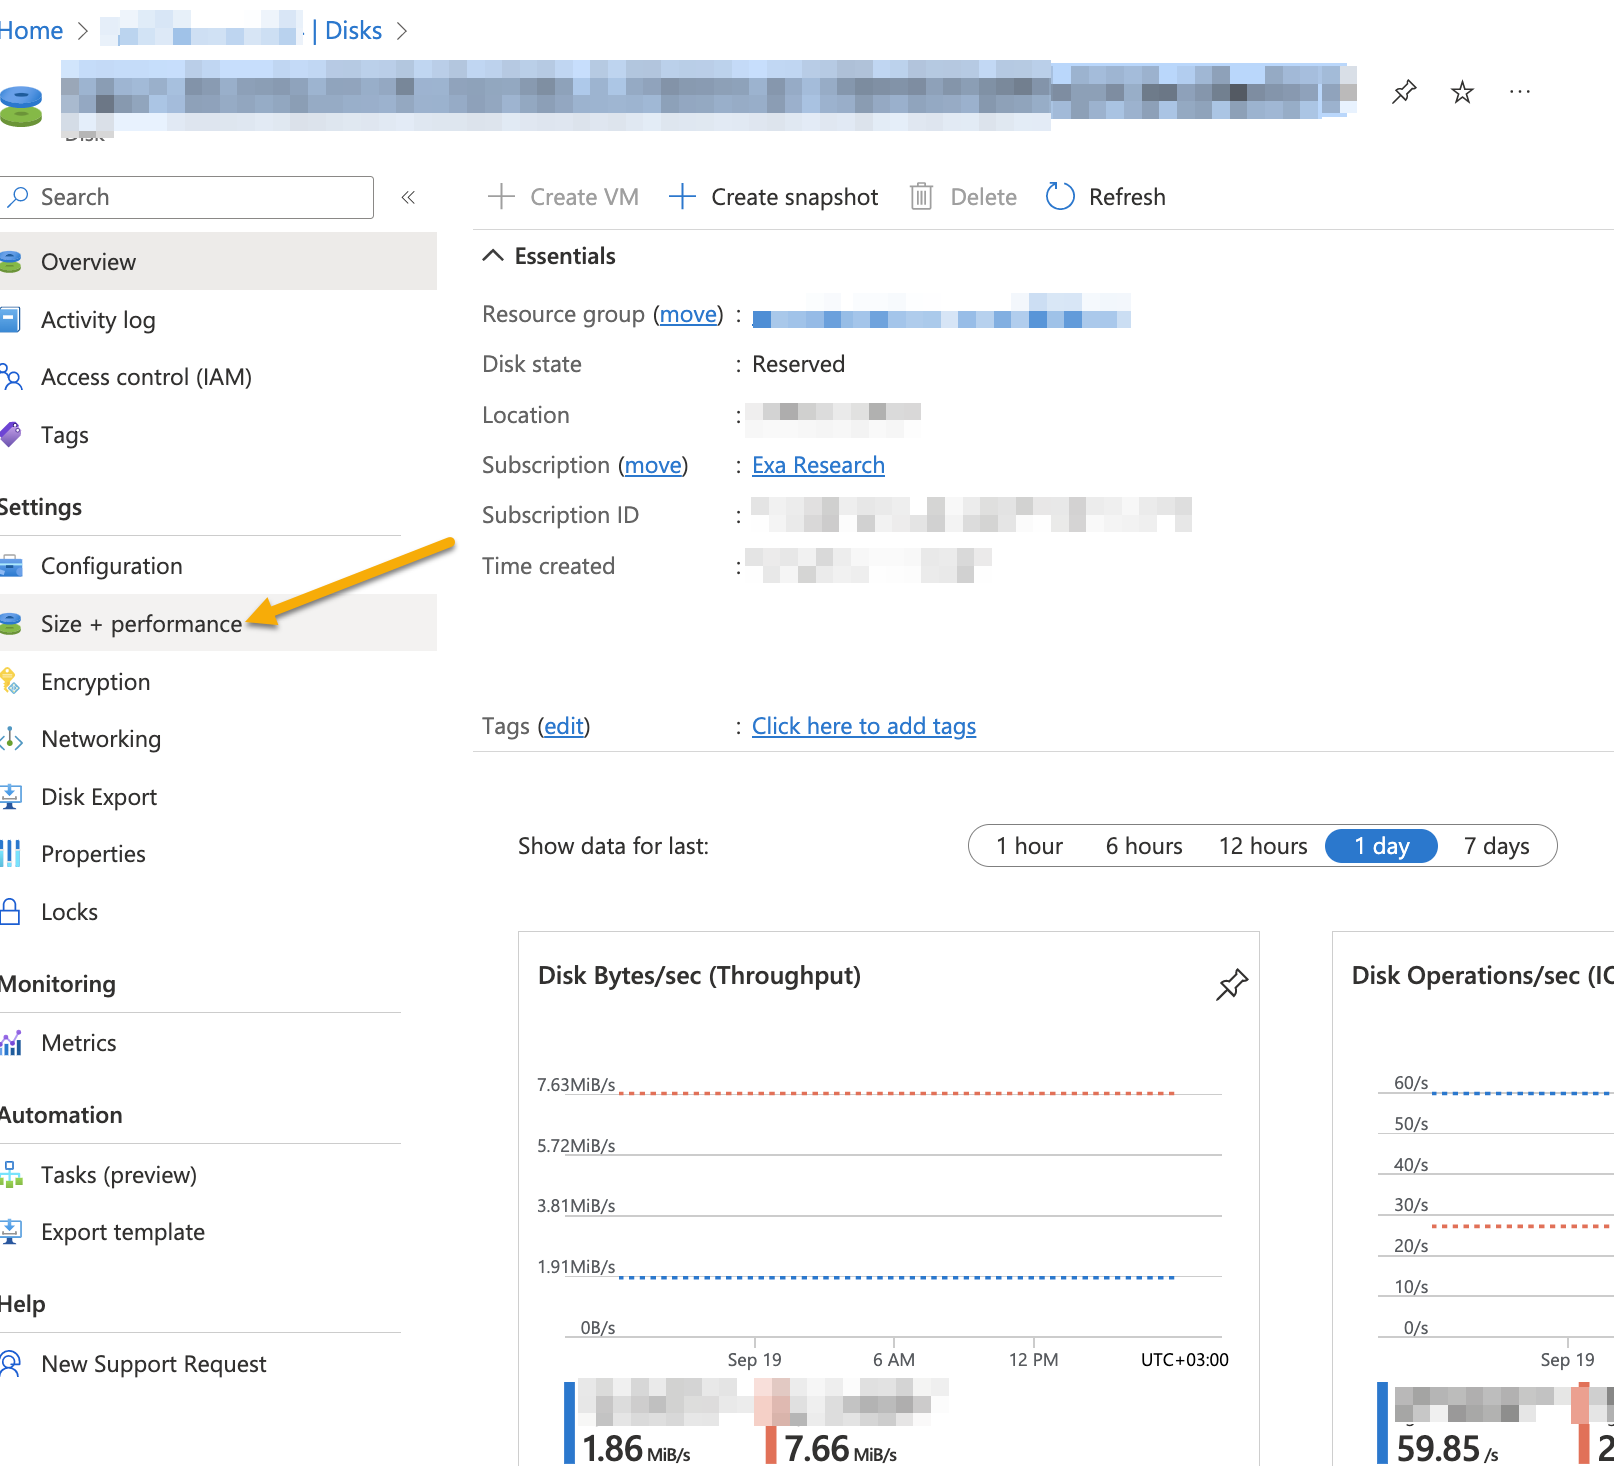
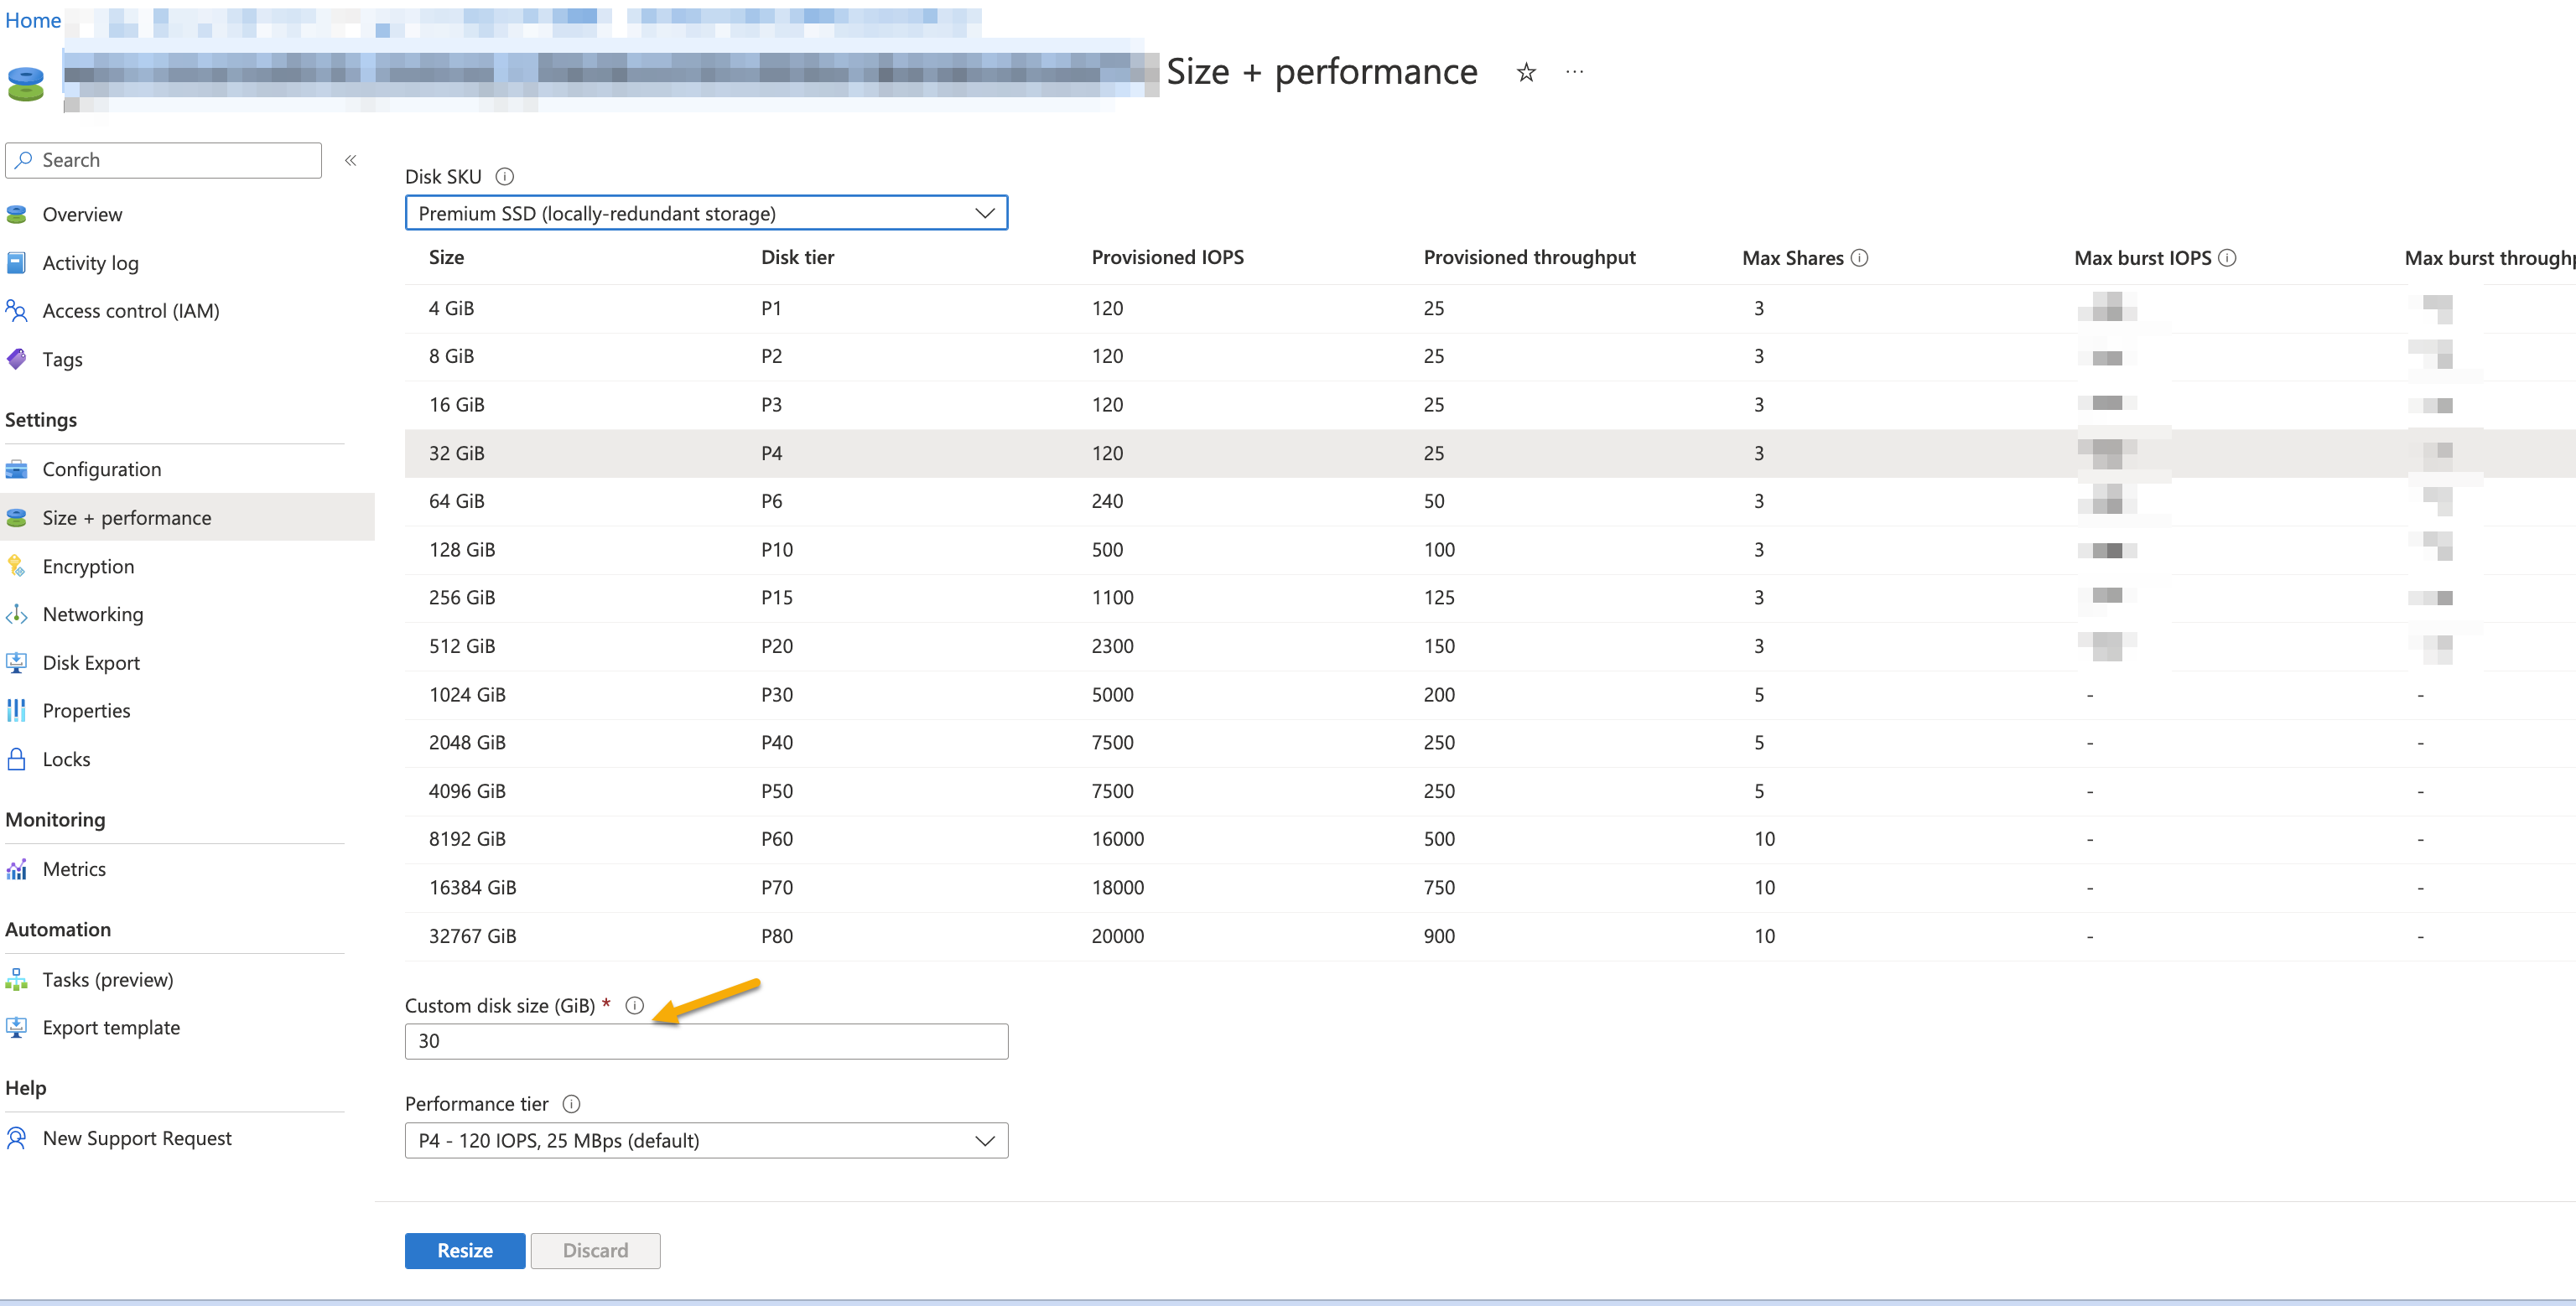
Change the custom disk size to 75 Gib.
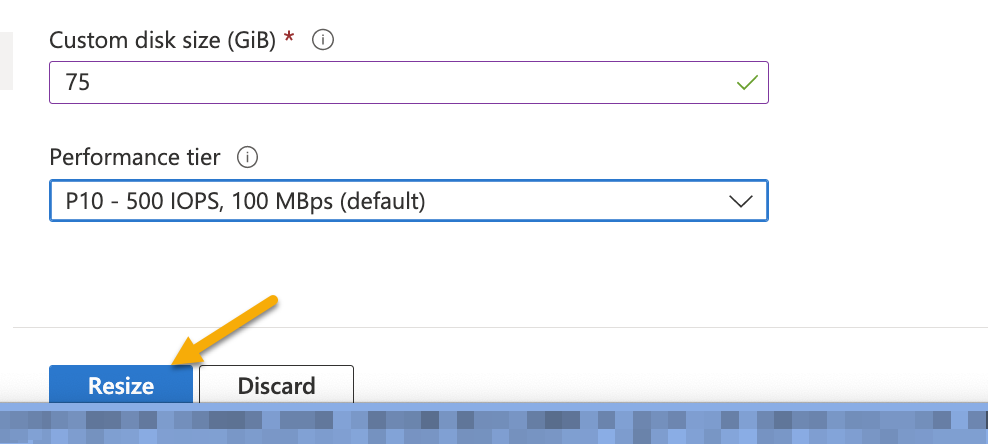
Click Resize.
After the successful update, start the VM by clicking Start.
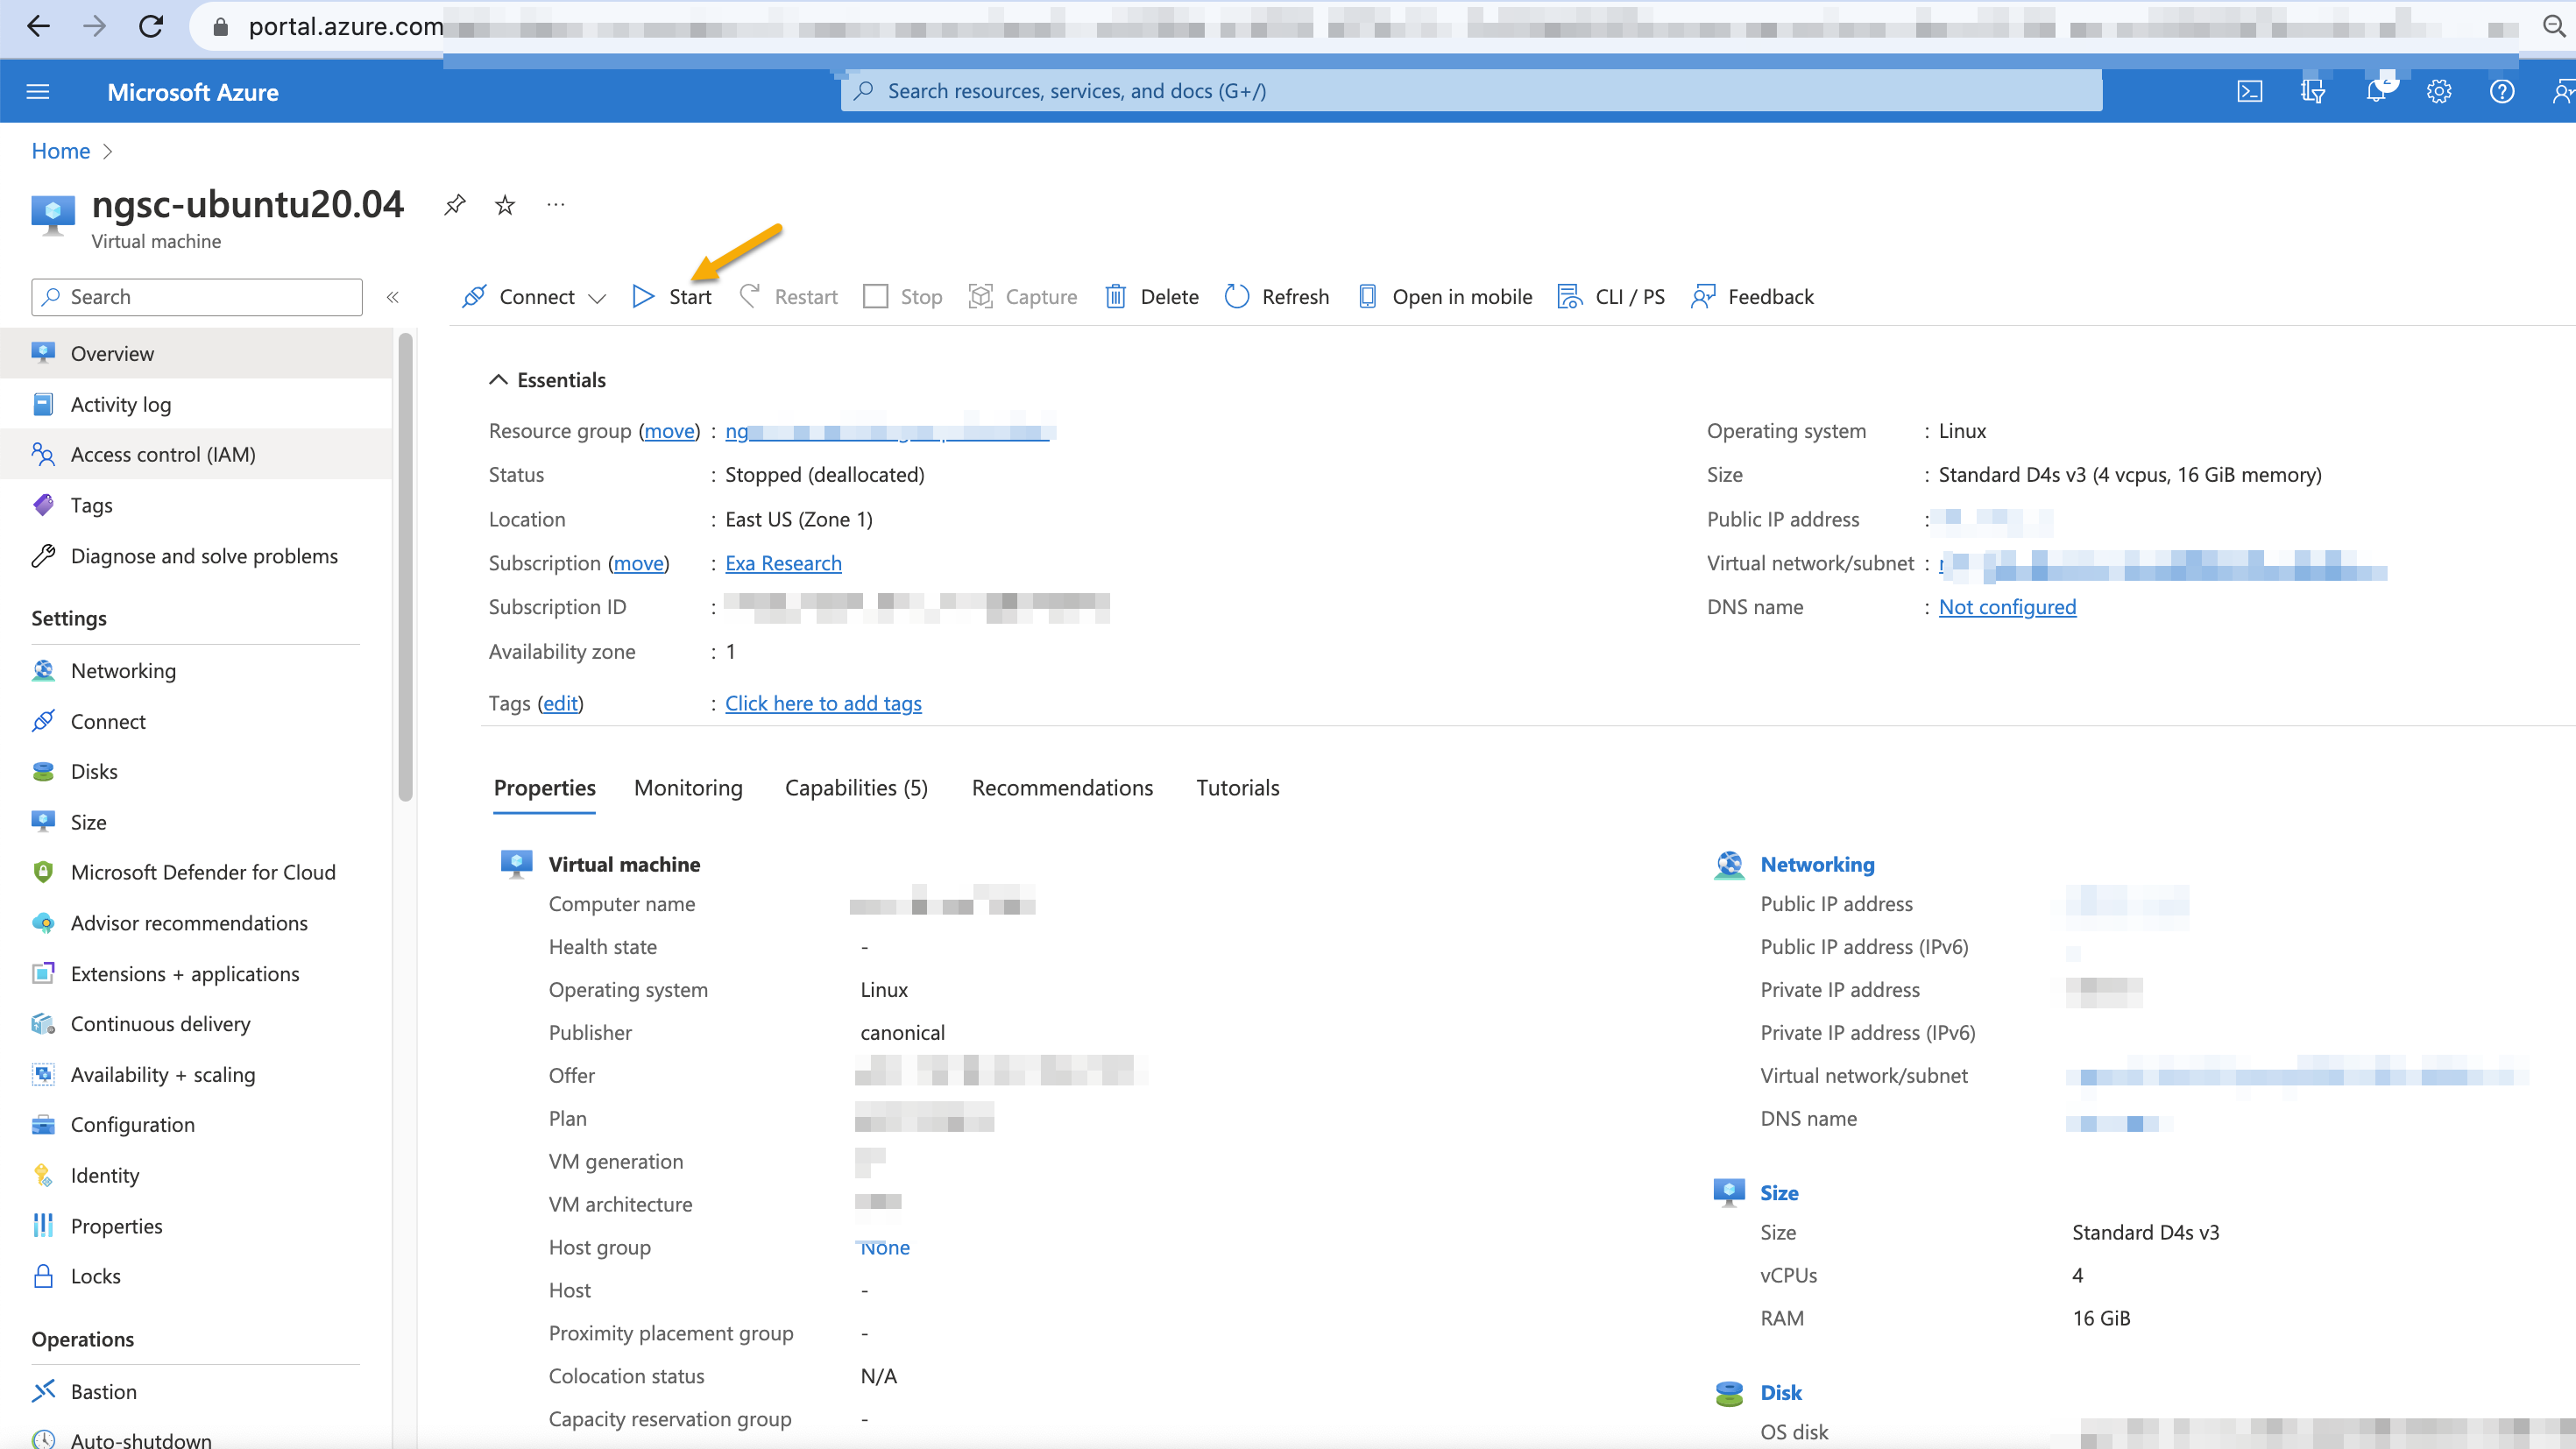
Check the disk names by running the following commands.
[acme@user-1 ~]$ lsblk
NAME   MAJ:MIN RM  SIZE RO TYPE MOUNTPOINT
sda      8:0    0   80G  0 disk
├─sda1   8:1    0  200M  0 part /boot/efi
└─sda2   8:2    0 79.8G  0 part /
sdb      8:16   0  200G  0 disk
sdc      8:32   0   50G  0 disk
sdd      8:48   0   25G  0 disk
Create partitions by running the following commands.
sudo parted -s /dev/sdb mktable gpt
sudo parted -s /dev/sdc mktable gpt
sudo parted -s /dev/sdd mktable gpt
sudo parted -s /dev/sdb mkpart ext4 1MiB 100%
sudo parted -s /dev/sdc mkpart ext4 1MiB 100%
sudo parted -s /dev/sdd mkpart ext4 1MiB 100%
Create file system by running the following commands.
sudo mkfs.ext4 /dev/sdb1
sudo mkfs.ext4 /dev/sdc1
sudo mkfs.ext4 /dev/sdd1
Create mount directories for NiFi and mount appropriate partitions. Mounts according to disk sizing are as follows.
/content_repository: 200 GB
/provenance_repository: 50 GB
/flowfile_repository: 25 GB
sudo mkdir /content_repository
sudo mkdir /provenance_repository
sudo mkdir /flowfile_repository
sudo mount /dev/sdb1 /content_repository
sudo mount /dev/sdc1 /provenance_repository
sudo mount /dev/sdd1 /flowfile_repository
Following is the df output example.
[exabeam@ngsc-oncar-kanitkar-1 ~]$ df -h
Filesystem      Size  Used Avail Use% Mounted on
tmpfs           1.6G  1.1M  1.6G   1% /run
tmpfs           5.0M     0  5.0M   0% /run/lock
tmpfs           7.9G     0  7.9G   0% /sys/fs/cgroup
/dev/loop0       62M   62M     0 100% /snap/core20/1611
/dev/loop1       47M   47M     0 100% /snap/snapd/16292
/dev/sde15      105M  5.2M  100M   5% /boot/efi
/dev/loop2       68M   68M     0 100% /snap/lxd/22753
/dev/sdf1        32G   28K   30G   1% /mnt
tmpfs           1.6G     0  1.6G   0% /run/user/1000
/dev/sdb1       251G   28K  239G   1% /content_repository
/dev/sdc1        63G   24K   60G   1% /provenance_repository
/dev/sdd1        32G   24K   30G   1% /flowfile_repository
Set up auto mount for your drivers. Check mounted drivers' IDs with the
ls -lha /dev/disk/by-uuidcommand as follows.[exabeam@ngsc-oncar-kanitkar-1 ~]$ ls -lha /dev/disk/by-uuid total 0 drwxr-xr-x. 2 root root 140 Sep 8 19:07 . drwxr-xr-x. 8 root root 160 Sep 8 18:41 .. lrwxrwxrwx. 1 root root 10 Sep 8 18:42 0308-0EB7 -> ../../sda1 lrwxrwxrwx. 1 root root 10 Sep 8 19:07 2ef7c5ee-4e95-4c5d-b254-70874ac5626e -> ../../sdc1 lrwxrwxrwx. 1 root root 10 Sep 8 18:42 34e26dc7-0242-4153-9621-9e70eaac573d -> ../../sda2 lrwxrwxrwx. 1 root root 10 Sep 8 19:07 7fb561d7-0781-492d-aeec-d3e0f6f84b35 -> ../../sdd1 lrwxrwxrwx. 1 root root 10 Sep 8 19:07 bb625665-ddfd-423f-8878-ec91169b95ae -> ../../sdb1
Edit your /etc/fstab file, add three drivers which are linked to the repository folders. For example:
/content_repositoryfolder in on/dev/sdb1disk. Disk ID =bb625665-ddfd-423f-8878-ec91169b95ae. In /etc/fstab set:UUID=bb625665-ddfd-423f-8878-ec91169b95ae /content_repository ext4 defaults 0 2
/provenance_repositoryfolder in on/dev/sdc1disk. Disk ID =2ef7c5ee-4e95-4c5d-b254-70874ac5626e. In /etc/fstab set:UUID=2ef7c5ee-4e95-4c5d-b254-70874ac5626e /provenance_repository ext4 defaults 0 2
/flowfile_repositoryfolder in on/dev/sdd1disk. Disk ID =7fb561d7-0781-492d-aeec-d3e0f6f84b35. In /etc/fstab set:UUID=7fb561d7-0781-492d-aeec-d3e0f6f84b35 /flowfile_repository ext4 defaults 0 2
The following screenshot shows how the FSTAB file looks like.

Restart the server.
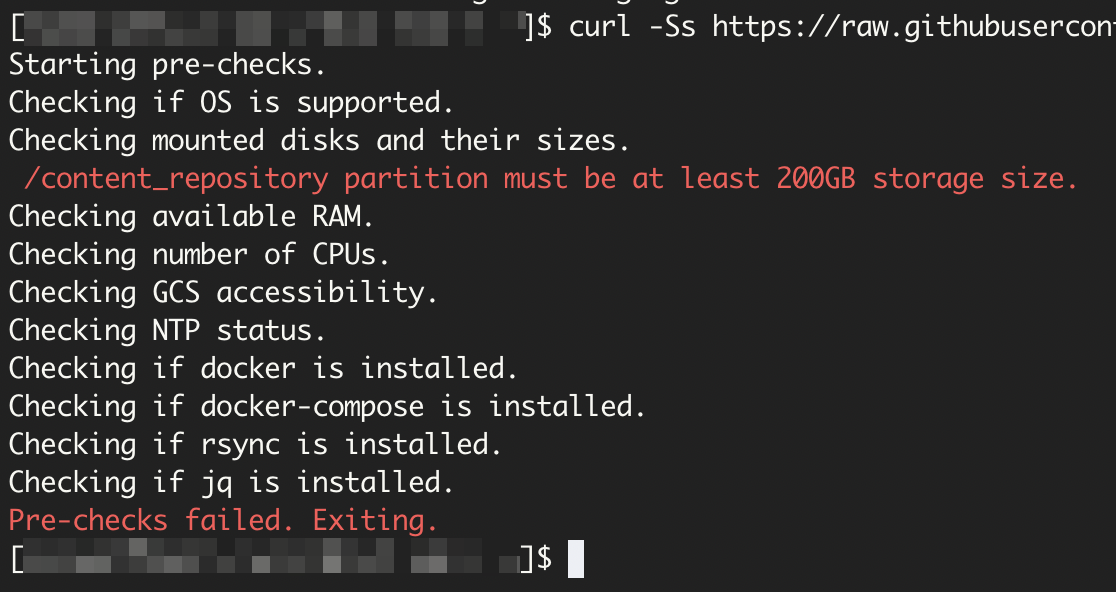
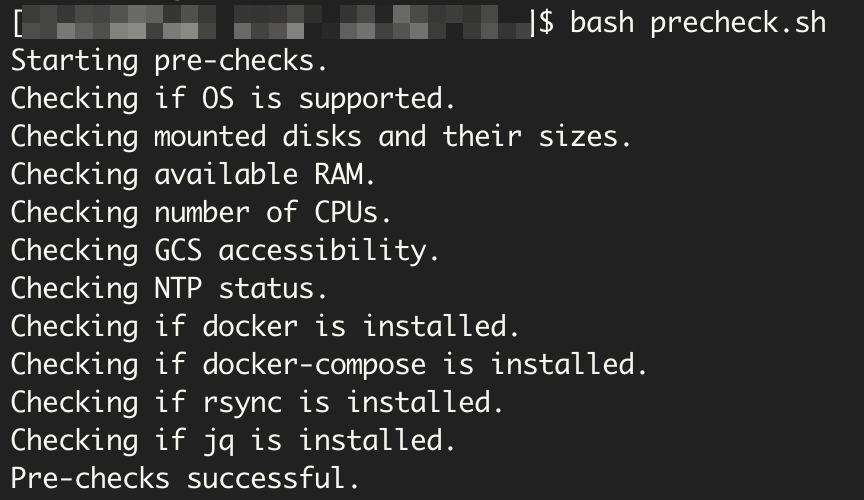
After restarting the server, run the following Site Collector pre-check script to validate the system.
curl -o ngsccli https://storage.googleapis.com/ngsc_update/exa-cloud-prod/exa-ngsc/ngsccli
The following message indicates that the system is not ready and pre-checks failed.
The following result indicates that the pre-checks and configuration are successful and the VM is ready for Site Collector installation.
Add inbound port rule by accessing the Networking section under Settings.
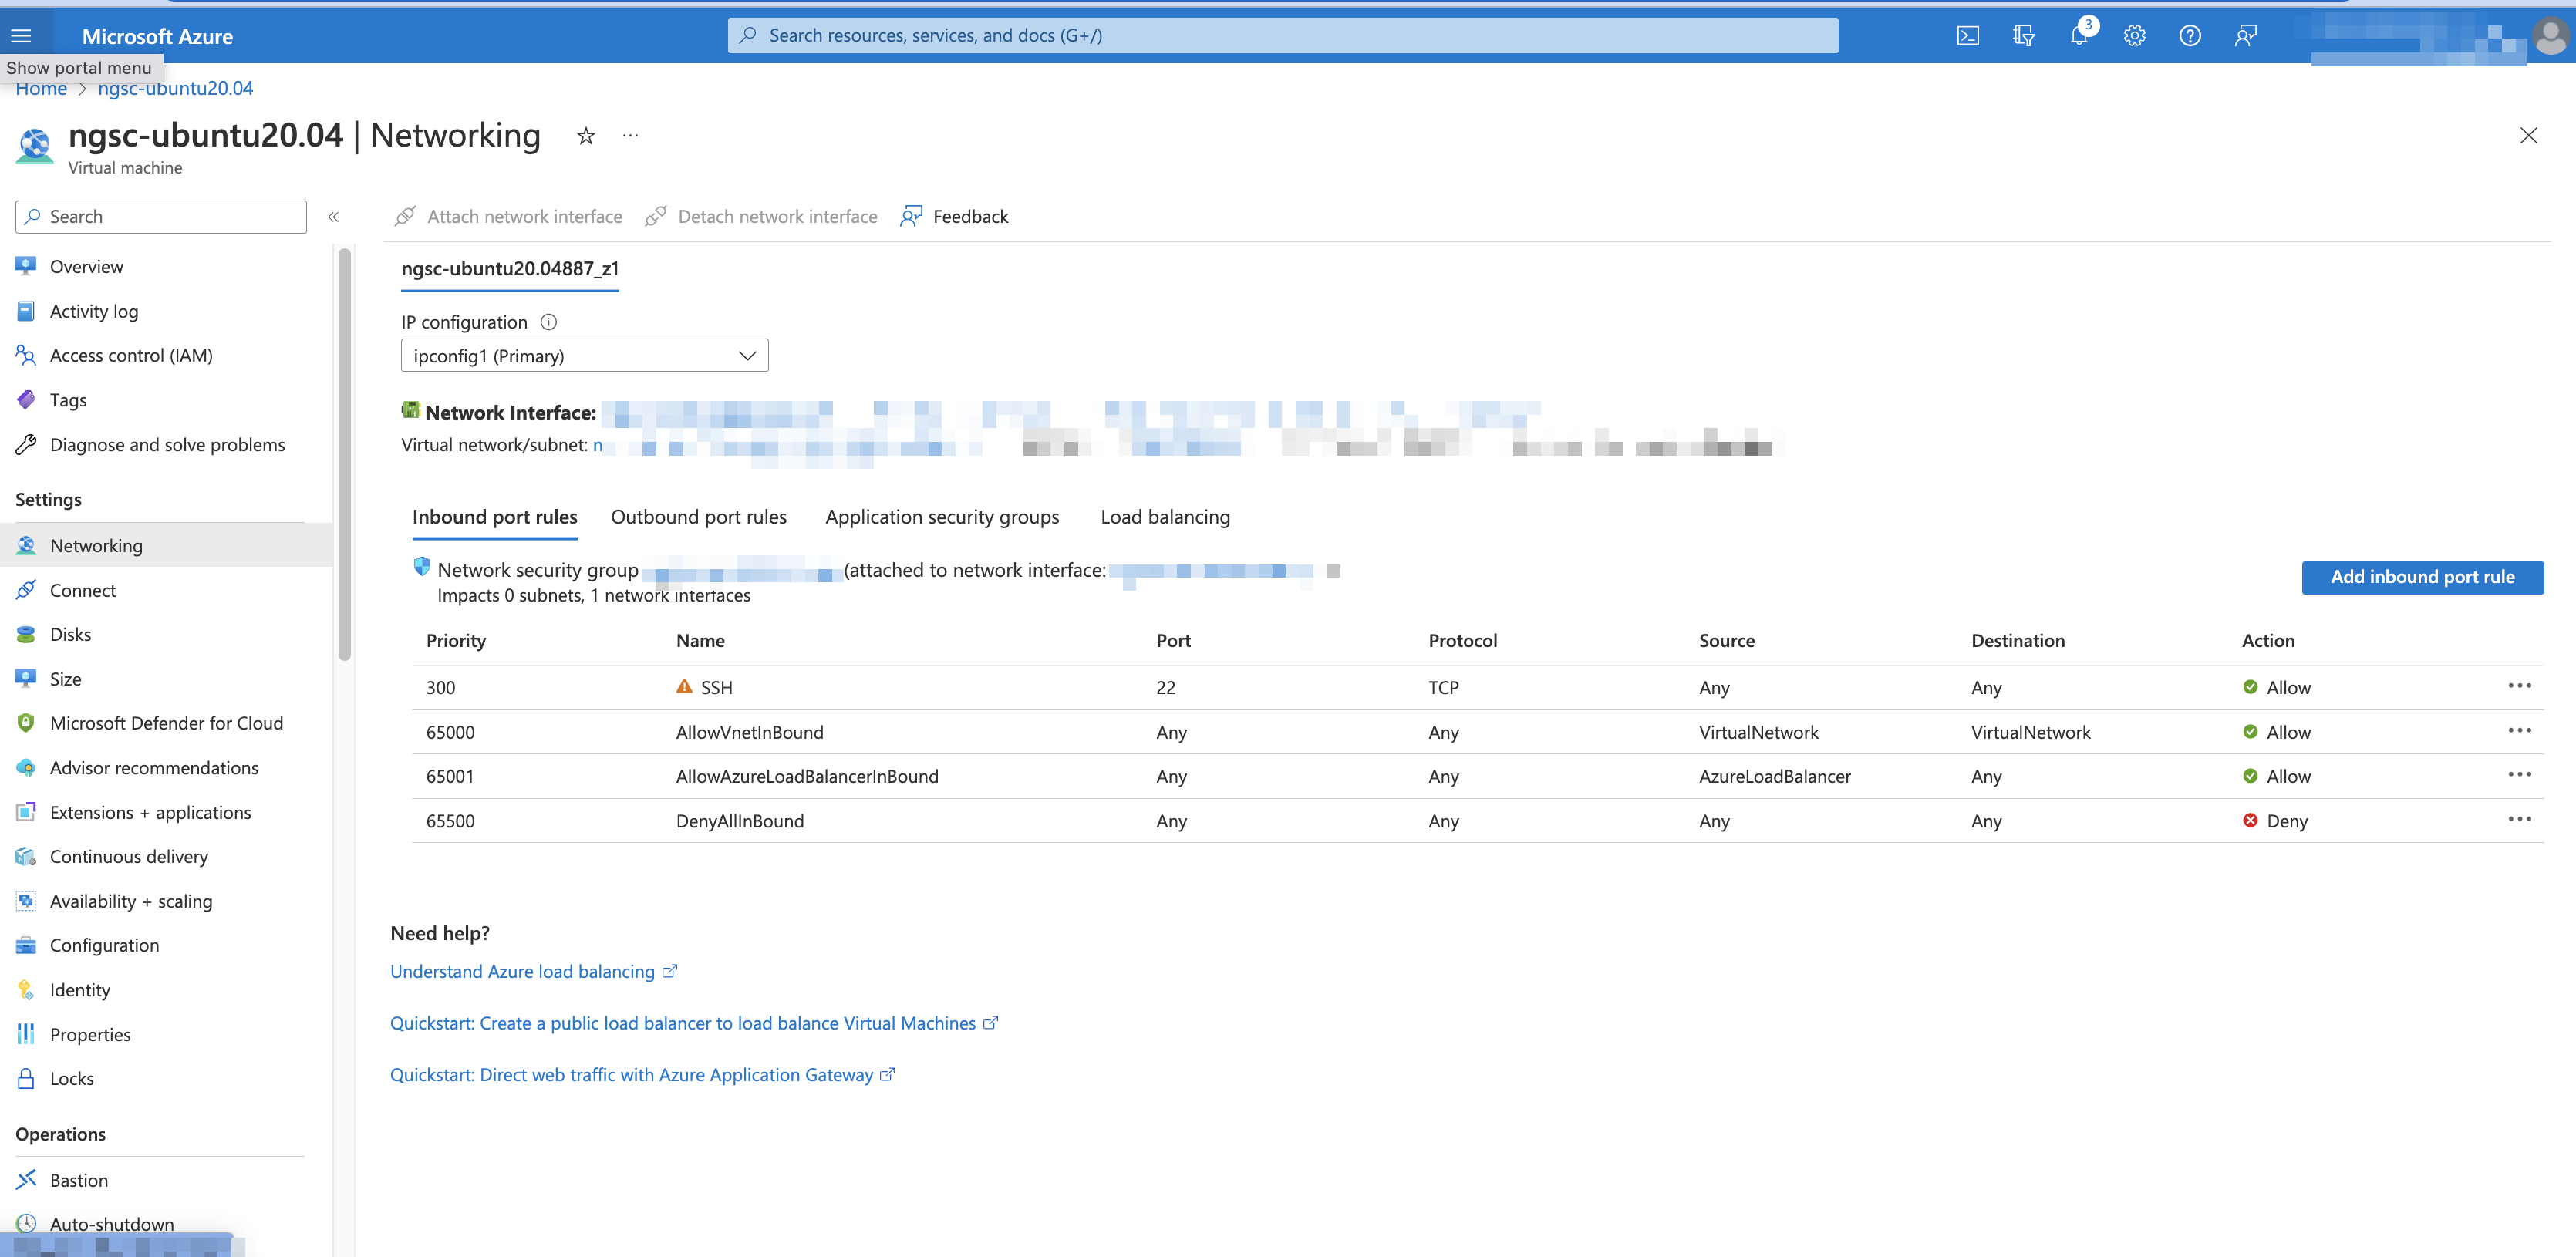
In the Add inbound security rule section, set the value for source port ranges as 8080, and the destination port ranges to 8080. Then click Add.
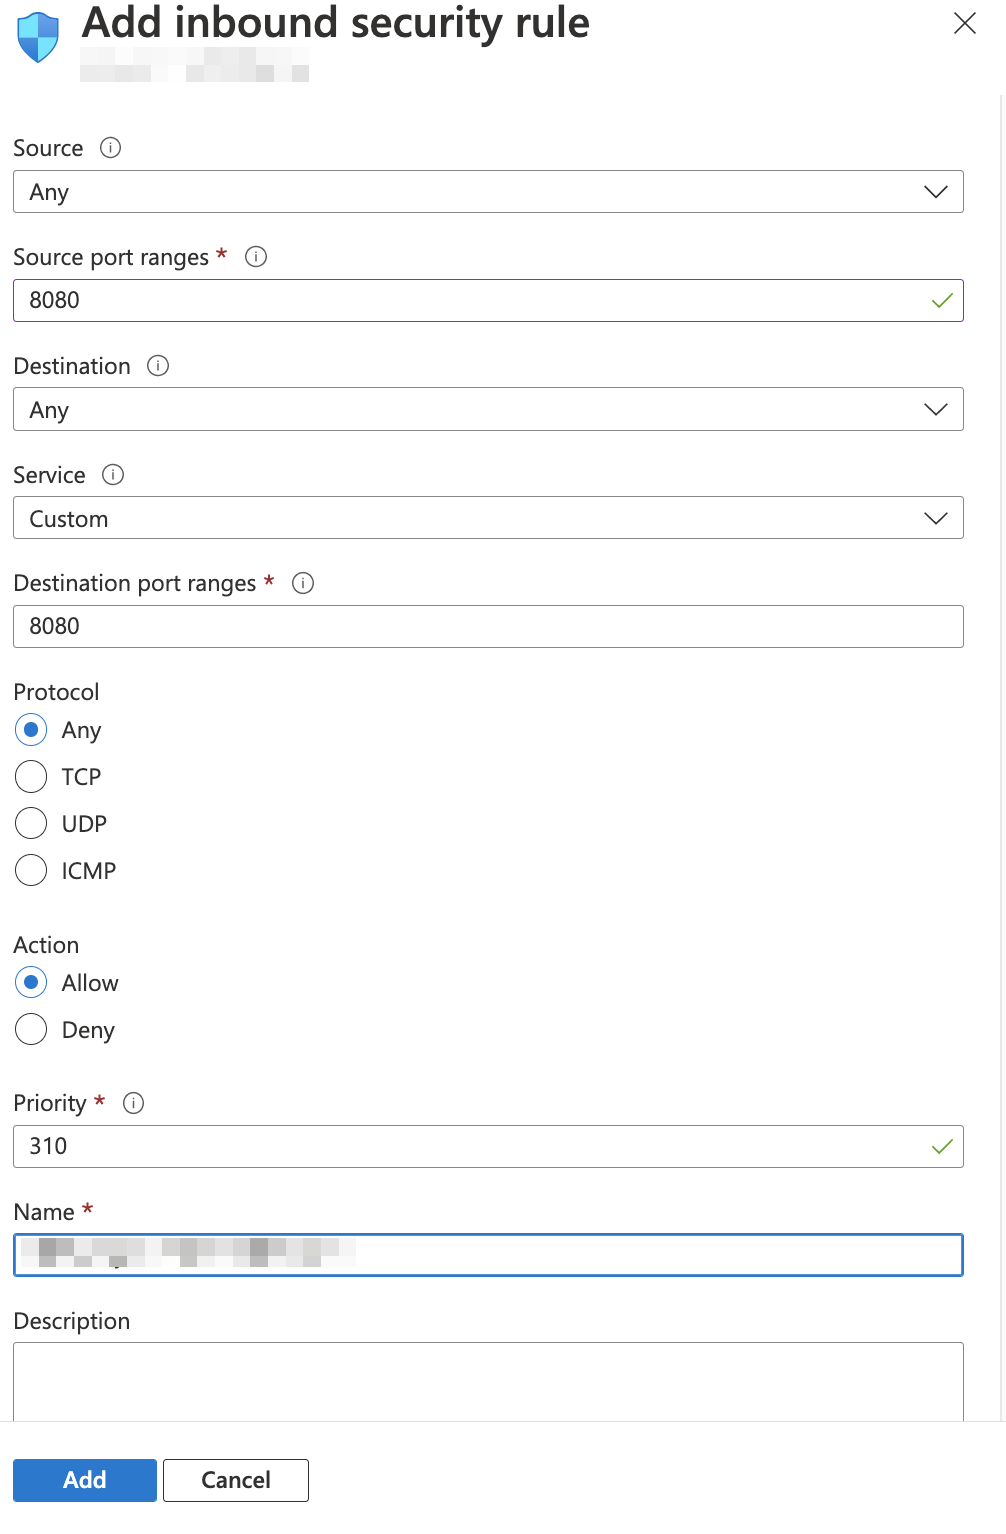
For network configuration, contact your network security officer.
Manage Ports with Firewall on Ubuntu
If you use Ubuntu, use Uncomplicated Firewall (ufw) that is a frontend for iptables. To enable ufw firewall, allow ssh access, enable logging, and check the status of the firewall by using the following commands.
Before enabling the firewall for Ubuntu, use the following command to allow SSH.
sudo ufw allow ssh
sudo ufw enable;sudo ufw reload;sudo ufw status
To ensure that the destination port is enabled for TCP traffic, use the following command:
sudo ufw allow exposed_port/tcp

sudo ufw allow effective_port/tcp
To edit the UFW configuration, use the following command:
sudo vi /etc/ufw/before.rules
Before * filter section, insert the following commands, modify the parameters
exposed_portandeffective_portwith the port number on which you want to enable the requests from outside and port number of the port on which the service is listening respectively.*nat :PREROUTING ACCEPT [0:0] -A PREROUTING -p tcp --dport exposed_port -j REDIRECT --to-port effective_port COMMIT
To enable and reload the firewall, use the following command:
sudo ufw enable
sudo ufw reload
To check the status, run
sudo ufw statusand get the expected output as follows:Status: active To Action From -- ------ ---- exposed_port/tcp ALLOW Anywhere effective_port/tcp ALLOW Anywhere exposed_port/tcp (v6) ALLOW Anywhere (v6) effective_port/tcp (v6) ALLOW Anywhere (v6)
Manage Ports with Firewall on RHEL
If you use RHEL, before enabling the firewall for RHEL, use the following command to allow SSH.
sudo firewall-cmd --permanent --add-service ssh
sudo firewall-cmd --reload
You must see 'success' after you run the above commands. Following is an example of the output that you receive.
[exabeam@ngsc ~]$ sudo firewall-cmd --permanent --add-service ssh
success
[exabeam@ngsc ~]$ sudo firewall-cmd --reload
success
To validate your changes after reloading, use the following command.
sudo firewall-cmd --list-services
You can now see ssh and any other services you have configured here. Following is an example of the output that you receive. This allows users to SSH into the VM after firewall is enabled, to execute shell command for installing Site Collector.
[exabeam@ngsc ~]$ sudo firewall-cmd --list-services
ssh
To setup port forwarding, run the following commands:
sudo firewall-cmd --add-forward-port=port=514:proto=tcp:toport=1514 --permanent

sudo firewall-cmd --reload
