- Site Collector Overview
- Get Started with Site Collectors
- Install Site Collector
- Set Up Collectors
- Sign Up for the Early Access Program: Site Collectors
- Choose the Right Collector based on Data Sources
- Set Up Archive Windows Collector
- Set Up Archive Linux Collector
- Set Up EStreamer Collector
- Set Up Fortinet Collector
- Set Up IBM Security QRadar Collector
- Set Up Kafka Collector
- Set Up Splunk Collector
- Set Up Linux File Collector
- Set Up Microsoft SQL Collector
- Set Up MySQL Collector
- Set Up Oracle Collector
- Set Up Syslog Collector
- Set Up Windows Active Directory Collector
- Set Up Windows Event Log Collector
- Set Up Windows File Collector
- Manage Site Collectors
- Apply Antivirus Exclusions
- Migrate to the New-Scale Site Collectors Service
- Modify Collector Configuration
- Modify a Site Collector Instance
- Manage Templates
- Monitor Log Sources
- Add Filters to Set Egress Log Filtering Conditions
- New Site Collector Management Service NGSCD
- Regenerate Certificates for Collectors
- Upgrade the Site Collector
- Upgrade the Site Collector Specifications
- Vulnerability Remediation Policy
- Site Collector Monitoring
- Troubleshoot the Site Collector
- Pre-checks failed during Site Collector installation and upgrade
- Site Collector UI shows the status INSTALLATION_ERROR
- Download Support Packages for Troubleshooting
- How to reboot the Virtual Machine (VM) successfully to apply security updates?
- What information must be added while creating a support ticket to resolve an issue?
- Site Collector UI is not displaying the heartbeats
- Splunk Collector can't be set up
- Splunk Collector is set up however, logs are not reaching DL/AA
- Only a few of the installed Splunk Collectors are processing logs or EPS has dropped by 50% as compared to last hour
- The Windows Active Directory Collector (formerly known as LDAP Collector) is set up, however, the context data is not reaching DL/AA
- The Windows Active Directory Collector (formerly known as LDAP Collector) is stuck in the ‘Update’ mode after deployment
- Installation is initiated; however, the collector shows the status as ‘Setting Up’ for some time
- Data Lake and Advanced Analytics Does Not Show Context Data
- Context Data from Windows Active Directory Collector is Segmented
- Minifi Permission Denied - Logback.xml File Missing and Config File Update - Failed Error Occurred while Installing the Windows Event Log Collector
- Where should I upload proxy certificates if I am running proxy with TLS interception?
- How to upgrade Linux collector instance?
Set Up Archive Windows Collector
Set up the Archive Windows Collector to collect log events from archived log files, *.gz, *.tar, *.tar.gz, *.gzip, *.rar, *.7z. The Archive Windows Collector is a set of Site Collector flows, pre-built processors, groups, custom processors, and other components that pull logs in plain text format and push the logs to New-Scale Security Operations Platform. The collector provides flexible template configuration capabilities to collect Windows events.
Tip
If you configure a Archive Windows Collector instance for a Site Collector instance which was created using a hostname, you may get a 'Request timed out' error while establishing communication with the host VM from a Windows VM. To avoid the 'Request timed out' error and ‘Setup error’, ensure that you complete the following steps on your Windows VM.
Type ping hostnname_of_site_collector in your Windows command prompt. If this command succeeds, proceed with installing a Windows Collector for this Site Collector instance. If you get a ‘Request timed out’, or ‘Cannot resolve host’ or ‘Unknown host’ error, use the following steps.
Open the hosts file that maintains mapping between hostname and IP_address, located at: C:\Windows\System32\drivers\etc\hosts, using Notepad.
Add a new entry with your hostname and IP address at the end of the file for example, hostnname_of_site_collector ip_address
Save the hosts file.
Proceed to install the Archive Windows Collector instance for this Site Collector instance.
To set up the Archive Windows Collector:
Log in to the New-Scale Security Operations Platform with your registered credentials.
Navigate to Collectors > Site Collectors.
Ensure that Site Collector is installed and in running state.
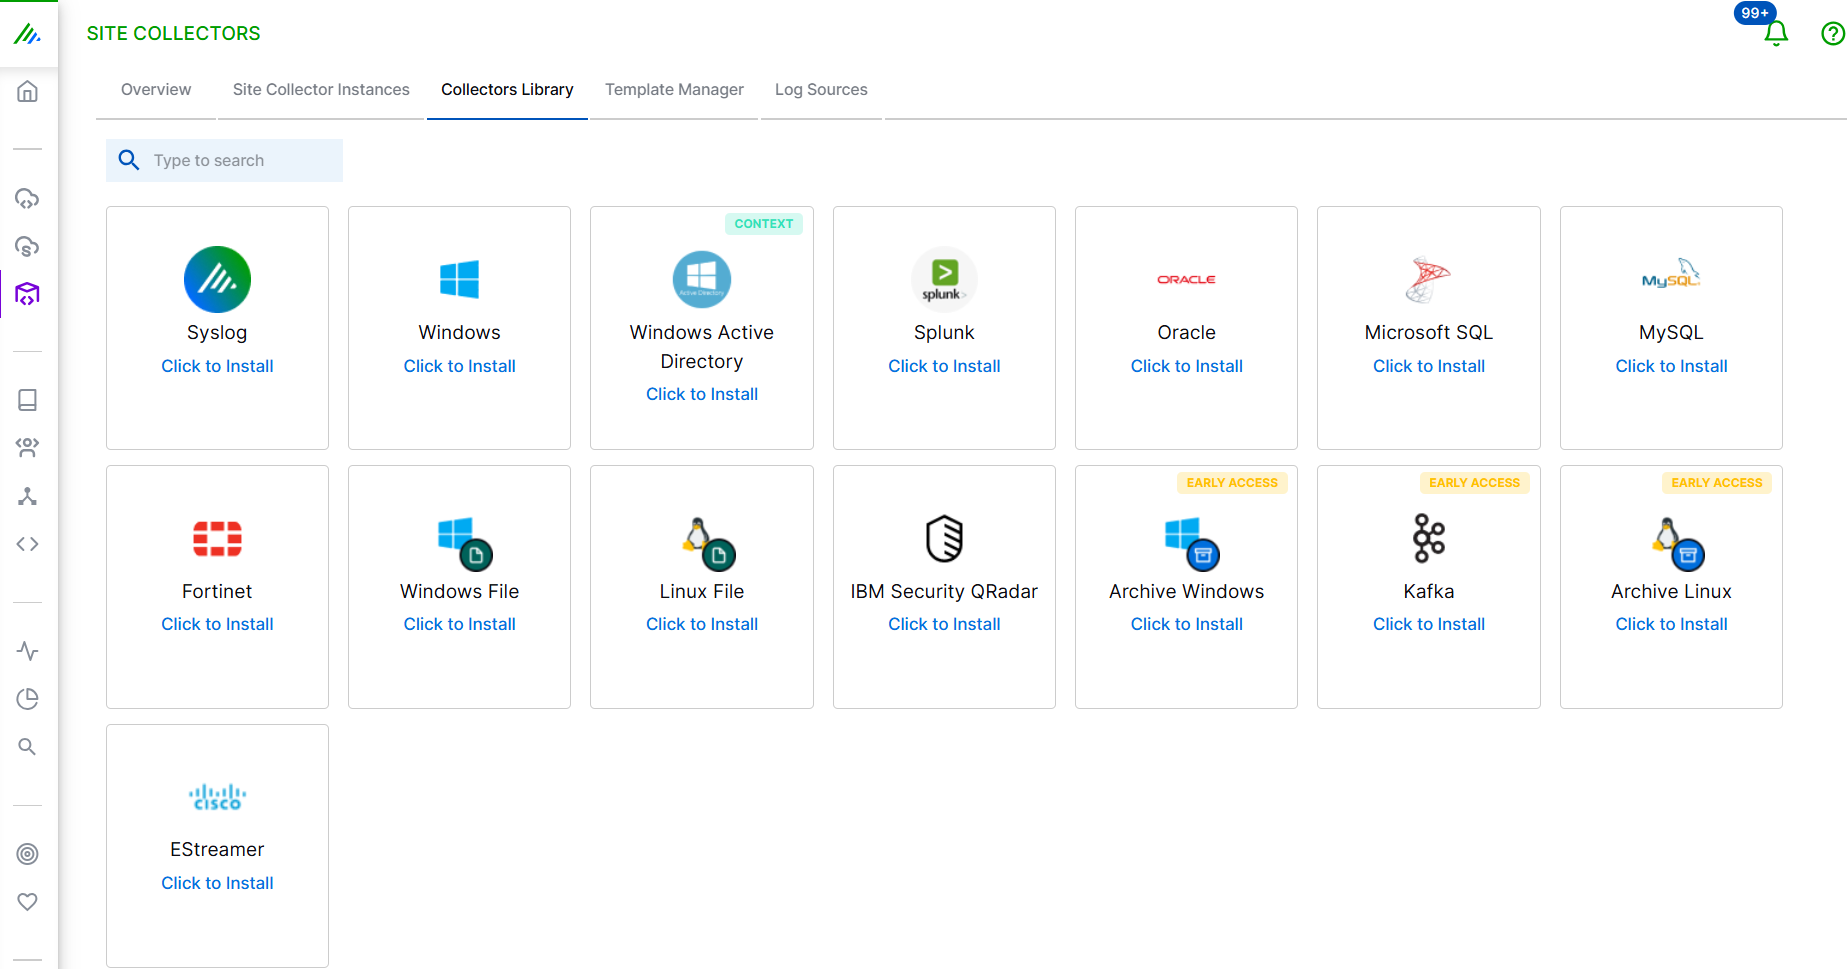
On the Site Collector page, click the Collectors Library tab, then click Archive Windows.
In the Definition section, enter the required information as follows.
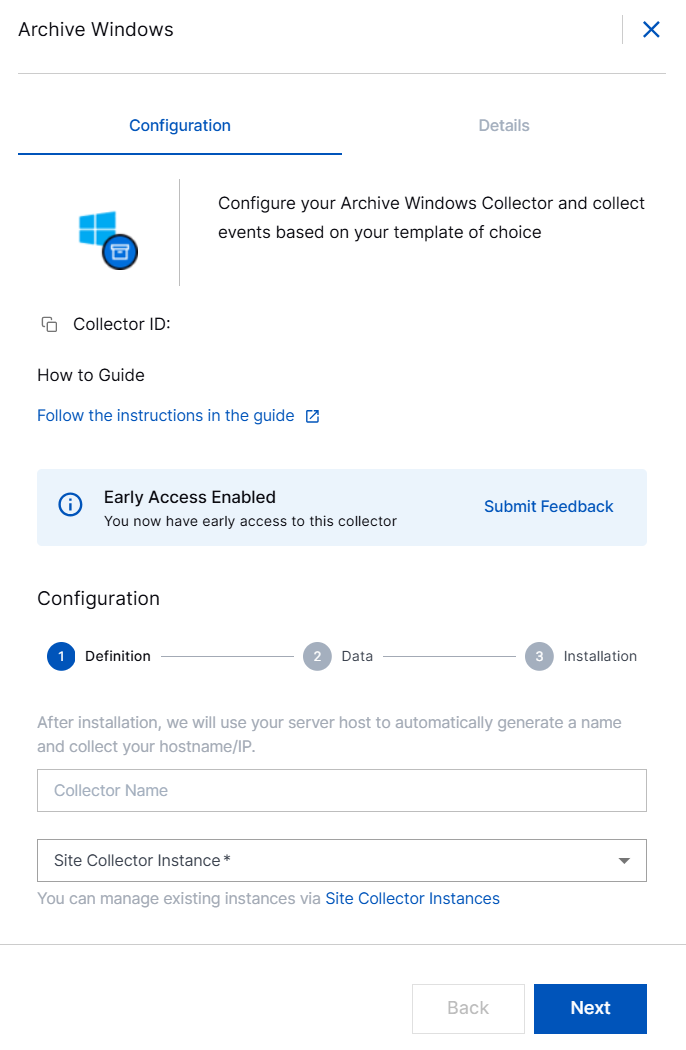
Collector Name – Site Collector generates a name for the Archive Windows collector based on your hostname.
Site Collector Instance – Select the site collector instance for which you want to set up the Archive Windows Collector. Only Site Collector instances on Site Collector version 1.17 and above are available.
Click Next.
In the Data section, set up the Windows template while configuring the collector. After you create a template, you can reuse the template for other collector instances or create a new template each time you set up a new Archive Windows Collector.

Archive Windows Template – Select a preconfigured template template to filter logs, or, create a new template. Templates enable you to filter logs by file names.
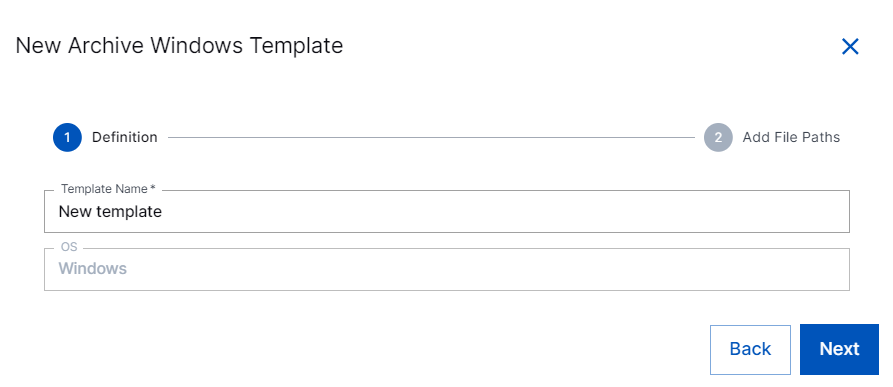
To create a new Archive Windows template:
In the Templates list, click New Windows Template.
In the Template Name field, specify a name for the new Windows template and click Next.
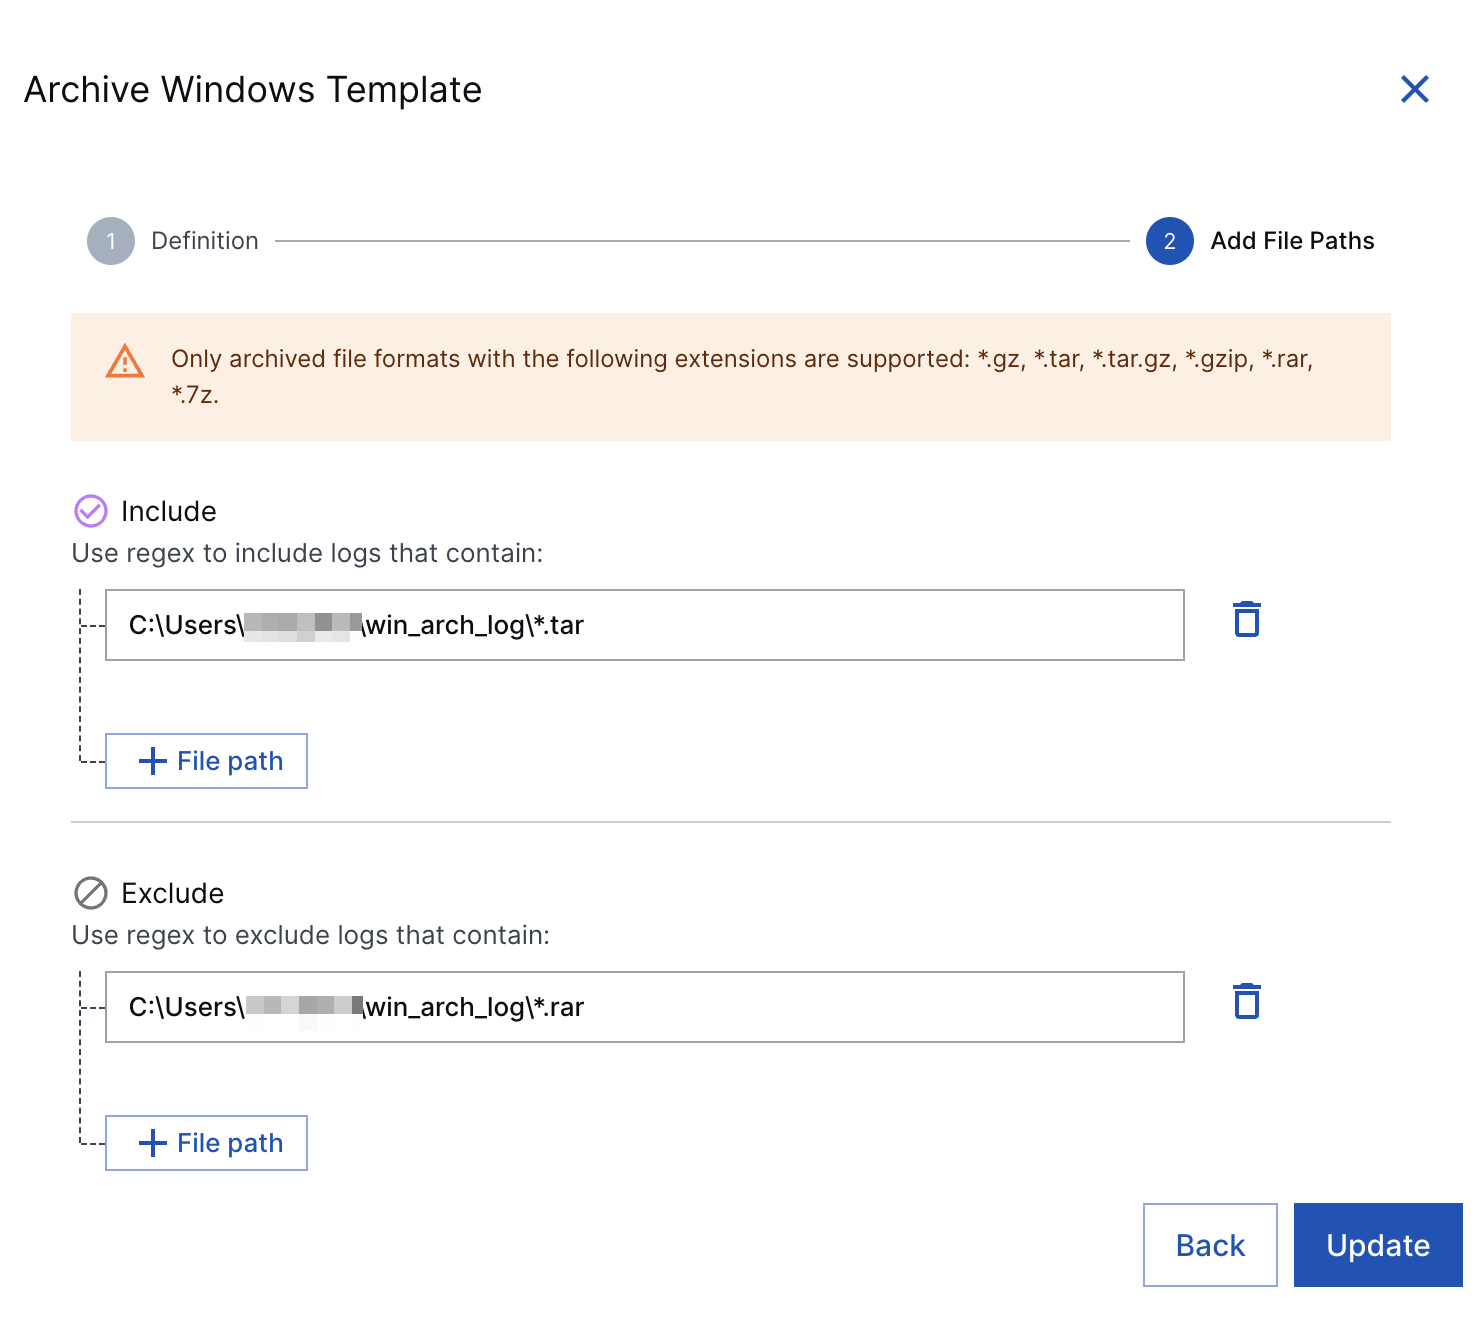
In the Add File Paths section, for filtering logs, enable the log fields that you want to use by entering regex. Supported file extension formats are *.gz, *.tar, *.tar.gz, *.gzip, *.rar, and *.7z.
Include – Enter regex for the file names or paths to be included in log collection.
Exclude – Enter regex for the file names or paths to be rejected while collecting logs. The collector collects all the security events from the specified log name excluding the events or file names listed in this section.
Note
Ensure that the regex you specify does not include directory-level wildcard characters. For example, patterns like
\/directory1\/[^/]*\/directory2that match nested paths are not supported.
In the Installation section, copy the scripts and download certificates as follows.
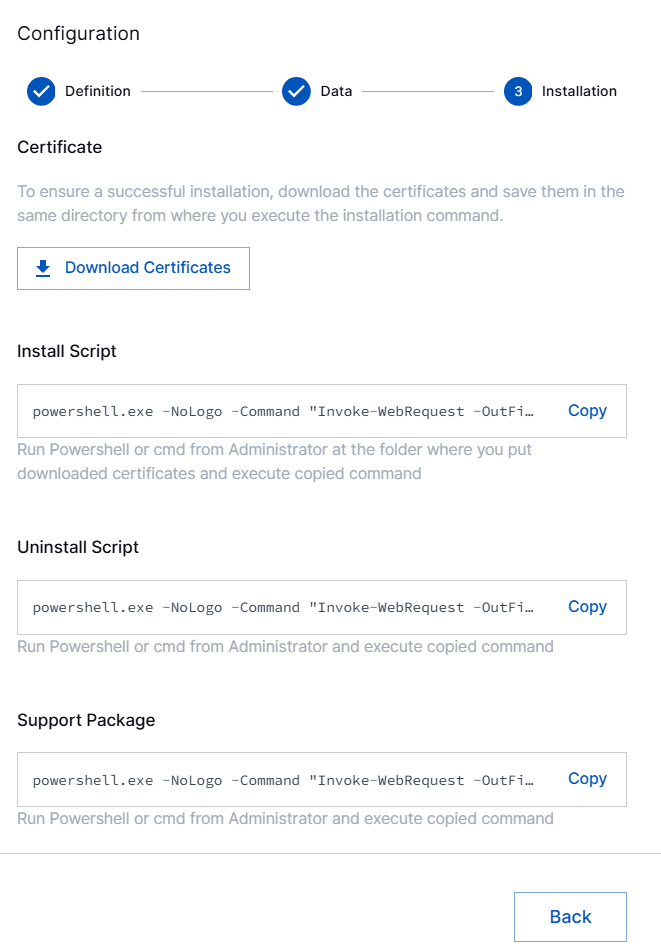
Certificate – Click Download Certificates to download the certificates. After you download the certificates, ensure that you save the certificates in the same directory from where you execute the installation command.
Install Script – Copy the Install script. Paste the script in the PowerShell or CMD command line interface as an administrator where you put downloaded certificates. Then, run the copied command to install the Windows collector.
Note
You can use one install script for installing Archive Windows Collector on multiple Windows machines.
Uninstall Script – To uninstall the Archive Windows collector, copy and run the script using PowerShell or CMD interface as an administrator. You must execute the script on the windows server.
Supported Package – Copy and run the support package command using PowerShell to share the support package with the support team for troubleshooting and remediation of issues if any.
Verify that the Collector installed. After you run the Install script on your Windows server, you get a confirmation message about successful collector installation and the Collector instance is listed in the Overview section on the user interface.
The Archive Windows Collector is set up and is ready to pull Windows events from your archived log files, *.gz, *.tar, *.tar.gz, *.gzip, *.rar, *.7z.
After the Windows collector is set up, Site Collector Core starts pulling logs periodically based on your template configuration and uploads logs to New-Scale Security Operations Platform. If the Windows server is not available, Site Collector core resumes pulling logs from the place where it stopped.
In case of installation failure, the collector is disabled, and the configuration is saved. You can check the status of the collector on the user interface or by using the support package.
Note
The supported versions of Windows operating system are Windows 10, Windows 11, Windows Server 2016, Windows Server 2016 core, Windows Sever 2019, Windows Server 2019 core, Windows Server 2022, and Windows Server 2022 core.
The Archive Windows Collector installation through a proxy or VPN is not supported.
The agent-based collectors use mutual TLS (mTLS) for authentication for installation, which requires the collector to connect using actual IP address of Site Collector to establish a secure connection. Network Address Translation (NAT) is not supported because it causes authentication failures and prevents installation. This restriction applies irrespective of proxy or VPN usage. Similarly, any configuration that involves NAT or TLS inspection—including those without proxy or VPN—will result in authentication failure and installation errors.
CrowdStrike may interfere with the operation of Windows Agent collectors. To avoid disruptions, ensure that you:
Whitelist the collector and management services. For example, for WELC, Exabeam Windows Collector service and Exabeam WELC Management service.
Provide read/write access to the installation folder of the agent collector and C:\Windows\Temp.
