- Site Collector Overview
- Get Started with Site Collectors
- Install Site Collector
- Set Up Collectors
- Sign Up for the Early Access Program: Site Collectors
- Choose the Right Collector based on Data Sources
- Set Up Archive Windows Collector
- Set Up Archive Linux Collector
- Set Up EStreamer Collector
- Set Up Fortinet Collector
- Set Up IBM Security QRadar Collector
- Set Up Kafka Collector
- Set Up Splunk Collector
- Set Up Linux File Collector
- Set Up Microsoft SQL Collector
- Set Up MySQL Collector
- Set Up Oracle Collector
- Set Up Syslog Collector
- Set Up Windows Active Directory Collector
- Set Up Windows Event Log Collector
- Set Up Windows File Collector
- Manage Site Collectors
- Apply Antivirus Exclusions
- Migrate to the New-Scale Site Collectors Service
- Modify Collector Configuration
- Modify a Site Collector Instance
- Manage Templates
- Monitor Log Sources
- Add Filters to Set Egress Log Filtering Conditions
- New Site Collector Management Service NGSCD
- Regenerate Certificates for Collectors
- Upgrade the Site Collector
- Upgrade the Site Collector Specifications
- Vulnerability Remediation Policy
- Site Collector Monitoring
- Troubleshoot the Site Collector
- Pre-checks failed during Site Collector installation and upgrade
- Site Collector UI shows the status INSTALLATION_ERROR
- Download Support Packages for Troubleshooting
- How to reboot the Virtual Machine (VM) successfully to apply security updates?
- What information must be added while creating a support ticket to resolve an issue?
- Site Collector UI is not displaying the heartbeats
- Splunk Collector can't be set up
- Splunk Collector is set up however, logs are not reaching DL/AA
- Only a few of the installed Splunk Collectors are processing logs or EPS has dropped by 50% as compared to last hour
- The Windows Active Directory Collector (formerly known as LDAP Collector) is set up, however, the context data is not reaching DL/AA
- The Windows Active Directory Collector (formerly known as LDAP Collector) is stuck in the ‘Update’ mode after deployment
- Installation is initiated; however, the collector shows the status as ‘Setting Up’ for some time
- Data Lake and Advanced Analytics Does Not Show Context Data
- Context Data from Windows Active Directory Collector is Segmented
- Minifi Permission Denied - Logback.xml File Missing and Config File Update - Failed Error Occurred while Installing the Windows Event Log Collector
- Where should I upload proxy certificates if I am running proxy with TLS interception?
- How to upgrade Linux collector instance?
Set Up Windows Active Directory Collector
If you use Active Directory, you can set up the Windows Active Directory Collector (Formerly known as LDAP Collector) to retrieve context data from your Active Directory server. The Windows Active Directory Collector is a set of Site Collector flows, built-in processors, groups, custom processors, other components, and integrations designed to pull context data from your Active Directory.
From the Site Collector service, the Active Directory data is available to the following downstream applications:
New-scale Context Management – A new-scale Exabeam service where context data can be processed and is available to downstream processes, including Search, Dashboards, and Correlation Rules.
SaaS Context Management – A SaaS service where context data is made available to Data Lake and Advanced Analytics applications.
Note
Ensure that you complete the following prerequisites before setting up the collector.
For the Windows Active Directory Collector to work in SaaS, Advanced Analytics-i62.3 and Data Lake-i40.5 must have Site Collector configured as a source in their Context Sources.
To pull context data, set the Read and List permissions for the authentication account. Because this account is a service account, interactive login permissions are not required. Ensure that you configure the permissions in your Windows Active Directory before setting up the collector.
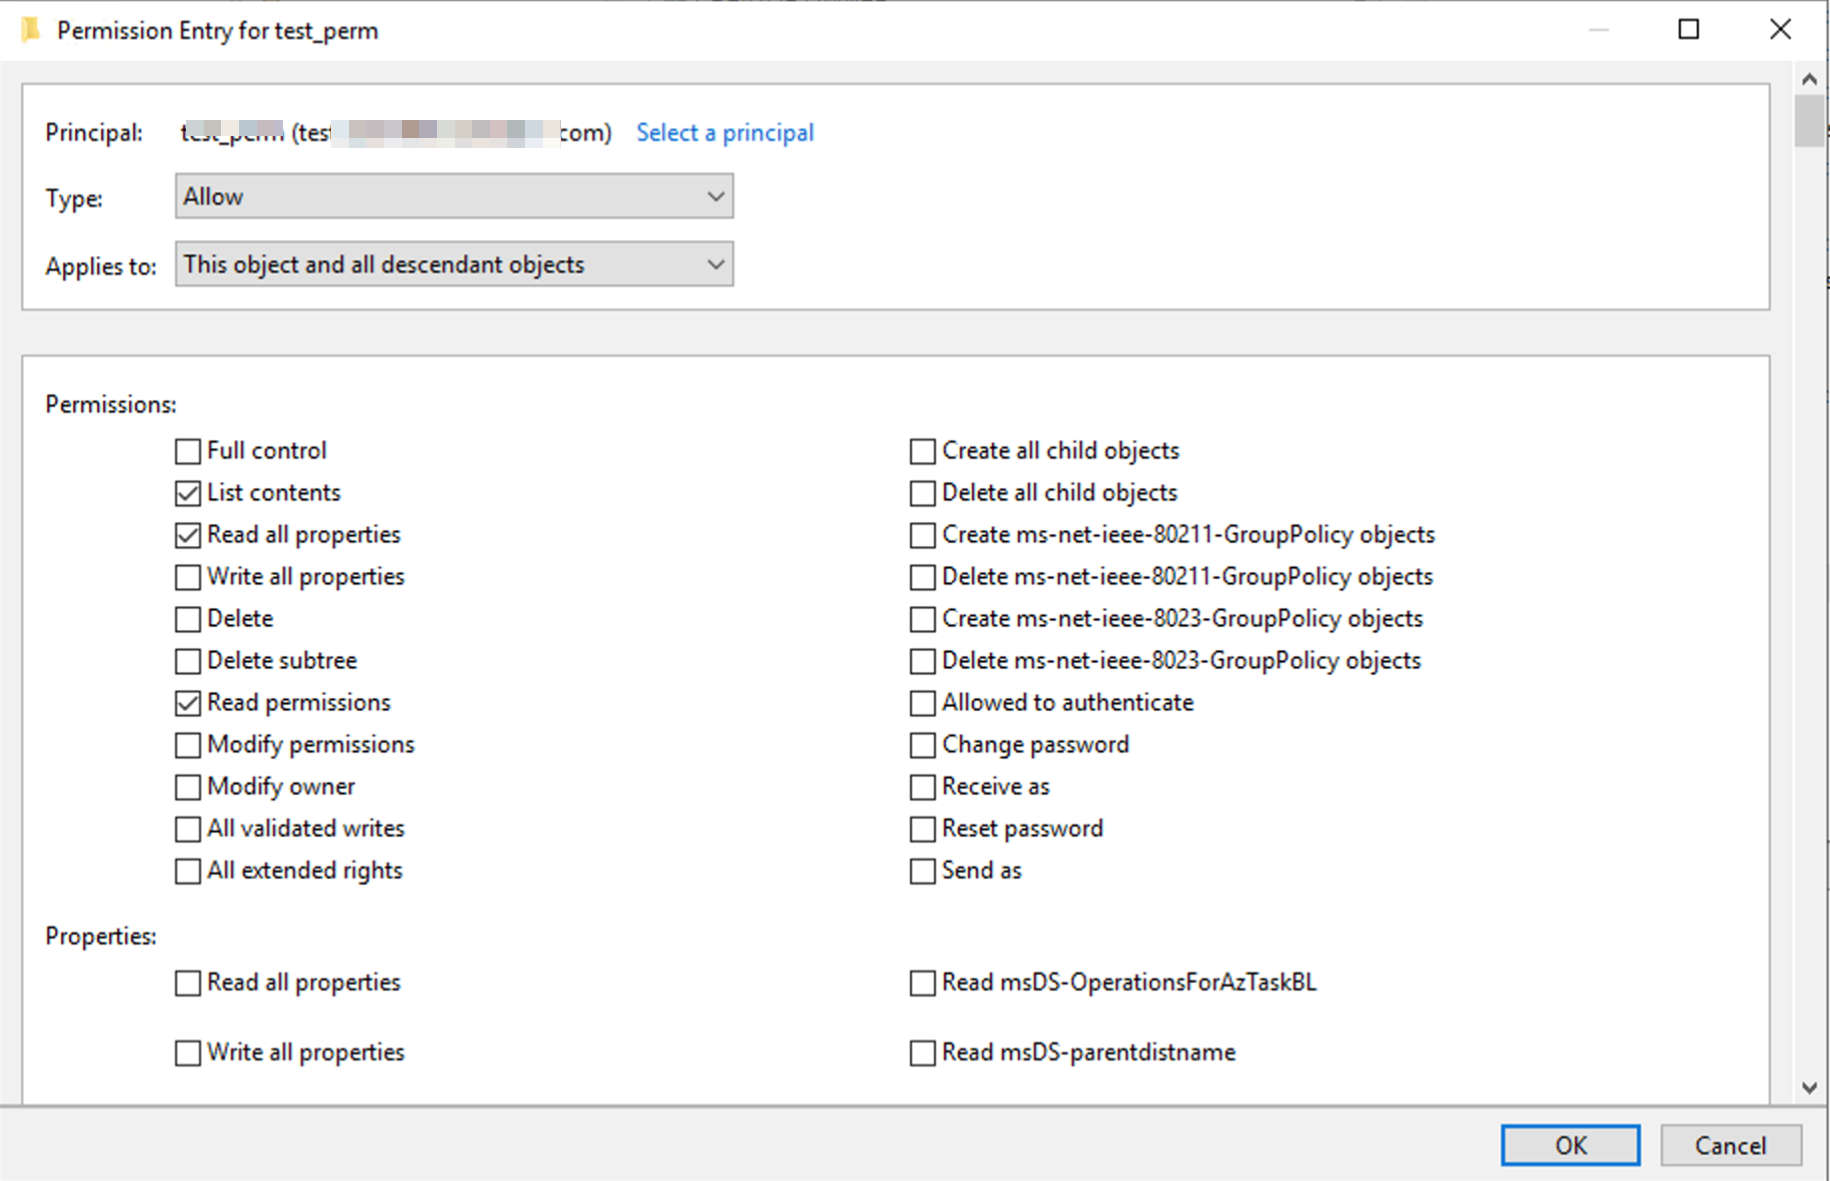
To set up a Windows Active Directory Collector:
Log in to the New-Scale Security Operations Platform with your registered credentials.
Navigate to Collectors > Site Collectors.
Ensure that at least one Site Collector is installed and in running state.
On the Site Collector page, click the Collectors Library tab, then click Windows Active Directory.
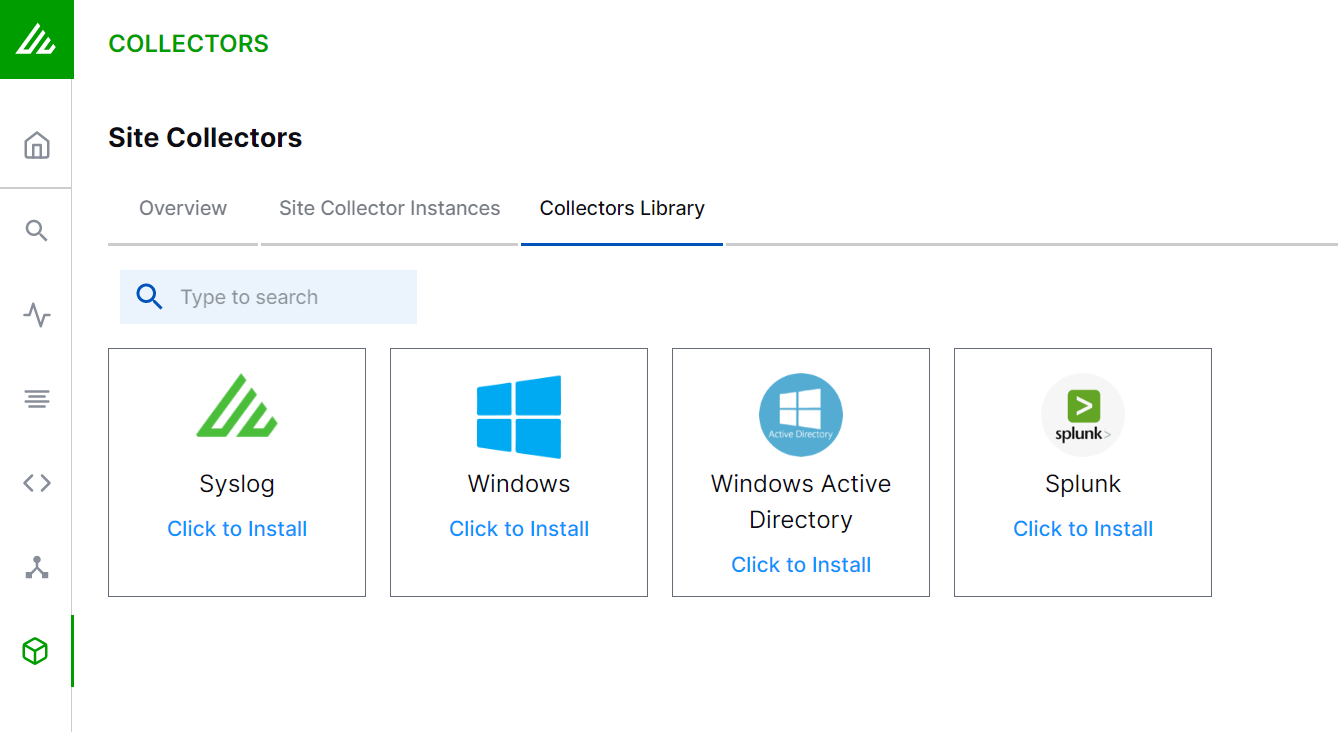
In the Definition section, enter the required information as follows.
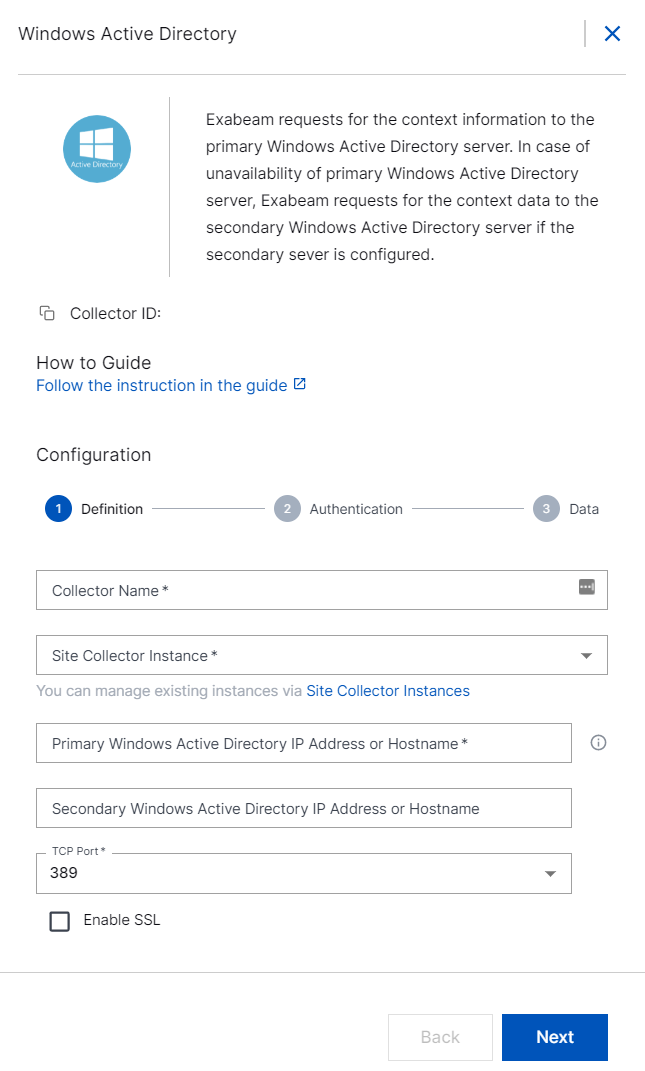
Collector Name – Enter a unique name for the Windows Active Directory Collector.
Note
Ensure that you specify different names for Site Collector instance and other collectors. The name must be unique across the tenant.
Site Collector Instance – Select the site collector instance for which you want to install the Windows Active Directory Collector.
Primary Windows Active Directory IP Address or Hostname – Enter the primary IP address or host name of the Active Directory server to which you want the Windows Active Directory Collector to retrieve context data.
Secondary Windows Active Directory IP Address or Hostname – (Optional) Enter a secondary IP address or host name of your Active Directory server.
TCP Port – Select the TCP port number of the Active Directory server.
Enable SSL (Active Directory) – Select this option if you have set up the Active Directory server to use SSL for secure communication.
Click Next.
In the Authentication section, enter the required information as follows.
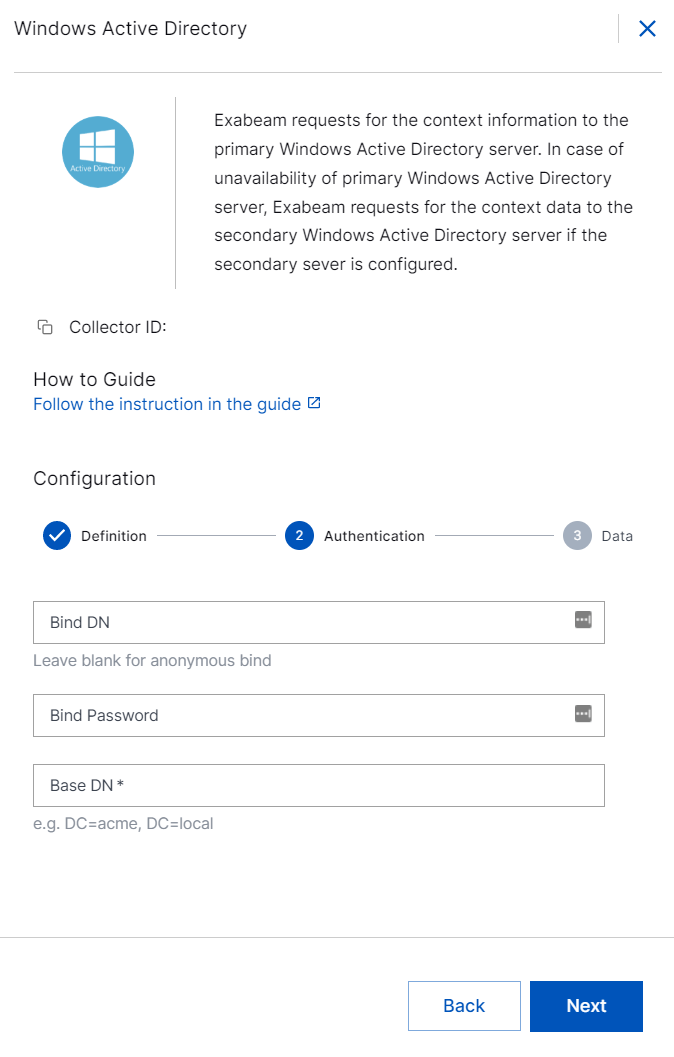
Bind DN – To authenticate your Active Directory server, enter the bind domain name.
Bind Password – Enter the bind password, if applicable.
Base DN – Enter the base domain name. For example, DC=acme, and DC=local.
Ensure that you set the Read and List permissions for the authentication account to pull context data before setting up the collector.
Click Next.
In the Data section, select the desired Active Directory Sync Frequency from 1 to 24 hours. The collector will retrieve context data at the specified frequency.
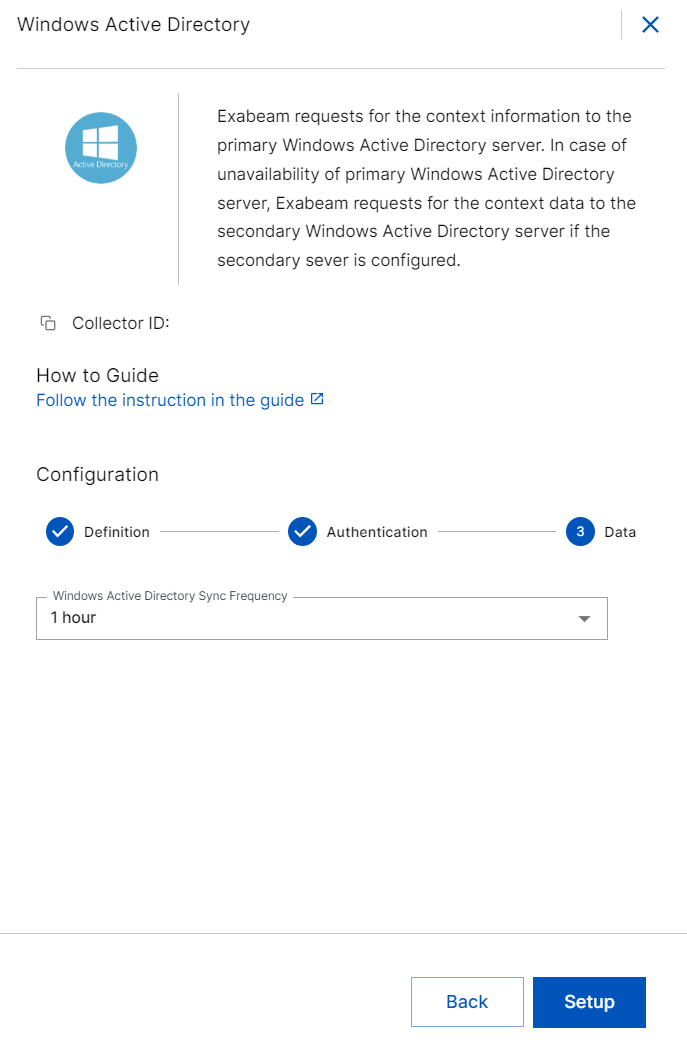
Click Setup.
The configuration for Active Directory collector is complete. The collector is set up and ready to pull context data from your Active Directory.
Note
After the Windows Active Directory Collector is set up, the collector pulls all the context data also called full snapshot at first and then incremental. Until the data pull is completed and the connection check runs, the Overview tab shows the status as
Setting upfor the Active Directory collector. The first data pull, and the subsequent incremental pull takes longer to process because the first pull is similar to full snapshot that includes all the data. The processing time depends on the amount of context data to be pulled and the sync frequency. After these two runs, the Active Directory collector shows the status asRunningon the Site Collector user interface.To make use of the data collected by the new Windows Active Directory Collector, do one of the following:
New-scale Context Management – Create an Active Directory context table that uses your new Active Directory site collector as its source. When created, the context table processes the user attributes pulled by the site collector from your Active Directory server. For information, see Create an Active Directory Context Table.
SaaS Context Management – Create a Context Source in Advanced Analytics or Data Lake. Windows Active Directory Collector collects context data. When you add the Windows Active Directory Collector as a context source in Context Management, the Context data will be automatically generated for the Site Collector Context Source. Do not generate context for this context source by clicking the Generate Context button. Wait until the context is processed automatically. Meanwhile, continue with configuring Advance Analytics. For more information about adding a context source, see Set up Active Directory Server.
To fetch all the context data one more time, after setting up the Windows Active Directory Collector, navigate to the Overview tab, click the Windows Active Directory Collector that you created, and select the Collect Full Snapshot check box to fetch all the context data, and click Update.
