- Advanced Analytics
- Understand the Basics of Advanced Analytics
- Configure Log Management
- Set Up Admin Operations
- Set Up Authentication and Access Control
- Additional Configurations
- Configure Rules
- Exabeam Threat Intelligence Service
- Threat Intelligence Service Prerequisites
- View Threat Intelligence Feeds
- Threat Intelligence Context Tables
- View Threat Intelligence Context Tables
- Assign a Threat Intelligence Feed to a New Context Table
- Create a New Context Table from a Threat Intelligence Feed
- Check ExaCloud Connector Service Health Status
- Exabeam Cloud Telemetry Service
- Manage Security Content in Advanced Analytics
- Health Status Page
Set Up Azure AD Context Enrichment
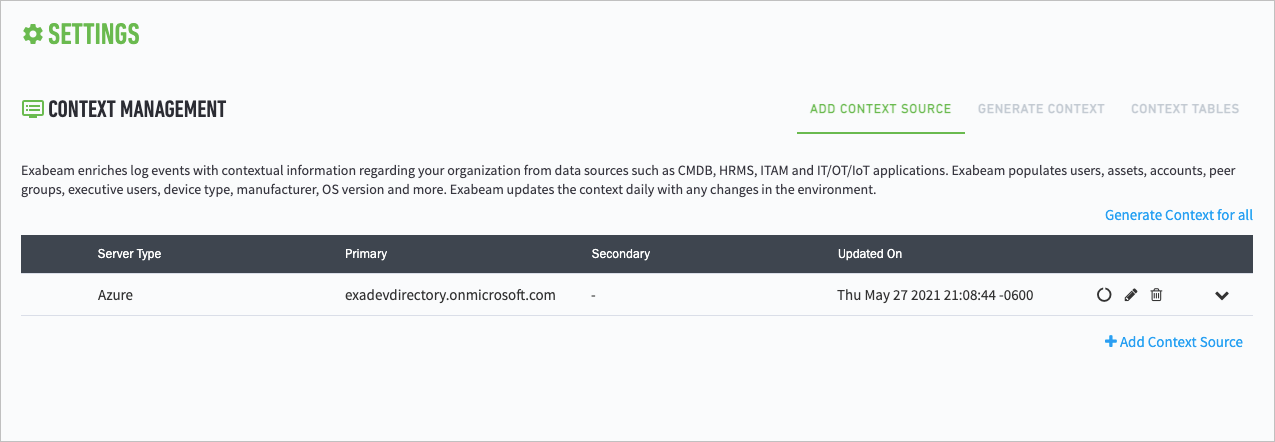
Navigate to Settings > Core > Context Management > Add Context Source.
The Context Management page opens.
Click + Add Context Source.
From the Source Type drop-down menu, select Microsoft Azure Active Directory.
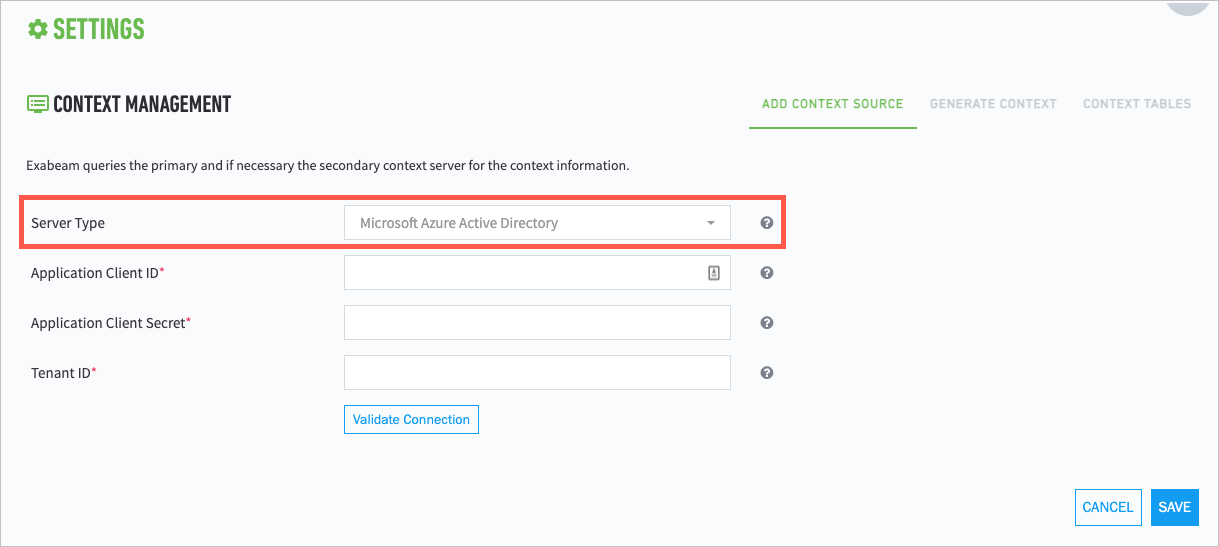
Provide the appropriate values for the following fields:
Application Client ID
Application Client Secret
Tenant ID
To generate the appropriate values for these fields, do the following:
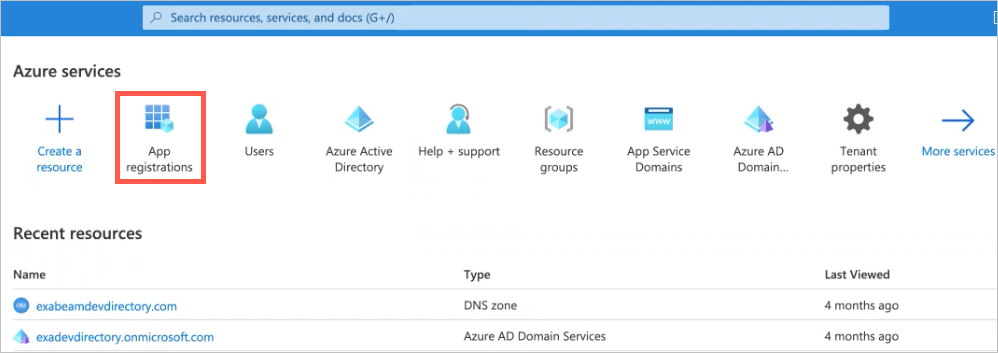
Log in to Microsoft Azure.
Under Azure services, click App registrations.
Click New registrations.
In the Name field, type a name for the app.
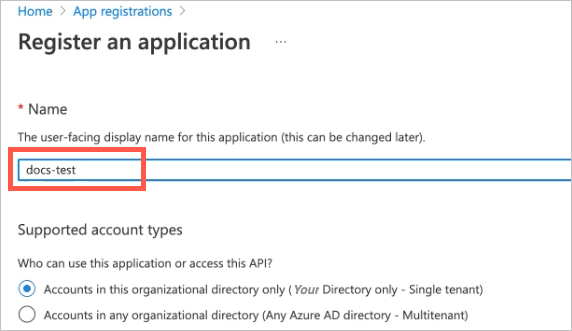
Under supported account types, ensure that the following setting is selected: Accounts in this organizational directory only (Your Directory only - Single tenant).
At the bottom of the page, click Register.
The Overview page for your new app appears.
Copy the Application (client) ID and paste it into the Application Client ID field in Exabeam; copy the Directory (tenant) ID and paste it into the Tenant ID field.

In the Manage menu, click API permissions.
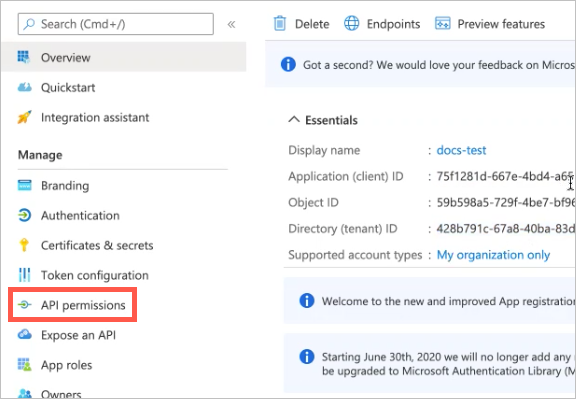
The API permissions page opens.
Click Add a permission.
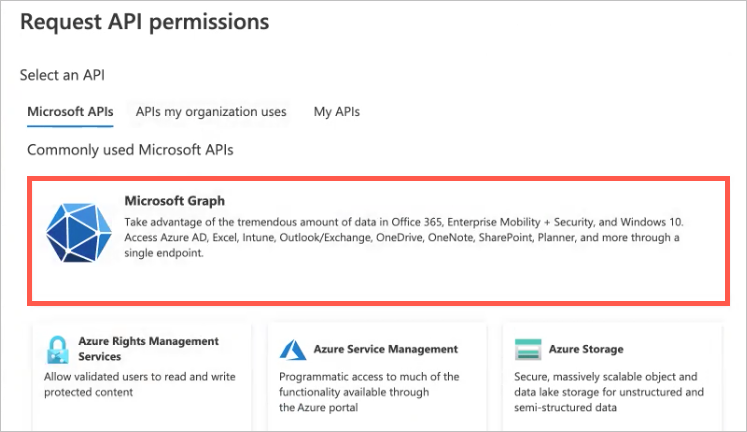
The Request API permissions panel opens on the right.
Click the Microsoft Graph box.
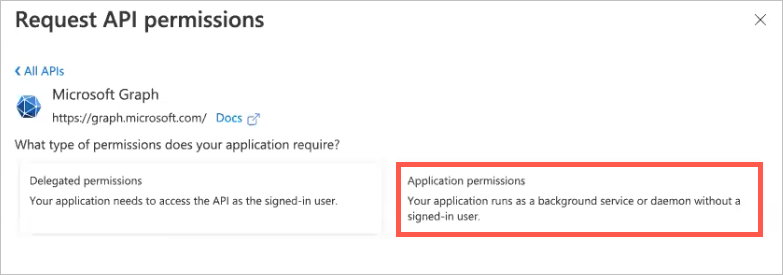
Click the Application permissions box.
In the Select permissions text filter, type
directory.Click the Directory drop-down arrow, and then select Directory.Read.All.
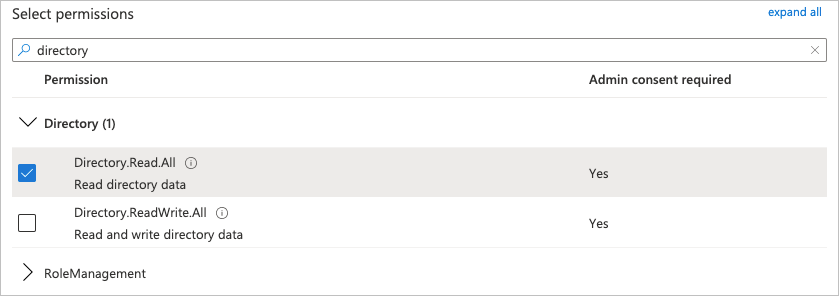
At the bottom of the panel, click Add permissions.
The panel closes and the added permission appears under Configured permissions.
Click Grant admin consent for Exadev Directory, and then click Grant admin consent confirmation.

In the Manage menu on the left, click Certificates & secrets.
The Certificates & secrets page opens.
Click New client secret.
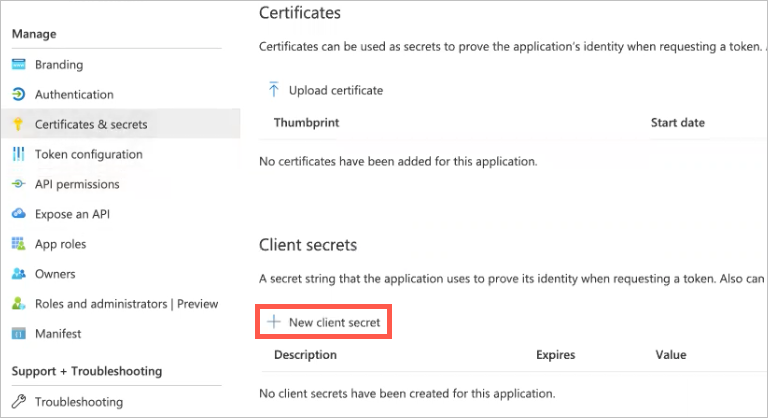
The Add a client secret panel opens on the right.
In the Description field, provide a description of the secret (such as what the secret is being used for).
From the Expires drop-down menu, select a time frame for when you want the secret to expire.
At the bottom of the panel, click Add.
The panel closes and the added secret appears in the Client secrets list.
Click the copy-to-clipboard icon for the secret Value, and then paste the value into the Application Client Secret field in Exabeam.

To test the connection with Azure AD, click Validate Connection.
A message displays to indicate whether the connection is successful.
If the connection is successful, click Save to complete the setup.
Azure AD is added to the list of data sources on the Context Management page.
