- Advanced Analytics
- Understand the Basics of Advanced Analytics
- Configure Log Management
- Set Up Admin Operations
- Set Up Authentication and Access Control
- Additional Configurations
- Configure Rules
- Exabeam Threat Intelligence Service
- Threat Intelligence Service Prerequisites
- View Threat Intelligence Feeds
- Threat Intelligence Context Tables
- View Threat Intelligence Context Tables
- Assign a Threat Intelligence Feed to a New Context Table
- Create a New Context Table from a Threat Intelligence Feed
- Check ExaCloud Connector Service Health Status
- Exabeam Cloud Telemetry Service
- Manage Security Content in Advanced Analytics
- Health Status Page
Third-Party Identity Provider Configuration
Exabeam supports integration with SAML 2.0 compliant third-party identity providers (IdPs) for single sign-on (SSO), multi-factor authentication, and access control. Once an IdP is added to your product, you can make IdP authentication mandatory for users to log in to the product, or you can allow users to log in through either the IdP or local authentication.
Note
You can add multiple IdPs to your Exabeam product, but only one IdP can be enabled at a time.
Add Exabeam to Your SAML Identity Provider
This section provides instructions for adding Exabeam to your SAML 2.0 compliant identity provider (IdP). For detailed instructions, refer to your IdP's user guide.
The exact procedures for configuring IdPs to integrate with Exabeam vary between vendors, but the general tasks that need to be completed include the following (not necessarily in the same order):
Begin the procedure to add a new application in your IdP for Exabeam (if needed, refer to your IdP's user guide for instructions).
In the appropriate configuration fields, enter the Exabeam Entity ID and the Assertion Consumer Service (ACS) URL as shown in the following:
Entity ID:
https://<exabeam_primary_host>:443/api/auth/saml2/<identity_provider>/login
ACS URL:
https://<exabeam_primary_host>:443/api/auth/saml2/<identity_provider>/handle-assertion
Important
Make sure that you replace
<exabeam_primary_host>with the IP address or domain name of your primary host. The only acceptable values for <identity_provider> are the following:adfsgooglepingoktaothers
If you are using Microsoft AD FS, Google IdP, Ping Identity, or Okta, enter the corresponding value from the preceding list. For all other IdPs, enter
others. All of the values are case sensitive.In the attribute mapping section, enter descriptive values for the following IdP user attributes:
Email address
First name
Last name
Group
Username (this attribute is optional)
Note
The actual names of these user attributes may vary between the different IdPs, but each IdP should have the corresponding attributes.
For example, if Primary email is the user email attribute in your IdP, you could enter
EmailAddressas the descriptive value. The following is an example of a completed attribute map in Google IdP: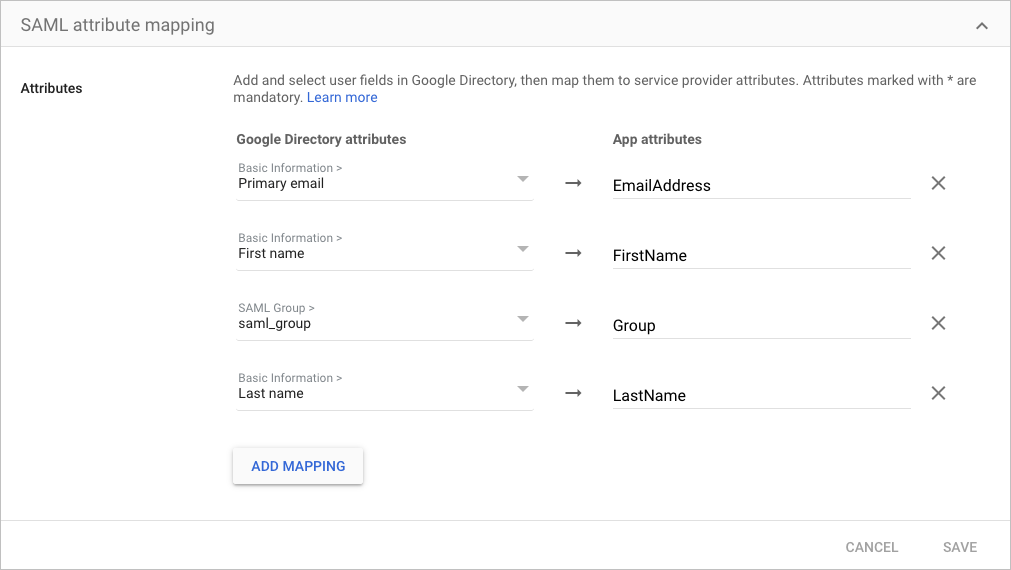
Important
When you Configure Exabeam for SAML Authentication, you need to use the same descriptive values to map the Exabeam query attributes with the corresponding IdP user attributes.
Complete any additional steps in your IdP that are necessary to finish the configuration. Refer to your IdP user guide for details.
Copy the IdP's connection details and download the IdP certificate or, if available, download the SAML metadata file.
Note
You need either the connection details and the IdP certificate or the SAML metadata file to complete the integration in Exabeam.
From the main menu on the left, select Apps and then click Web and mobile apps.
From the Add app drop-down menu, click Add custom SAML app.
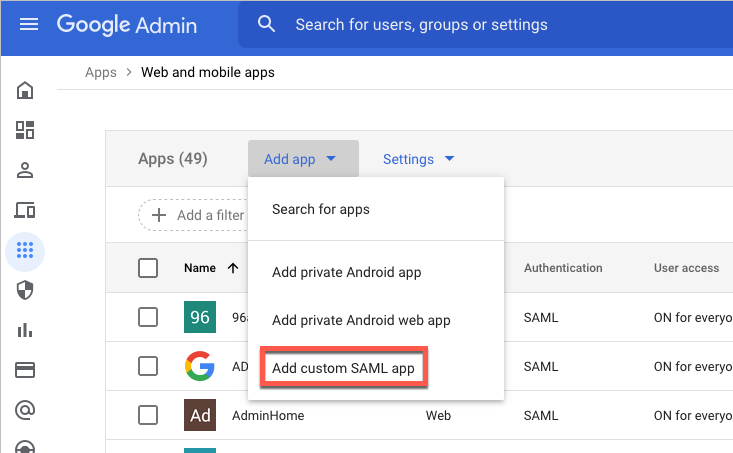
The App Details section opens.
In the App name field, enter a name.
Under App icon, click the blue circle, navigate to an image file that can be used as an icon and click to upload it.
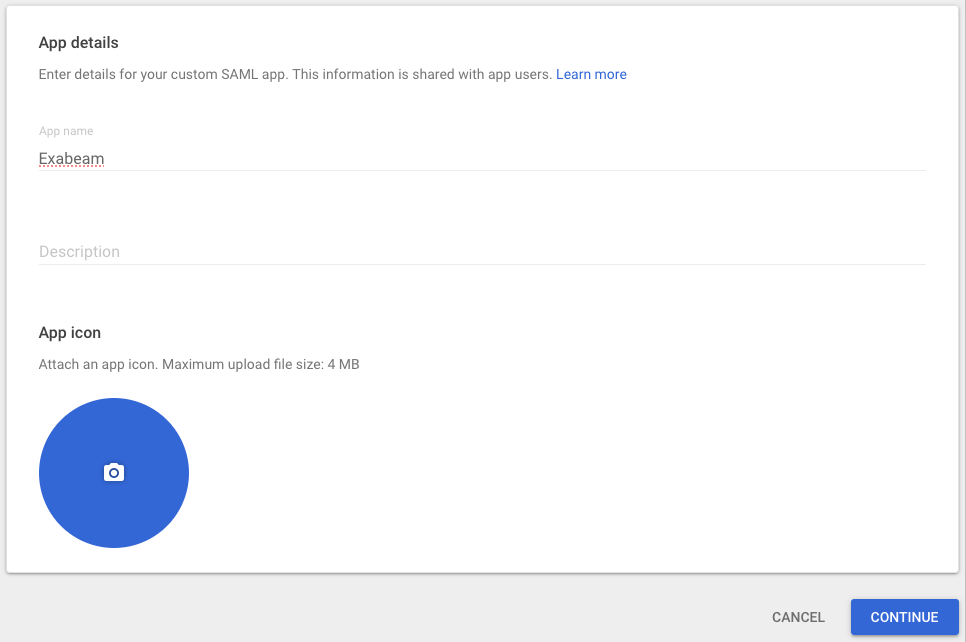
Click Continue.
The Google Identity Provider Details section opens.
Click Download IdP Metadata.
Note
The IdP metadata file needs to be uploaded to Exabeam when you Configure Exabeam for SAML Authentication.
Click Continue.
The Service Provider Details section opens.
Enter the ACS URL and Entity ID as shown in the following:
ACS URL:
https://<exabeam_primary_host>:443/api/auth/saml2/google/handle-assertion
Entity ID:
https://<exabeam_primary_host>:443/api/auth/saml2/google/login
Note
Make sure that you replace
<exabeam_primary_host>with the IP address or domain name of your primary host.Click Continue.
The Attribute Mapping section opens.
Click Add Mapping, and then from Select field drop-down menu, select Primary email.
Repeat the previous step for each of the following attributes:
Primary email
First name
Last name
Group
In the App attributes fields, enter descriptive values for the attributes.
For example, for the Primary email attribute, you could enter
EmailAddressfor the descriptive value. The following is an example of a completed attribute map:
Important
When you Configure Exabeam for SAML Authentication, you need to use the same descriptive values to map the Exabeam query attributes with the corresponding IdP user attributes.
Click Continue.
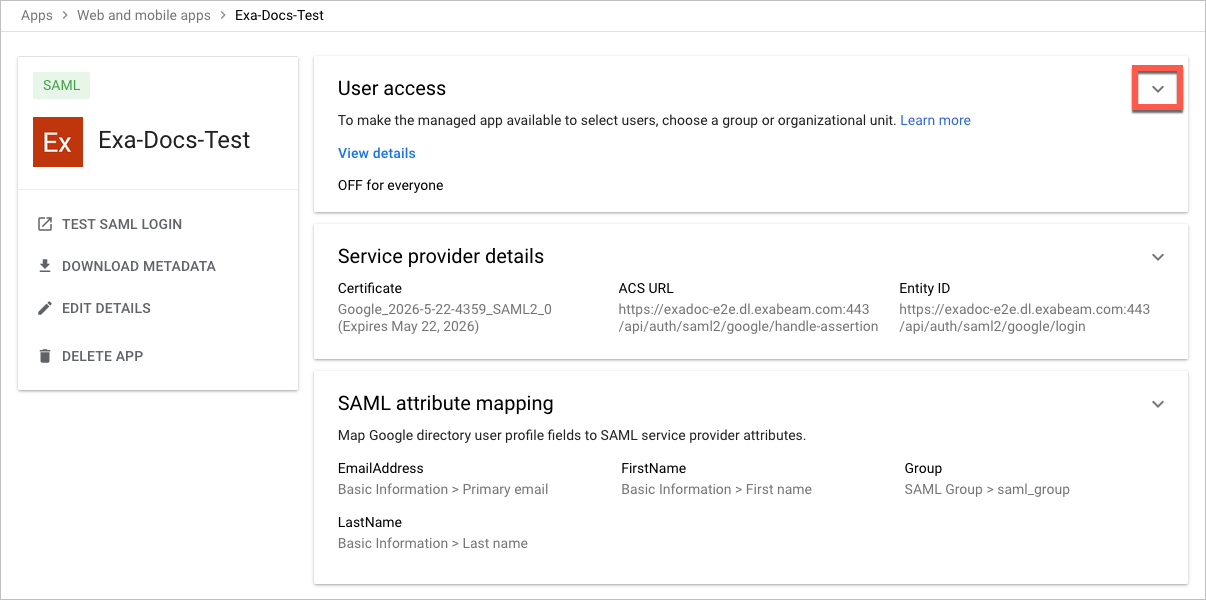
The details page opens for your Exabeam app.
In the User Access panel, click the Expand panel icon to begin assigning the appropriate organizational units and groups to your Exabeam app and manage its service status.
You are now ready to Configure Exabeam for SAML Authentication.
Note
The following instructions include procedural information for configuring both Azure AD and Exabeam to complete the IdP setup.
Log in to Microsoft Azure and navigate to Enterprise Applications.
Create an Exabeam enterprise application by doing the following:
Click New application, and then click Create your own application.
The Create your own application dialog box appears.
In the What's the name of your app field, type a name for the app (for example, "Exabeam-SAML").
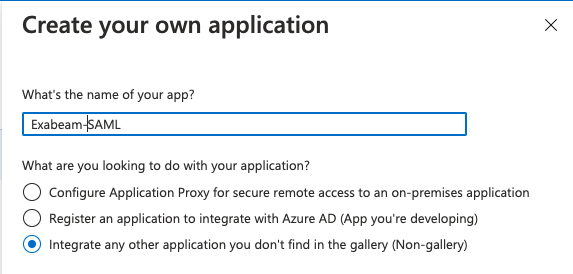
Select Integrate any other application you don't find in the gallery (Non-gallery).
Click Create.
On the Enterprise Application page, locate and click the application that you added in step 2.
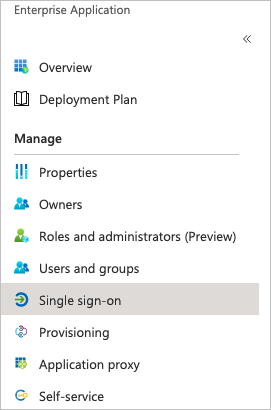
In the Manage section, click Single sign-on.
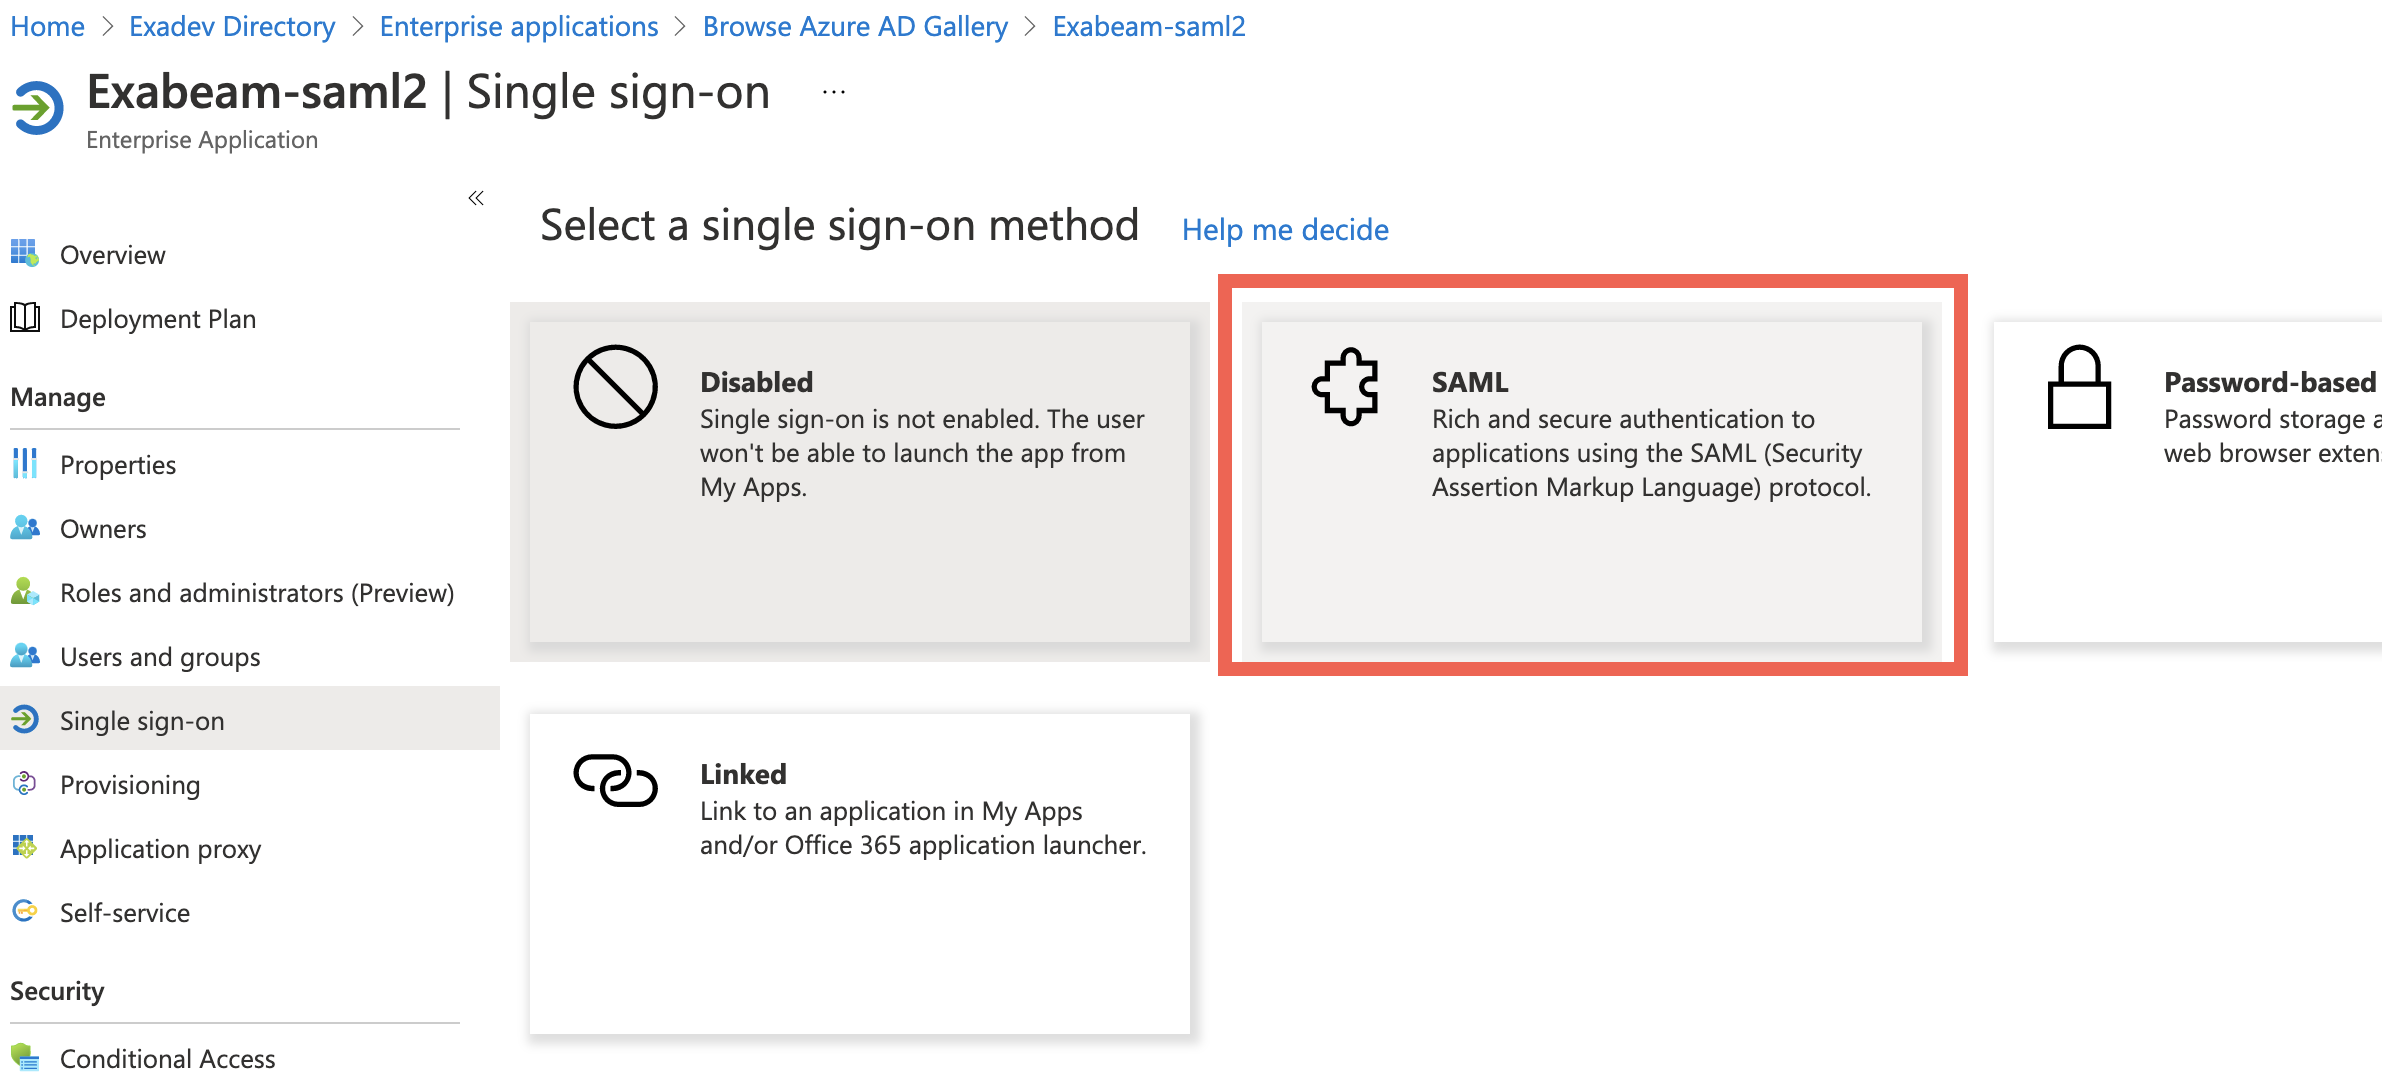
Click the SAML tile.
In the Basic SAML Configuration box (
 ), click Edit, and then do the following:
In the Identifier (Entity ID) field, enter the following: https://<exabeam_primary_host>:443/api/auth/saml2/others/login
Note
Make sure that you replace
<exabeam_primary_host>with the IP address or domain name of your primary host.In the Reply URL (Assertion Consumer Service URL) field, enter the following: https://<exabeam_primary_host>:443/api/auth/saml2/others/handle-assertion
Note
Make sure that you replace
<exabeam_primary_host>with the IP address or domain name of your primary host.Click Save.
In the User Attributes & Claims box (
 ), click Edit, and then map the Azure objects to your Exabeam field attributes.
Click the row for the user.mail claim.
The Manage claim dialog box appears.
In the Name field, type the name of the appropriate Exabeam field attribute.
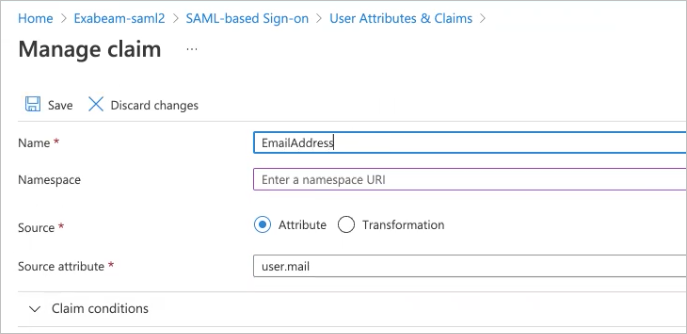
If needed, clear the value in the Namespace field to leave it empty.
Click Save.
Repeat steps a through d as needed for the following claims:
user.givenname
user.userprincipalname
user.surname
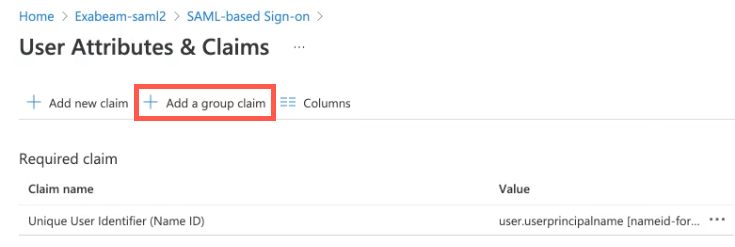
Click Add a group claim.
In the Group Claims dialog box, select Groups assigned to the application.
From the Source attribute drop-down list, select Group ID.
In the Advanced Options section, select the checkbox for Customize the name of the group claim.
In the Name (required) field, type Group.
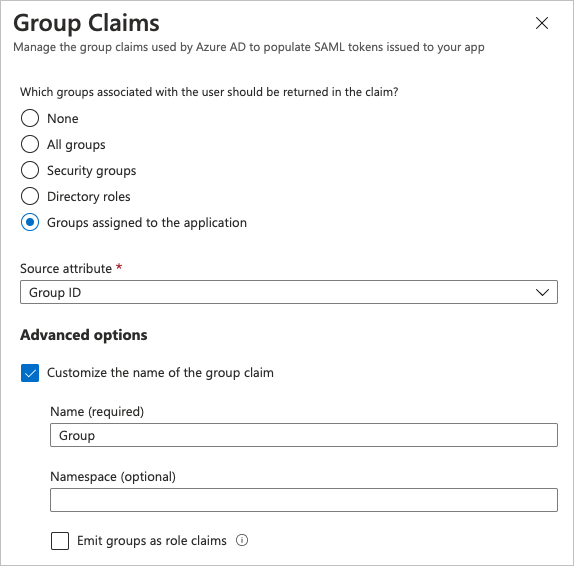
Click Save.
The Group claim is added to the User Attributes & Claims box.

In the SAML Signing Certificate box (
 ), download the Federation Metadata XML certificate to upload to Exabeam.
In Exabeam, navigate to Settings > User Management > Configure SAML, and then click Add Identity Provider.
The New Identity Provider dialog box appears.
From the SAML Provider drop-down list, select Custom/Generic IdP.
Under SSO Configuration, select Upload the XML metadata filed provided by your IdP, and then choose the Federation Metadata XML file that was downloaded in step 8.
In the Name of IdP field, type a name (for example, "Azure").
In the Upload IdP logo field, click Choose File, and then select a PNG file of the logo that you want to use.
Note
The PNG logo file size cannot exceed 1 MB.
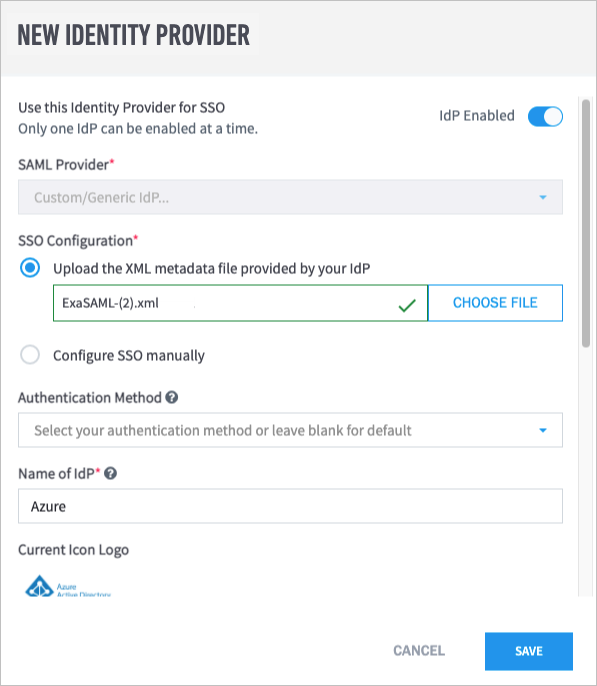
In the Query Attributes section, enter the appropriate IdP attribute values for each field that you defined in step 7.
Important
The IdP attribute values must match the values that you defined in step 7.
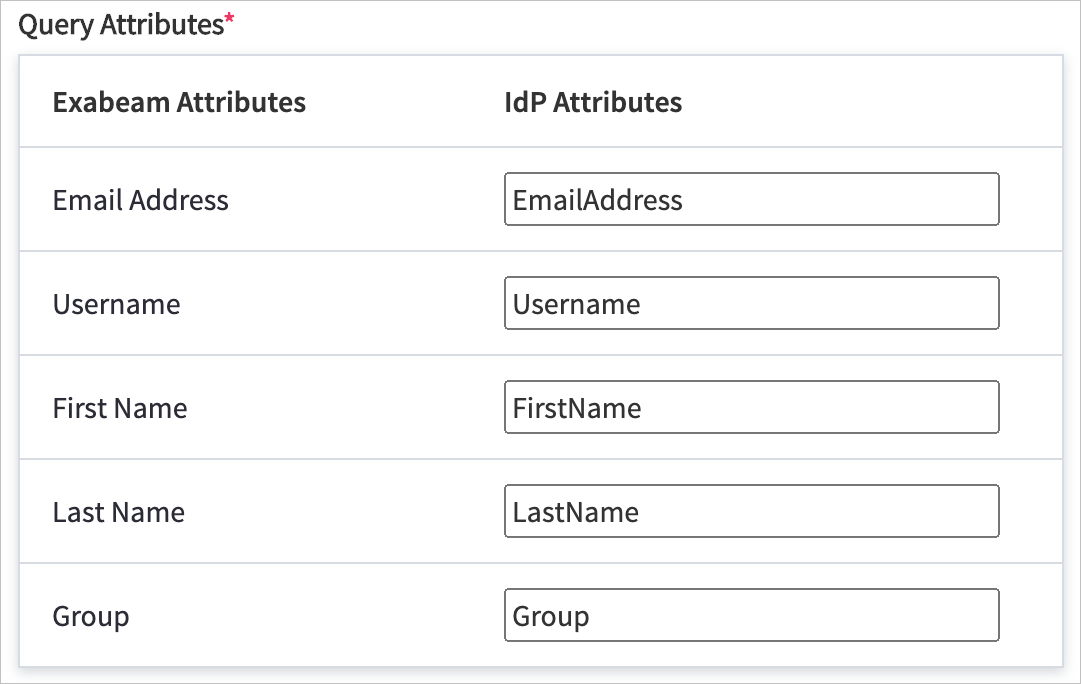
Click Save.
Azure now appears as an identity provider in the Configure SAML tab of the User Management page, and a Group Mappings section also appears.
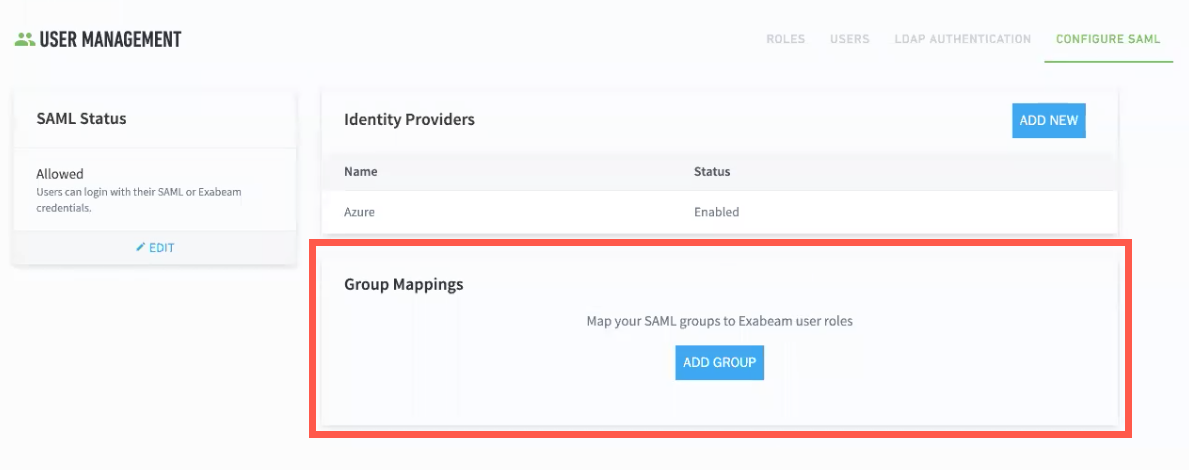
To map a SAML group to Exabeam user roles, do the following:
On the home page of Azure, click Groups.
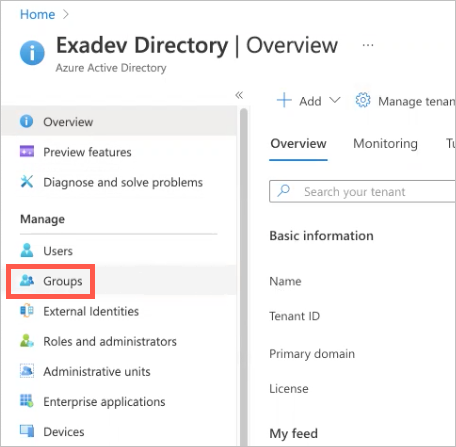
From the Object Id column, copy the ID for the Azure group that you want to map.

In Exabeam, on the Configure SAML tab of the User Management page, click Add Group.
The Edit Group Mapping dialog box appears.
From the Identity Provider drop-down menu, select Others.
In the Group Name field, paste the object ID that you copied in step b.
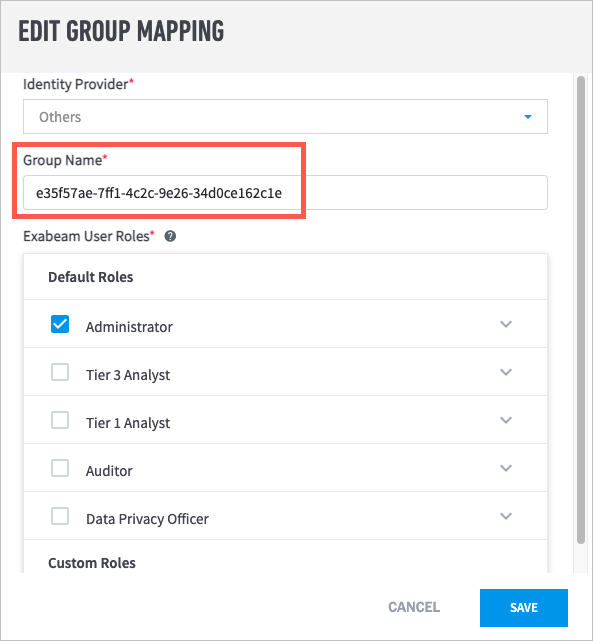
Select the Exabeam User Roles that you want to assign to the group.
Click Save.
Repeat steps a through g for each Azure group that you want mapped to user roles.
To verify that Azure has been successfully configured, log out of Exabeam and look for the Azure Active Directory option on the sign-on screen.
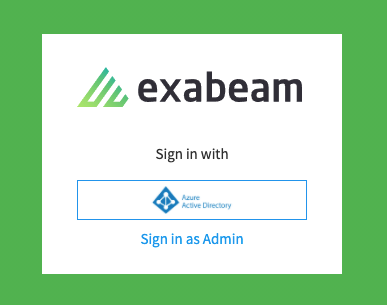
Configure Exabeam for SAML Authentication
Important
Before you begin this procedure, you need to Add Exabeam to Your SAML Identity Provider.
Log in to your Exabeam product.
Navigate to Settings
 > Core > User Management > Configure SAML.
Click Add Identity Provider.

From the SAML Provider drop-down menu, select your IdP.
Note
If your IdP is not listed, select Custom/Generic IdP.
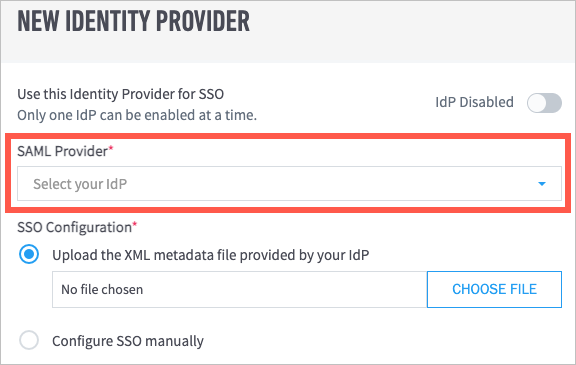
With the information that you collected in step 5 of Add Exabeam to Your SAML Identity Provider, do one of the following:
If you have an XML metadata file from your IdP, select Upload the XML metadata provided by your IdP, and then click Choose File to locate and upload the file from your computer.
If you do not have a metadata file, select Configure SSO manually and then do the following:
Click Choose File to locate and upload the IdP certificate from your computer.
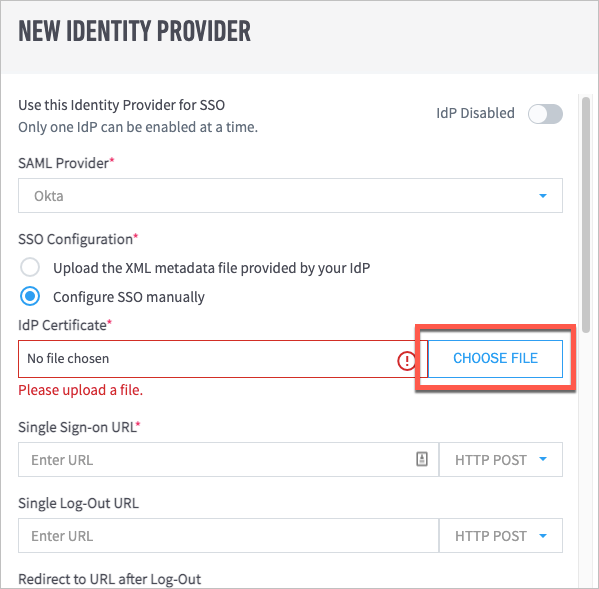
In the Single Sign-on URL field, enter the appropriate URL, and then select either HTTP POST or HTTP REDIRECT as needed from the drop-down menu.
(Optional) In the Single Log-Out URL and Redirect to URL after Log-Out fields, enter the appropriate URLs.
If you selected Custom/Generic IdP in the previous step, do the following:
In the Name of IdP field, enter a name.
Under Upload IdP Logo, click Choose File to locate and upload an IdP logo image in PNG format.
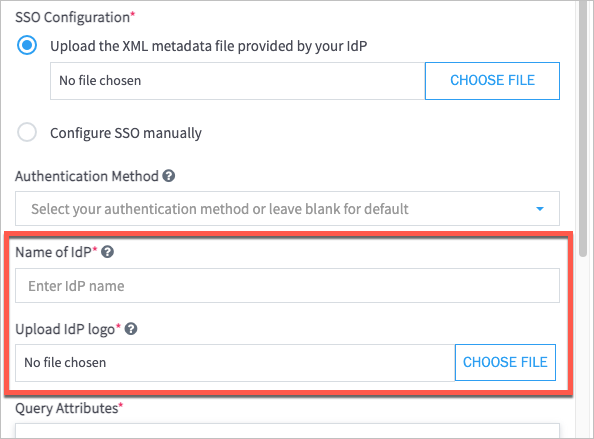
(Optional) From the Authentication Method drop-down menu, select an authentication method.
Note
Leave the field blank to accept the IdP's default method.
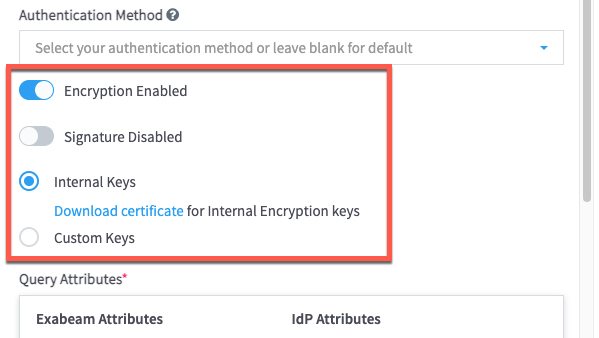
If you are using AD FS and want to enable encryption, click the Encryption Disabled toggle to enable it (the toggle turns blue when enabled), and then configure the following encryption options that apply to your environment:
In the Query Attributes table, map the Exabeam query attributes to the corresponding IdP user attributes by entering the same descriptive values that you did in Add Exabeam to Your SAML Identity Provider, as demonstrated in the following example:

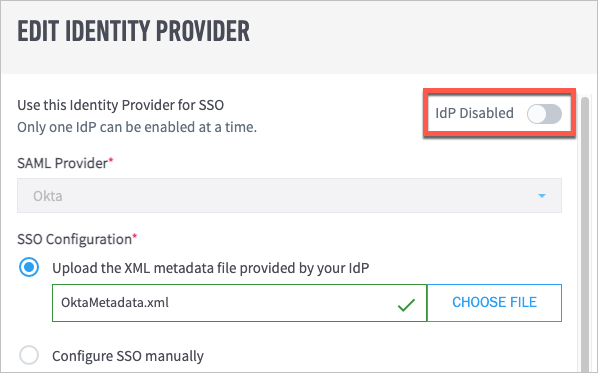
(Optional) If you are ready to enable the IdP, click the IdP Disabled toggle. When the IdP is enabled, the toggle turns blue.
Note
You can add multiple IdPs to your Exabeam product, but only one IdP can be enabled at a time.
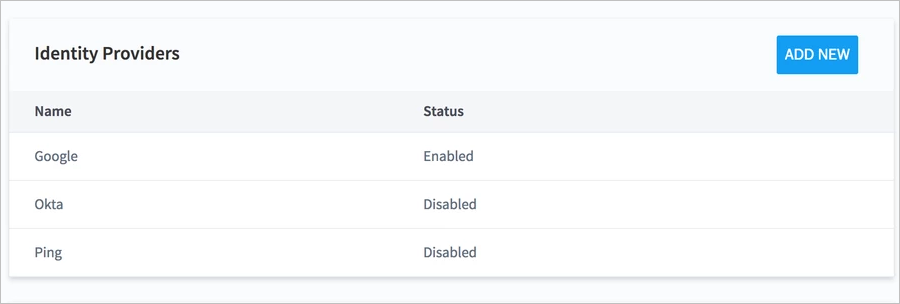
Click Save. Your identity provider now appears in the Identity Providers table.
To complete the configuration, you need to map your SAML groups to Exabeam user roles. For instructions, see Map SAML Groups to Exabeam User Roles.
Map SAML Groups to Exabeam User Roles
After adding a third-party identity provider (IdP) to your Exabeam product, you need to map the IdP user groups to the appropriate user roles in Exabeam. For example, if in your IdP you have an "Advanced Analyst" user group that needs the permissions included in the Tier 3 Analyst (Advanced Analytics) role, you can map the group to that role. Each group can be mapped to one or more roles as needed.
Navigate to Settings
 >Core >User Management > Configure SAML.
In the Group Mappings section (which appears below the Identity Providers table), click Add Group.
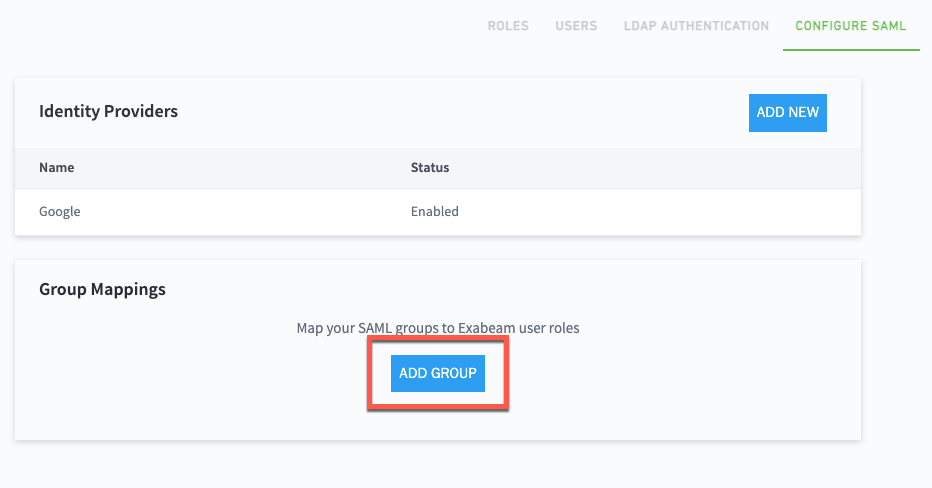
The New Group Mapping dialog box appears.
From the Identity Provider drop-down menu, select the IdP that you want to map.
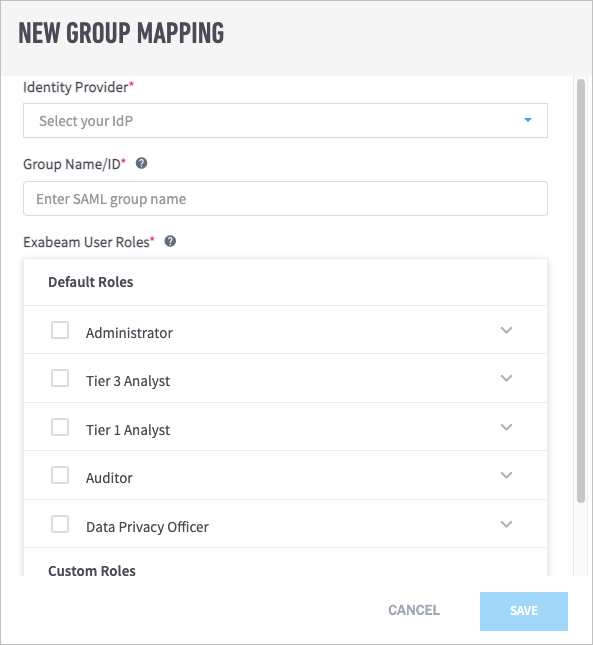
In the Group Name/ID field, enter the group name or ID as it is listed in the IdP.
Important
Group names are case sensitive.
In the Exabeam User Roles list, select the checkboxes for the role(s) that you want to assign to the group.
Click Save.
Manage SAML Login Status
You can make authentication through your selected identity provider (IdP) mandatory for users to log in, or you can allow users to log in through either the IdP or local authentication. You can also disable your selected IdP so that users can only log in through local authentication.
Navigate to Settings
 > Core > User Management > Configure SAML.
In the SAML Status box, select a login status for your IdP.
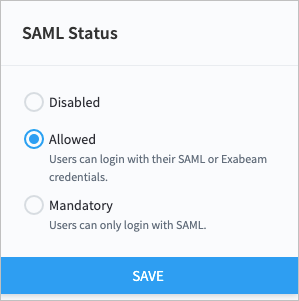
Click Save.
Enable or Disable Identity Providers
Note
You can add multiple identity providers (IdPs) to your Exabeam product, but only one IdP can be enabled at a time.
Navigate to Settings > Core > User Management > Configure SAML.
Move your pointer over the IdP that you want to enable or disable, and click the edit icon.
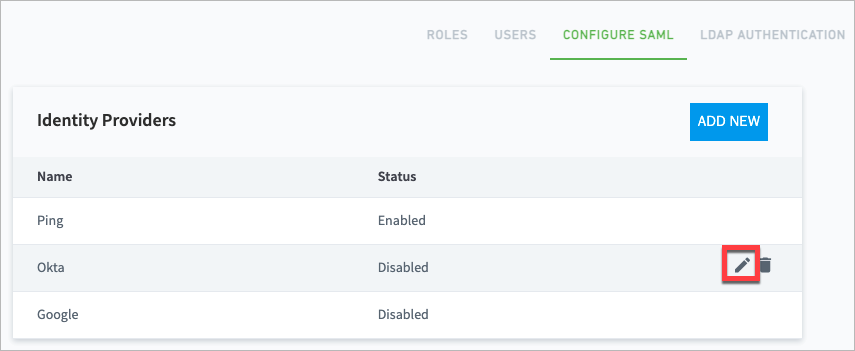
The Edit Identity Provider dialog box opens.
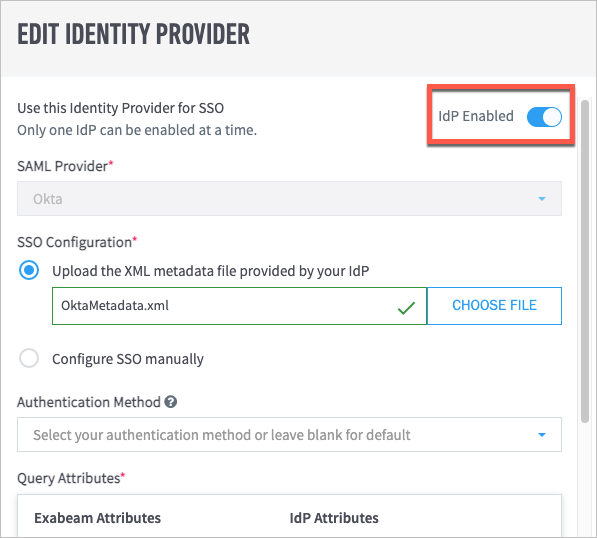
Click the IdP Enabled/Disabled toggle to enable or disable the IdP as needed.
The toggle is blue when the IdP is enabled and gray when it is disabled.
