- Advanced Analytics
- Understand the Basics of Advanced Analytics
- Configure Log Management
- Set Up Admin Operations
- Set Up Authentication and Access Control
- Additional Configurations
- Configure Rules
- Exabeam Threat Intelligence Service
- Threat Intelligence Service Prerequisites
- View Threat Intelligence Feeds
- Threat Intelligence Context Tables
- View Threat Intelligence Context Tables
- Assign a Threat Intelligence Feed to a New Context Table
- Create a New Context Table from a Threat Intelligence Feed
- Check ExaCloud Connector Service Health Status
- Exabeam Cloud Telemetry Service
- Manage Security Content in Advanced Analytics
- Health Status Page
Import Data into a Context Table Using an LDAP Connection
This section details the steps required to create context tables to customize your lookups. In this example, we are creating a lookup table with two fields: the userAccountControl field and the User ID field. This allows the event enricher to map one to the other. For example, let's say you have a log that does not include the username, but instead included the userAccountControl field. This would map the two together. A similar use case would be badge logs: you could create a lookup table that maps the badge ID to the actual username, assuming the badge ID is contained in LDAP.
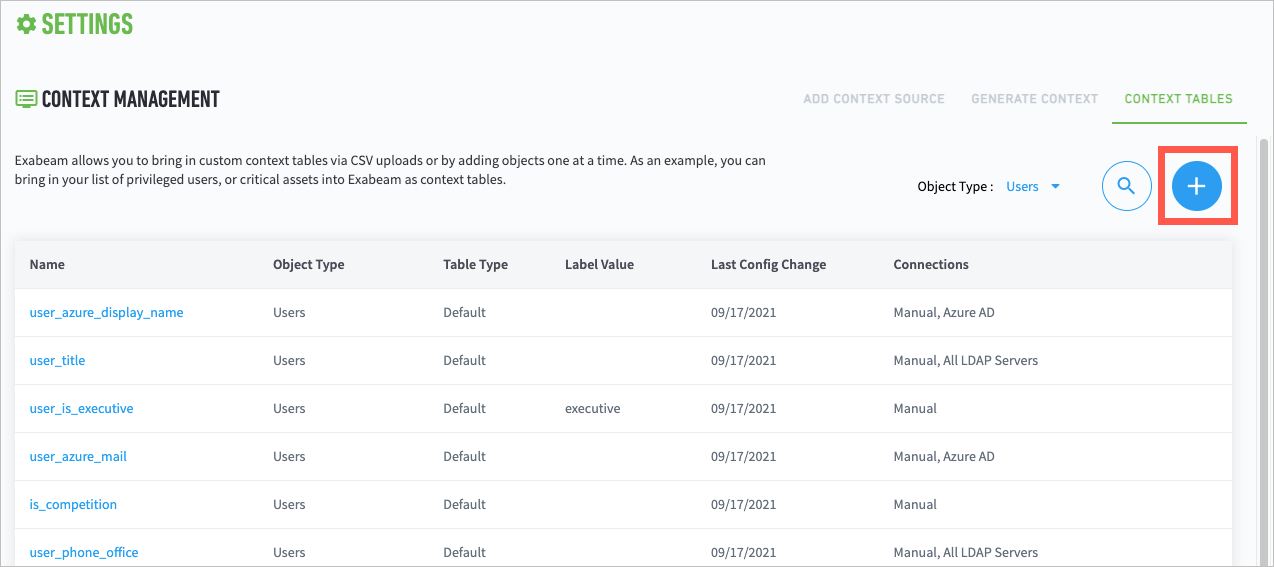
Navigate to the Settings > Analytics > Accounts & Groups > Context Tables.
Click the + icon to add a new table.
Complete the New Context Table dialog box as needed for your context table.
Example 1.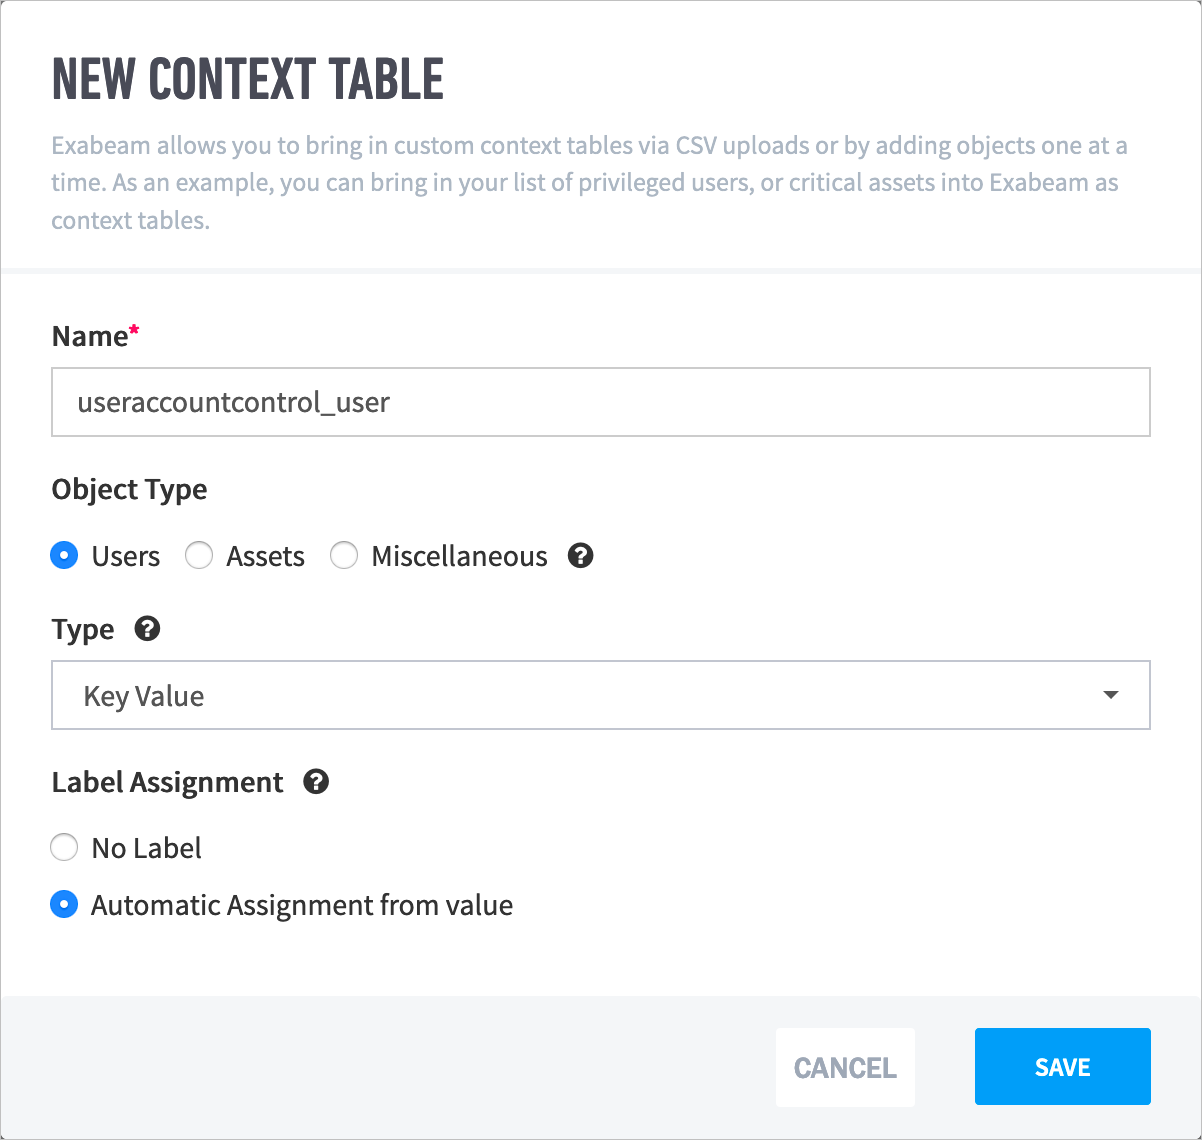
Note
If you do not want to add a label to matching records during parsing or filtering, click No Label.
Click Save.
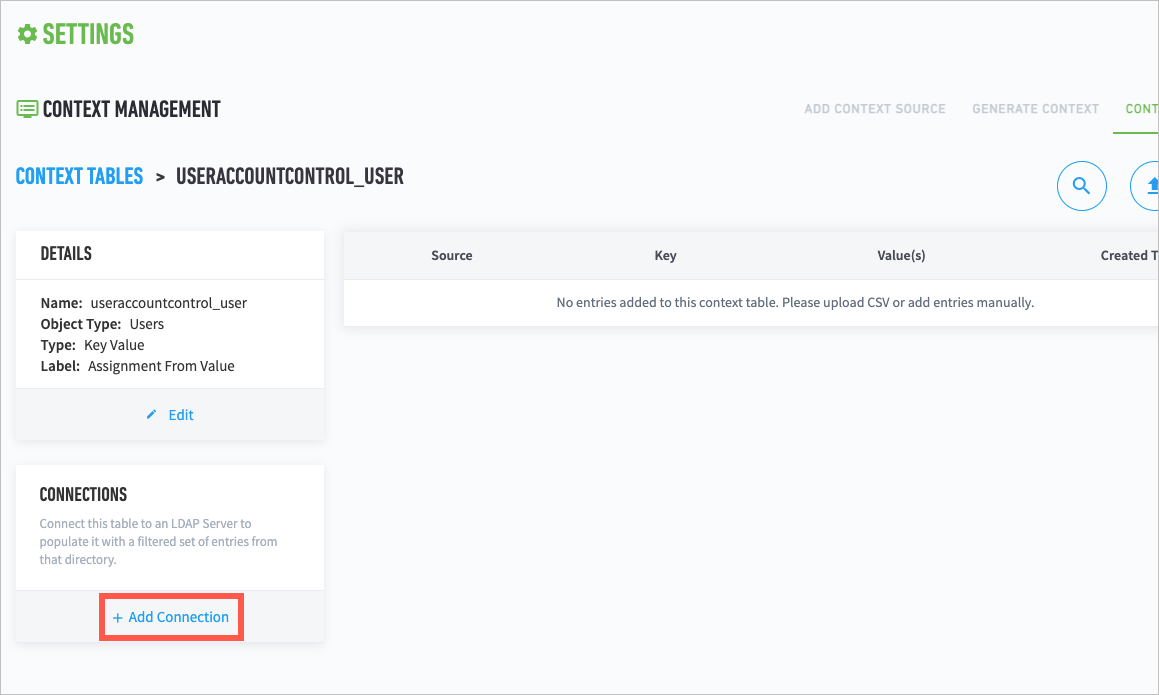
The set up page for the new context table appears.
Click + Add Connection to connect the context table to an LDAP domain server.
Select the LDAP Server(s), Key, and Value to populate the context table. Optionally, filter the attribute source with conditions by clicking ADD CONDITION.
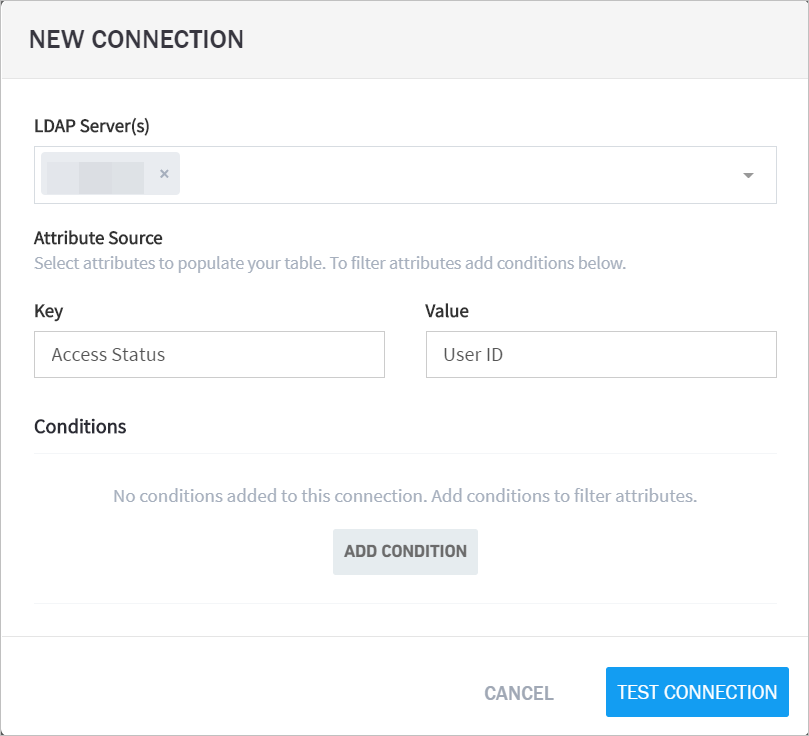
Click TEST CONNECTION to view and validate the test results, and then click SAVE.
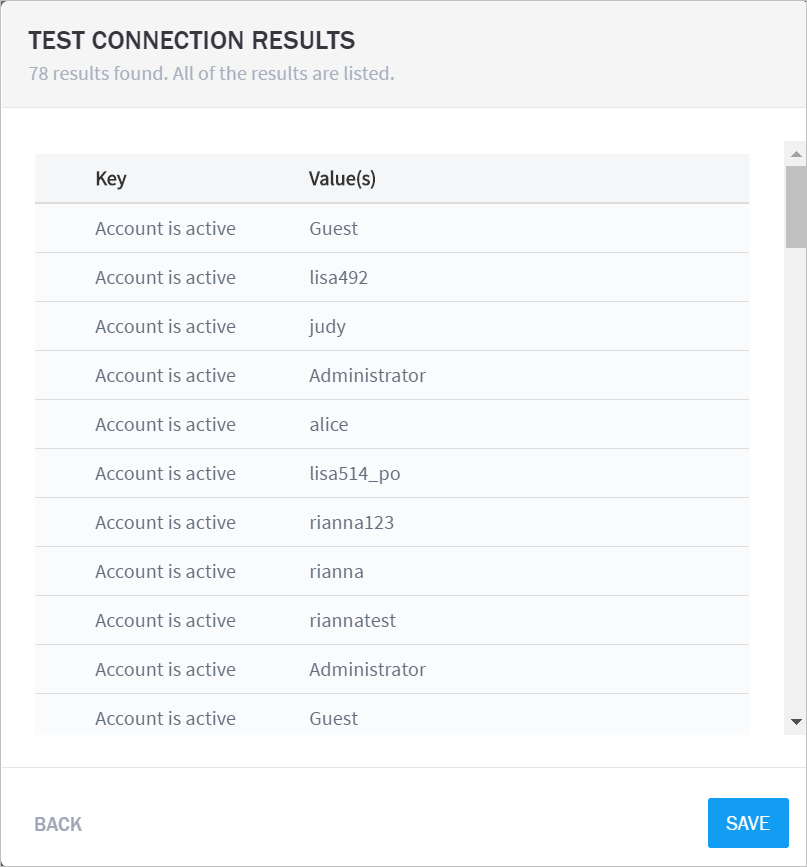
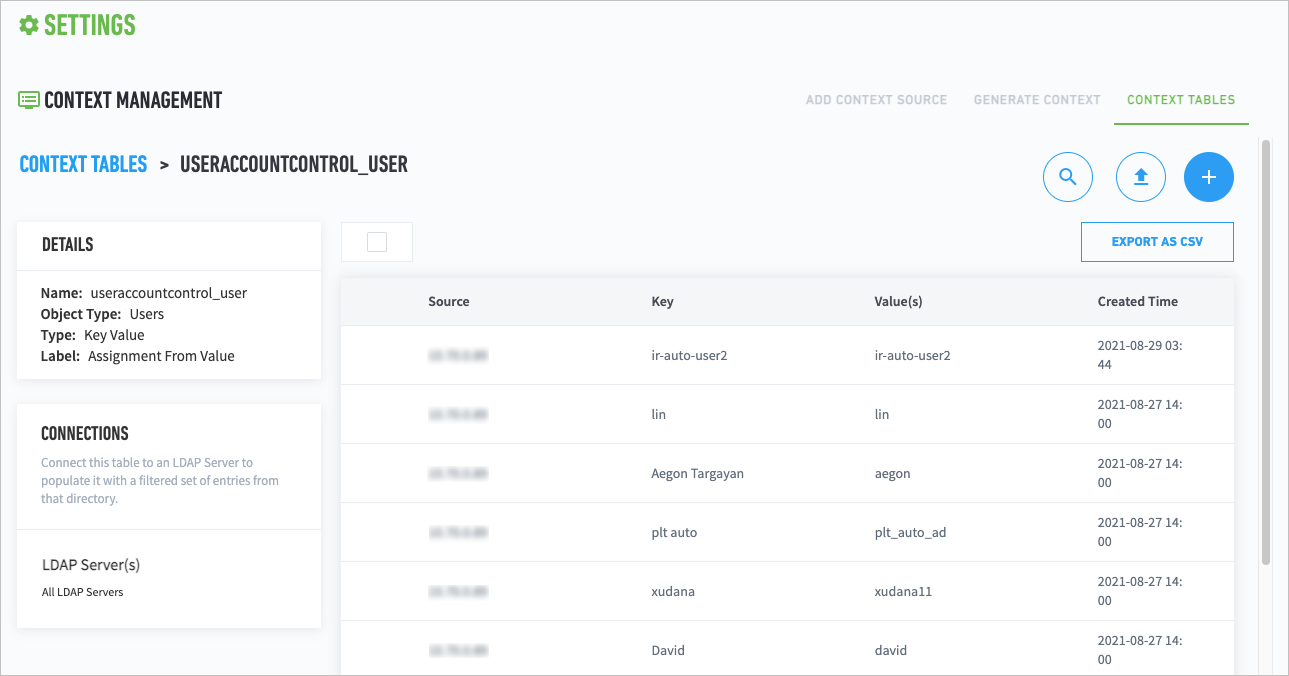
Once context has been integrated, it is displayed in the table. You can use the lookup table in rules as required.
Note
The Created Time column displays the time that the context was processed, as context values may change over time. For example, a user's role may change within an organization, in which case the value for the user's job title would depend on when the context was processed. The Created Time field helps to explain such changes in values.
For assistance in creating custom context tables, contact Exabeam Customer Success by opening a case at Exabeam Community
