- Cloud Collectors Overview
- Administration
- Administrative Access
- Shareable Service Accounts
- Add Accounts for AWS Cloud Collectors
- Add Accounts for Cisco Duo Cloud Collector
- Add Accounts for Google Cloud Collectors
- Add Accounts for Microsoft Cloud Collectors
- Add Accounts for Okta Cloud Collectors
- Add Accounts for Salesforce Cloud Collectors
- Add Accounts for Splunk Cloud Collectors
- Add Accounts for Trend Micro Cloud Collectors
- Add Accounts for Wiz
- Define a Unique Site Name
- Sign Up for the Early Access Program
- Onboard Cloud Collectors
- Abnormal Security Cloud Collector
- Anomali Cloud Collector
- AWS CloudTrail Cloud Collectors
- AWS CloudWatch Cloud Collector
- AWS CloudWatch Alarms Cloud Collector
- AWS GuardDuty Cloud Collector
- AWS S3 Cloud Collector
- AWS Security Lake Cloud Collector
- AWS SQS Cloud Collector
- Azure Activity Logs Cloud Collector
- Azure Blob Storage Cloud Collector
- Azure Log Analytics Cloud Collector
- Azure Event Hub Cloud Collector
- Azure Storage Analytics Cloud Collector
- Azure Virtual Network Flow Cloud Collector
- Box Cloud Collector
- Broadcom Carbon Black Cloud Collector
- Cato Networks Cloud Collector
- ChatGPT Enterprise Cloud Collector
- Cisco Duo Cloud Collector
- Cisco Meraki Cloud Collector
- Cisco Secure Endpoint Cloud Collector
- Cisco Umbrella Cloud Collector
- Cloudflare Cloud Collector
- Cribl Cloud Collector
- CrowdStrike Cloud Collectors
- Cylance Protect (now Arctic Wolf) Cloud Collector
- DataBahn Cloud Collector
- Dropbox Cloud Collector
- GCP Cloud Logging Cloud Collector
- GCP Pub/Sub Cloud Collector
- GCP Security Command Center Cloud Collector
- Gemini Enterprise Cloud Collector
- GitHub Cloud Collector
- Gmail BigQuery Cloud Collector
- Google Workspace Cloud Collector
- LastPass Cloud Collector
- Microsoft Defender XDR (via Azure Event Hub) Cloud Collector
- Microsoft Entra ID Context Cloud Collector
- Microsoft Entra ID Logs Cloud Collector
- Microsoft 365 Exchange Admin Reports Cloud Collector
- Supported Sources from Microsoft 365 Exchange Admin Reports
- Migrate to the Microsoft 365 Exchange Admin Reports Cloud Collector
- Prerequisites to Configure the Microsoft 365 Exchange Admin Reports Cloud Collector
- Configure the Microsoft 365 Exchange Admin Reports Cloud Collector
- Troubleshooting the Microsoft 365 Exchange Admin Reports Cloud Collector
- Microsoft 365 Management Activity Cloud Collector
- Microsoft Security Alerts Cloud Collector
- Microsoft Sentinel (via Event Hub) Cloud Collector
- Mimecast Cloud Collector
- Mimecast Incydr Cloud Collector
- Netskope Alerts Cloud Collector
- Netskope Events Cloud Collector
- Okta Cloud Collector
- Okta Context Cloud Collector
- Palo Alto Networks Cortex Data Lake Cloud Collector
- Palo Alto Networks XDR Cloud Collector
- Progress ShareFile Cloud Collector
- Proofpoint On-Demand Cloud Collector
- Proofpoint Targeted Attack Protection Cloud Collector
- Qualys Cloud Collector
- Recorded Future Cloud Collector
- Recorded Future Context Cloud Collector
- Rest API Cloud Collector
- Salesforce Cloud Collector
- Salesforce EventLog Cloud Collector
- SentinelOne Alerts Cloud Collector
- SentinelOne Cloud Funnel Cloud Collector
- SentinelOne Threats Cloud Collector
- SentinelOne Cloud Collector
- ServiceNow Cloud Collector
- Slack Cloud Collector
- Snowflake Cloud Collector
- Sophos Central Cloud Collector
- Splunk Cloud Collector
- STIX/TAXII Cloud Collector
- Symantec Endpoint Security Cloud Collector
- Tenable Cloud Collector
- Trend Vision One Cloud Collector
- Trellix Endpoint Security Cloud Collector
- Vectra Cloud Collector
- Zoom Cloud Collector
- Zscaler ZIA Cloud Collector
- Webhook Cloud Collectors
- Wiz Issues Cloud Collector
- Wiz API Cloud Collector
- Troubleshooting Cloud Collectors
Configure the Trend Vision One Cloud Collector
Set up the Trend Vision One Cloud Collector to continuously ingest Observed Attack Techniques events and Workbench Alerts.
Before you configure the Trend Vision One Cloud Collector, ensure that you complete the prerequisites.
Log in to the New-Scale Security Operations Platform with your registered credentials as an administrator.
Navigate to Collectors > Cloud Collectors.
Click New Collector.
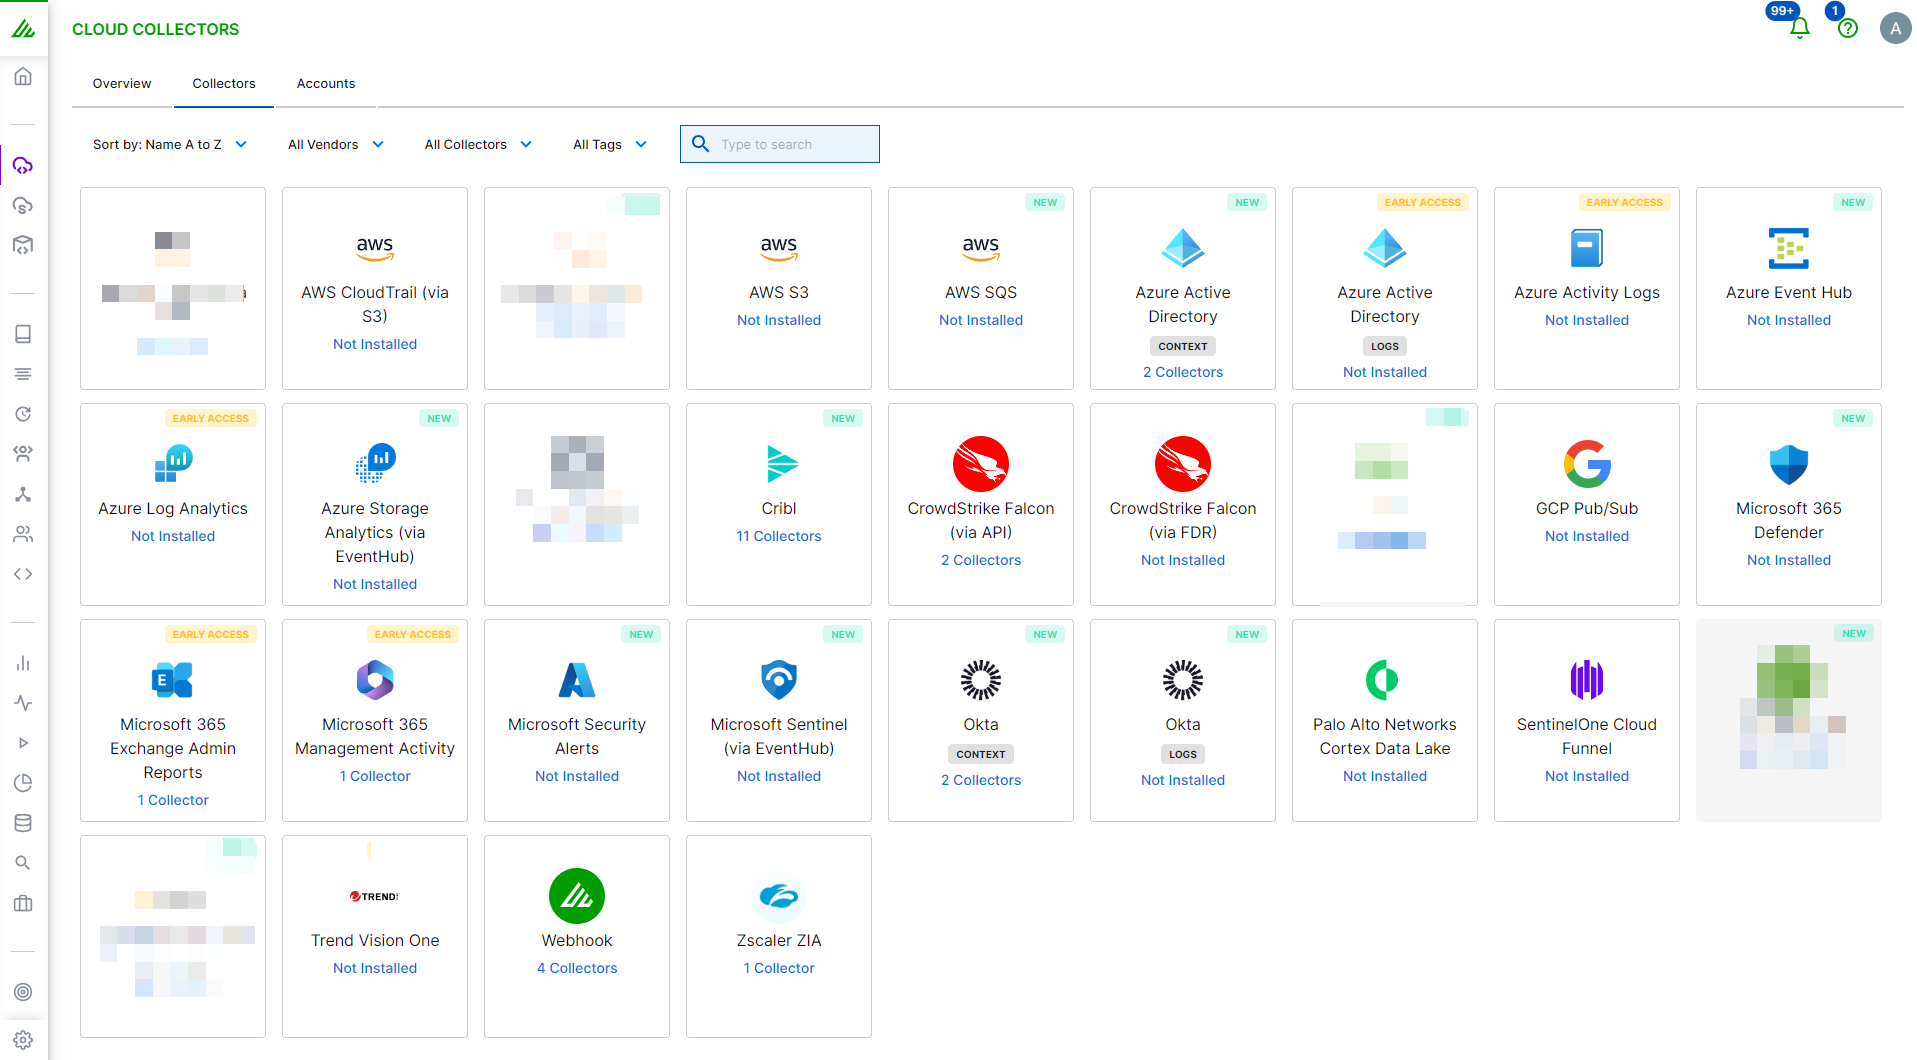
Click Trend Vision One.
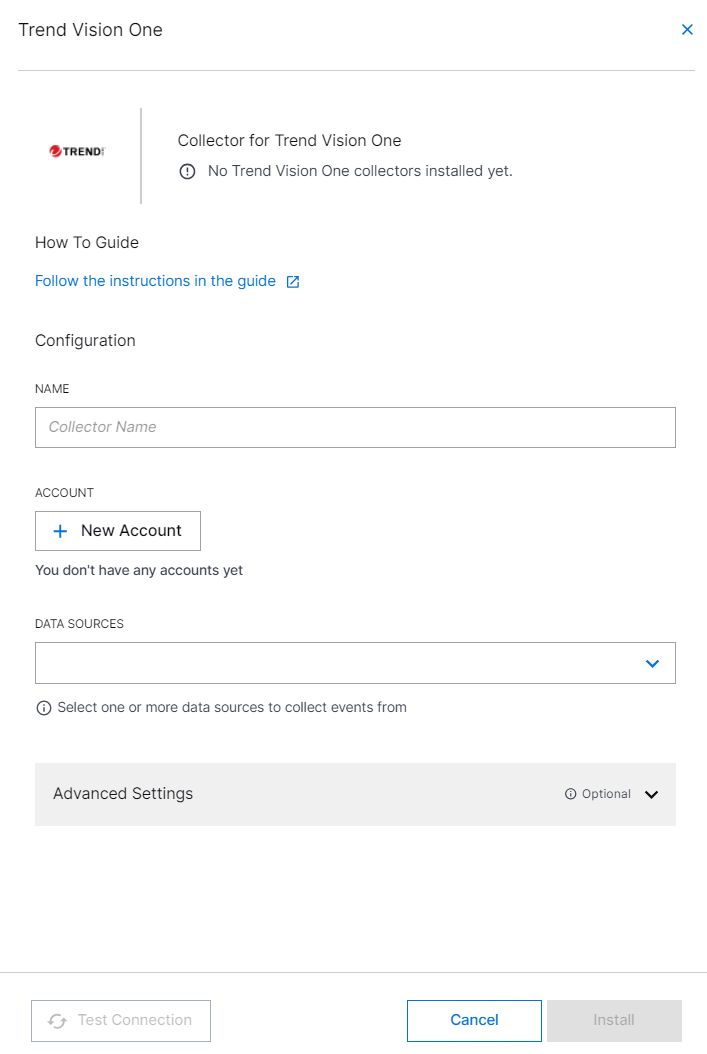
Enter the following information for the cloud collector:
NAME – Specify a name for the cloud collector instance.
ACCOUNT – Click New Account to add a new Trend Micro account or select an existing account if you already created one. You can use the same account information across multiple Trend Micro cloud collectors. For more information, see Add Accounts for Trend Micro Cloud Collectors.
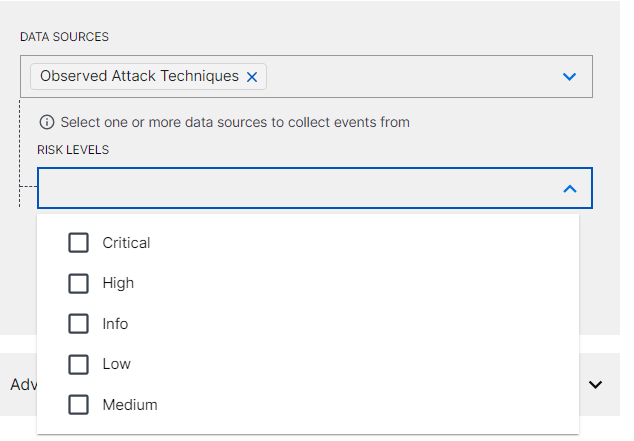
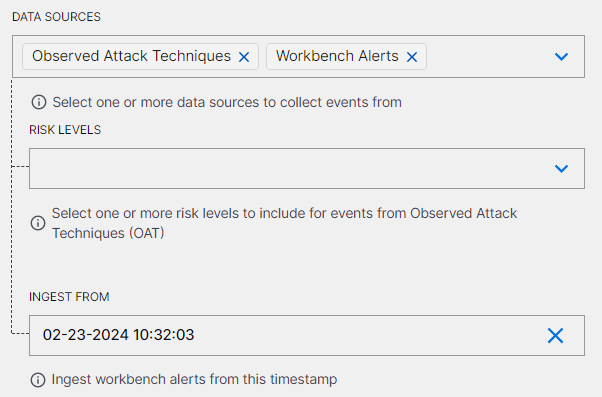
DATA SOURCES – Select the endpoints from which you want to collect data. Options include Observed Attack Techniques and Workbench Alerts.
Observed Attack Techniques – Select the risk levels for the events that you want the cloud collector to include.
Workbench Alerts – Select the INGEST FROM date and time to provide a threshold before which the collector will exclude events. From this time, the collector starts pulling events. If you leave this field blank and do not provide a threshold, events are collected from the current time.
If you want to select a threshold to include events to be ingested from the past, select a date previous to the present date. You can select a date which is backdated to 30 days.
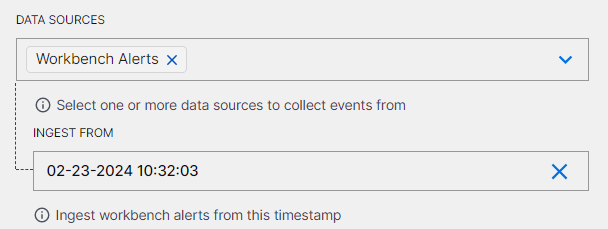
If you select both the options, Observed Attack Techniques and Workbench Alerts, select the risk levels for Observed Attack Techniques and the ingest from date for Workbench Alerts.
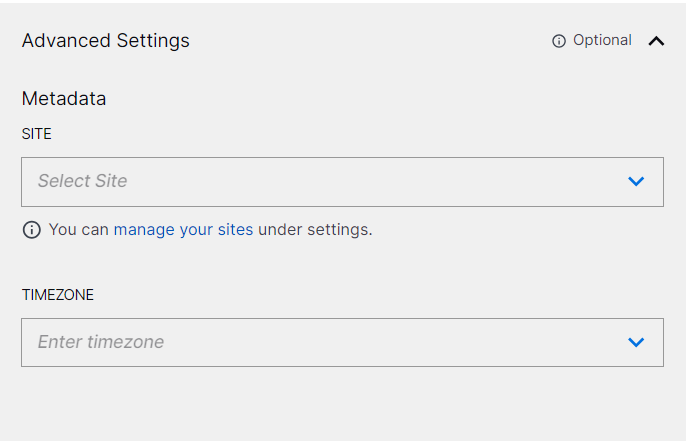
(Optional) SITE – Select an existing site or to create a new site with a unique ID, click manage your sites. Adding a site name helps you to ensure efficient management of environments with overlapping IP addresses.
By entering a site name, you associate the logs with a specific independent site. A sitename metadata field is automatically added to all the events that are going to be ingested via this collector. For more information about Site Management, see Define a Unique Site Name.
(Optional) TIMEZONE – Select a time zone applicable to you for accurate detections and event monitoring.
By entering a time zone, you override the default log time zone. A timezone metadata field is automatically added to all events ingested through this collector.
Click Test Connection to verify communication with the service for Workbench Alerts.
Note
The Test Connection functionality does not test the Observed Attack Techniques data source.
Click Install.
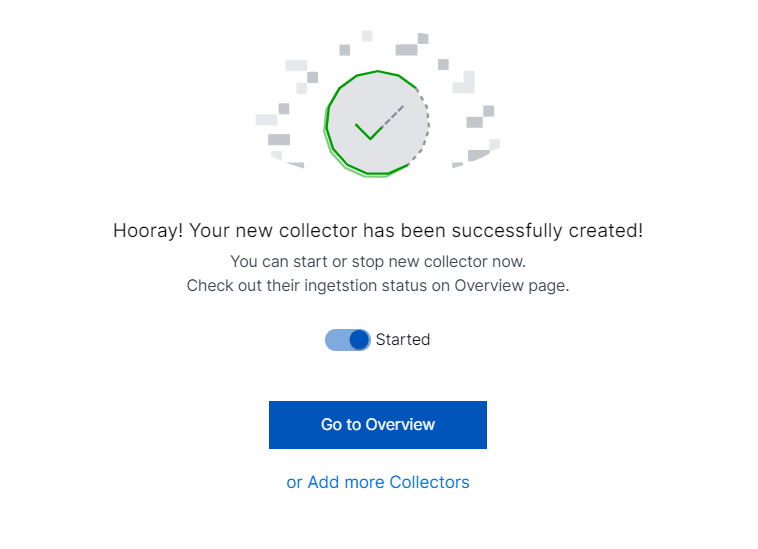
A confirmation message informs you that the new cloud collector is created.
