- Cloud Collectors Overview
- Administration
- Administrative Access
- Shareable Service Accounts
- Add Accounts for AWS Cloud Collectors
- Add Accounts for Cisco Duo Cloud Collector
- Add Accounts for Google Cloud Collectors
- Add Accounts for Microsoft Cloud Collectors
- Add Accounts for Okta Cloud Collectors
- Add Accounts for Salesforce Cloud Collectors
- Add Accounts for Splunk Cloud Collectors
- Add Accounts for Trend Micro Cloud Collectors
- Add Accounts for Wiz
- Define a Unique Site Name
- Sign Up for the Early Access Program
- Onboard Cloud Collectors
- Abnormal Security Cloud Collector
- Anomali Cloud Collector
- AWS CloudTrail Cloud Collectors
- AWS CloudWatch Cloud Collector
- AWS CloudWatch Alarms Cloud Collector
- AWS GuardDuty Cloud Collector
- AWS S3 Cloud Collector
- AWS Security Lake Cloud Collector
- AWS SQS Cloud Collector
- Azure Activity Logs Cloud Collector
- Azure Blob Storage Cloud Collector
- Azure Log Analytics Cloud Collector
- Azure Event Hub Cloud Collector
- Azure Storage Analytics Cloud Collector
- Azure Virtual Network Flow Cloud Collector
- Box Cloud Collector
- Broadcom Carbon Black Cloud Collector
- Cato Networks Cloud Collector
- ChatGPT Enterprise Cloud Collector
- Cisco Duo Cloud Collector
- Cisco Meraki Cloud Collector
- Cisco Secure Endpoint Cloud Collector
- Cisco Umbrella Cloud Collector
- Cloudflare Cloud Collector
- Cribl Cloud Collector
- CrowdStrike Cloud Collectors
- Cylance Protect (now Arctic Wolf) Cloud Collector
- DataBahn Cloud Collector
- Dropbox Cloud Collector
- GCP Cloud Logging Cloud Collector
- GCP Pub/Sub Cloud Collector
- GCP Security Command Center Cloud Collector
- Gemini Enterprise Cloud Collector
- GitHub Cloud Collector
- Gmail BigQuery Cloud Collector
- Google Workspace Cloud Collector
- LastPass Cloud Collector
- Microsoft Defender XDR (via Azure Event Hub) Cloud Collector
- Microsoft Entra ID Context Cloud Collector
- Microsoft Entra ID Logs Cloud Collector
- Microsoft 365 Exchange Admin Reports Cloud Collector
- Supported Sources from Microsoft 365 Exchange Admin Reports
- Migrate to the Microsoft 365 Exchange Admin Reports Cloud Collector
- Prerequisites to Configure the Microsoft 365 Exchange Admin Reports Cloud Collector
- Configure the Microsoft 365 Exchange Admin Reports Cloud Collector
- Troubleshooting the Microsoft 365 Exchange Admin Reports Cloud Collector
- Microsoft 365 Management Activity Cloud Collector
- Microsoft Security Alerts Cloud Collector
- Microsoft Sentinel (via Event Hub) Cloud Collector
- Mimecast Cloud Collector
- Mimecast Incydr Cloud Collector
- Netskope Alerts Cloud Collector
- Netskope Events Cloud Collector
- Okta Cloud Collector
- Okta Context Cloud Collector
- Palo Alto Networks Cortex Data Lake Cloud Collector
- Palo Alto Networks XDR Cloud Collector
- Progress ShareFile Cloud Collector
- Proofpoint On-Demand Cloud Collector
- Proofpoint Targeted Attack Protection Cloud Collector
- Qualys Cloud Collector
- Recorded Future Cloud Collector
- Recorded Future Context Cloud Collector
- Rest API Cloud Collector
- Salesforce Cloud Collector
- Salesforce EventLog Cloud Collector
- SentinelOne Alerts Cloud Collector
- SentinelOne Cloud Funnel Cloud Collector
- SentinelOne Threats Cloud Collector
- SentinelOne Cloud Collector
- ServiceNow Cloud Collector
- Slack Cloud Collector
- Snowflake Cloud Collector
- Sophos Central Cloud Collector
- Splunk Cloud Collector
- STIX/TAXII Cloud Collector
- Symantec Endpoint Security Cloud Collector
- Tenable Cloud Collector
- Trend Vision One Cloud Collector
- Trellix Endpoint Security Cloud Collector
- Vectra Cloud Collector
- Zoom Cloud Collector
- Zscaler ZIA Cloud Collector
- Webhook Cloud Collectors
- Wiz Issues Cloud Collector
- Wiz API Cloud Collector
- Troubleshooting Cloud Collectors
Prerequisites to Configure the Azure Event Hub Cloud Collector
Before you configure the Azure Event Hub Cloud Collector you must complete the following prerequisites.
For Shared Access Signature Authentication, complete the following prerequisites.
Obtain the consumer group name to be entered while configuring the Cloud Collector.
Obtain the connection string to be entered while configuring the Cloud Collector.
(Optional) Configure your Event Hub setup for enabling sufficient egress. Consider referring to the tip in this section.
For Role Based Access Control Authentication, complete the following prerequisites.
Note the values for Client ID, Tenant ID, Secret Value from your Microsoft Entra ID application and the values for Namespace endpoint, EventHub name, and Consumer group from your Event Hub configuration.
Obtain the Consumer Group Name and Connection String
Before configuring the Azure Event Hub Cloud Collector, use the following steps to obtain the Consumer Group Name and Connection String for your EventHub endpoint.
To obtain the name of the consumer group of the Event Hub, perform the following steps.
On the Azure portal, navigate to the Event Hubs namespace in which the Event Hub with the data you want to retrieve resides.

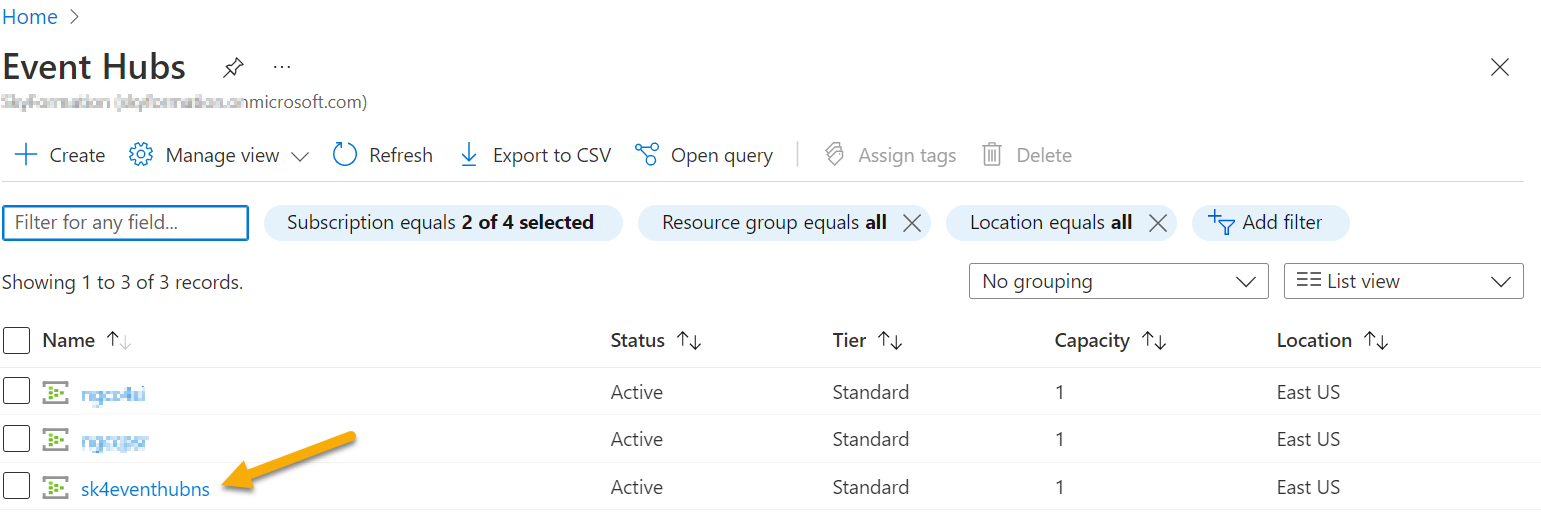
Select the EventHub where your data to be retrieved resides.
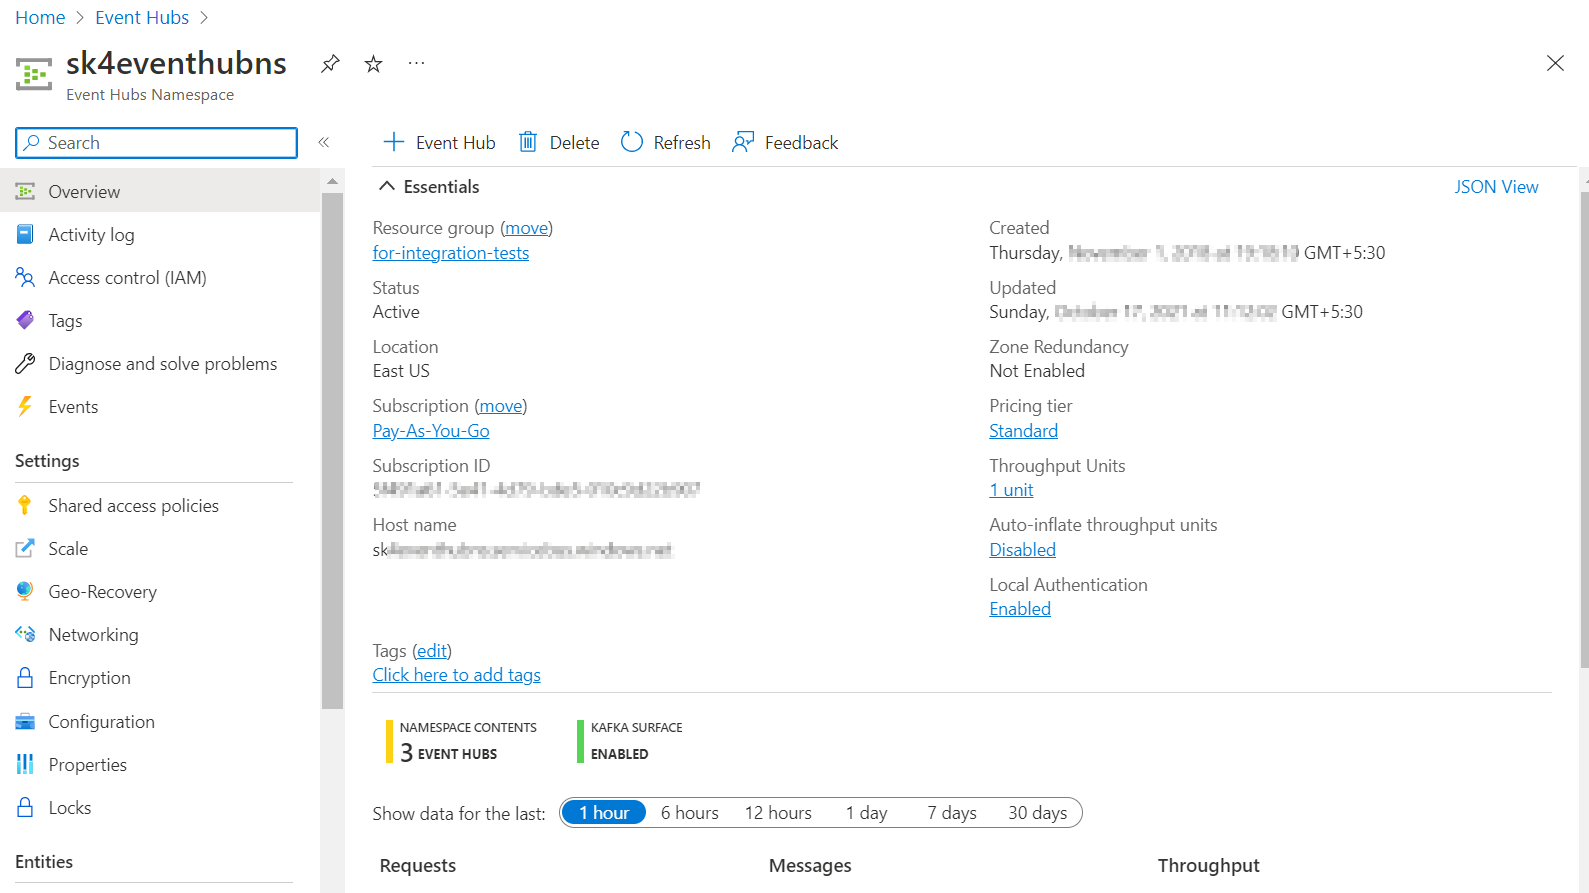
Note
If connection errors occur after the Cloud Collector configuration, enable local authentication for a given Event Hubs namespace.
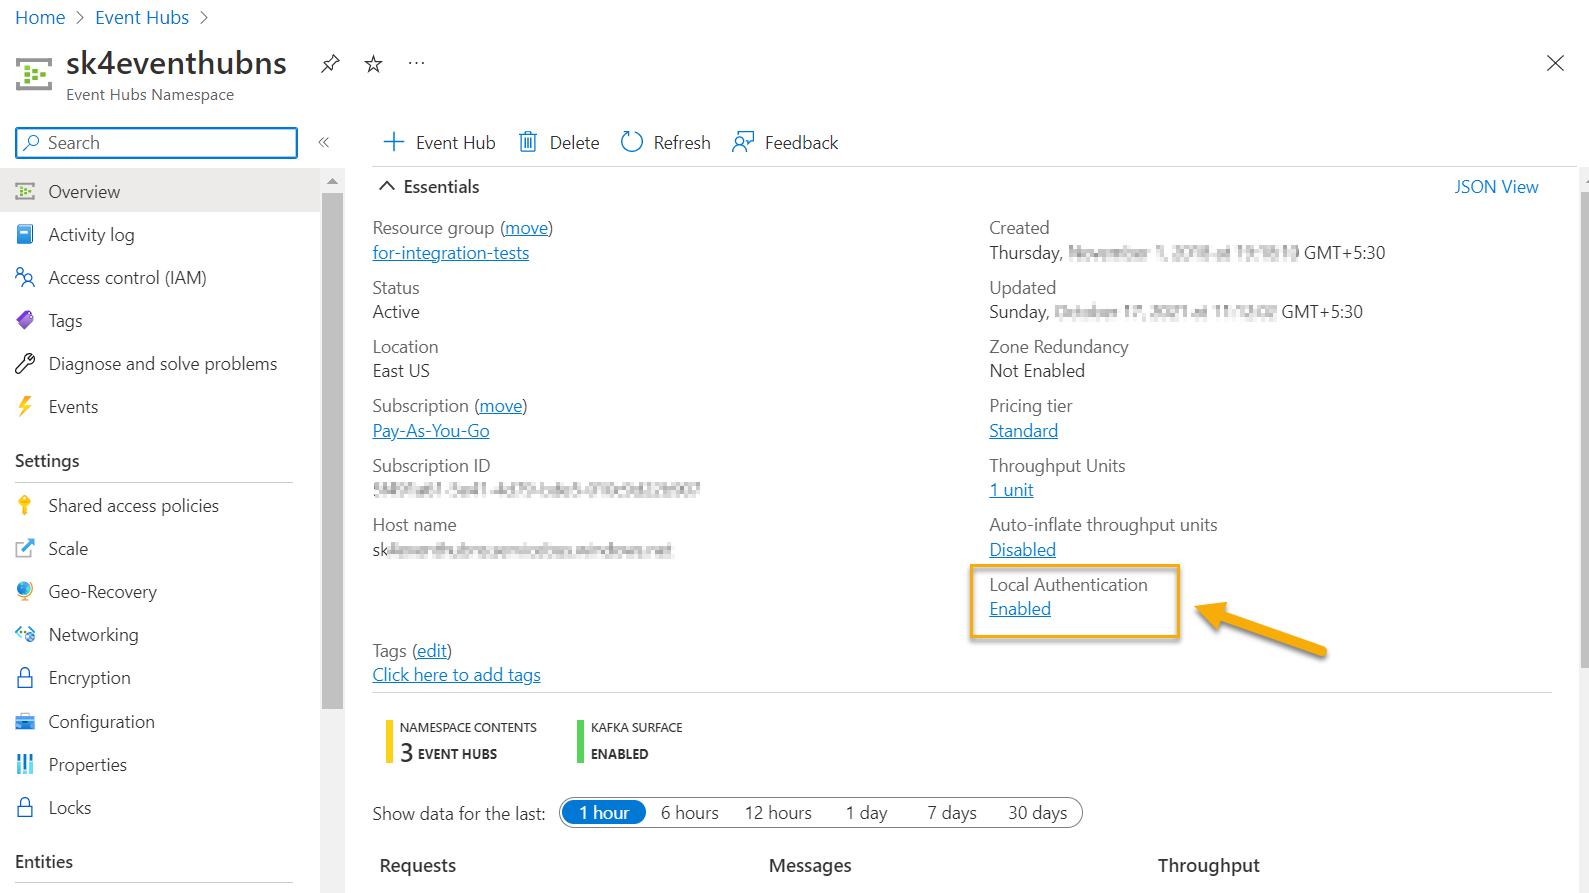
Navigate to Consumer groups to note the name of the consumer group.
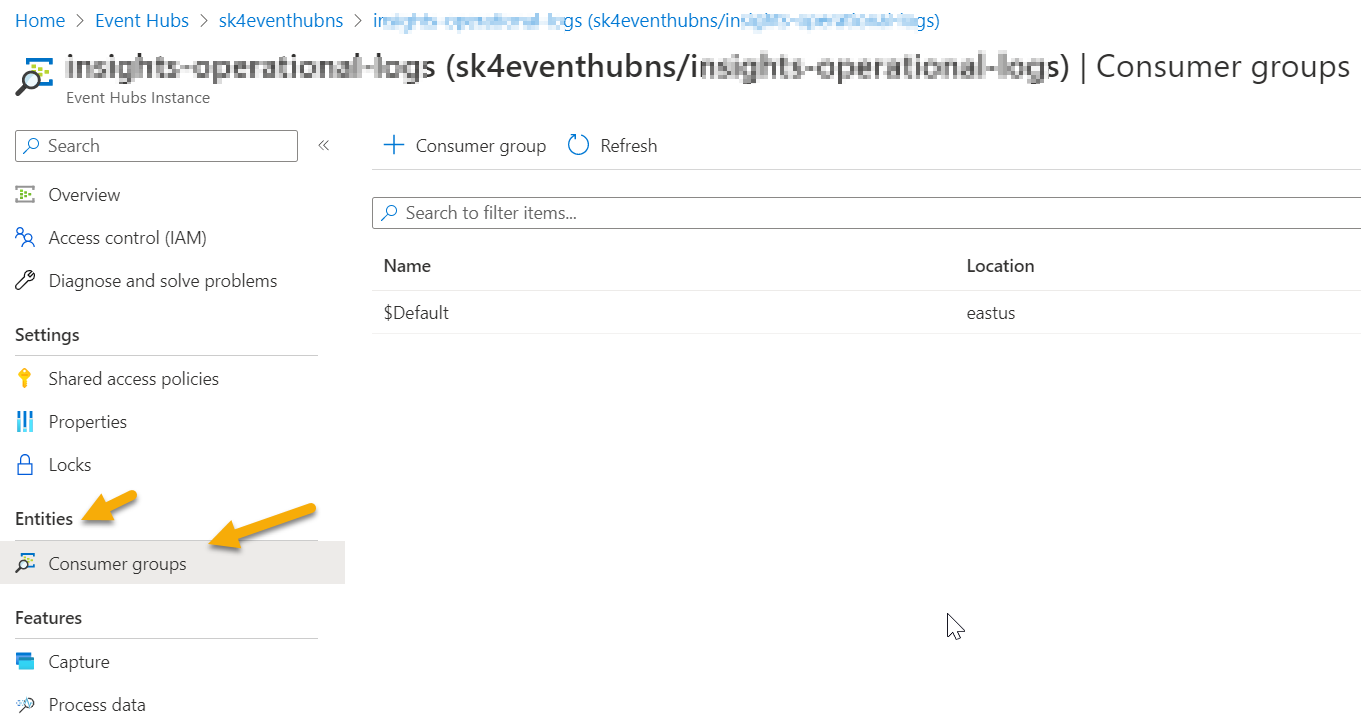
Note
Ensure that you create and use a unique consumer group for each EventHub that you configure. If you use the same consumer group for two cloud collector instances, it may result in event loss or ingestion issues.
Create a SAS policy with listen-only permissions for Exabeam:
In Event Hub, navigate to Shared access policies.
Click + Add to add a new Policy on the Add SAS Policy page and enable the Listen permission.
Provide a descriptive name for the token which is listen-only, then click Create.
After you see the confirmation message (for example Creating SAS Policy successful), access the policy you just created and note the following.
SAS policy name
Primary key value
Note
The Connection string primary key acts as a connection string for the Azure Event Hub Cloud Collector.
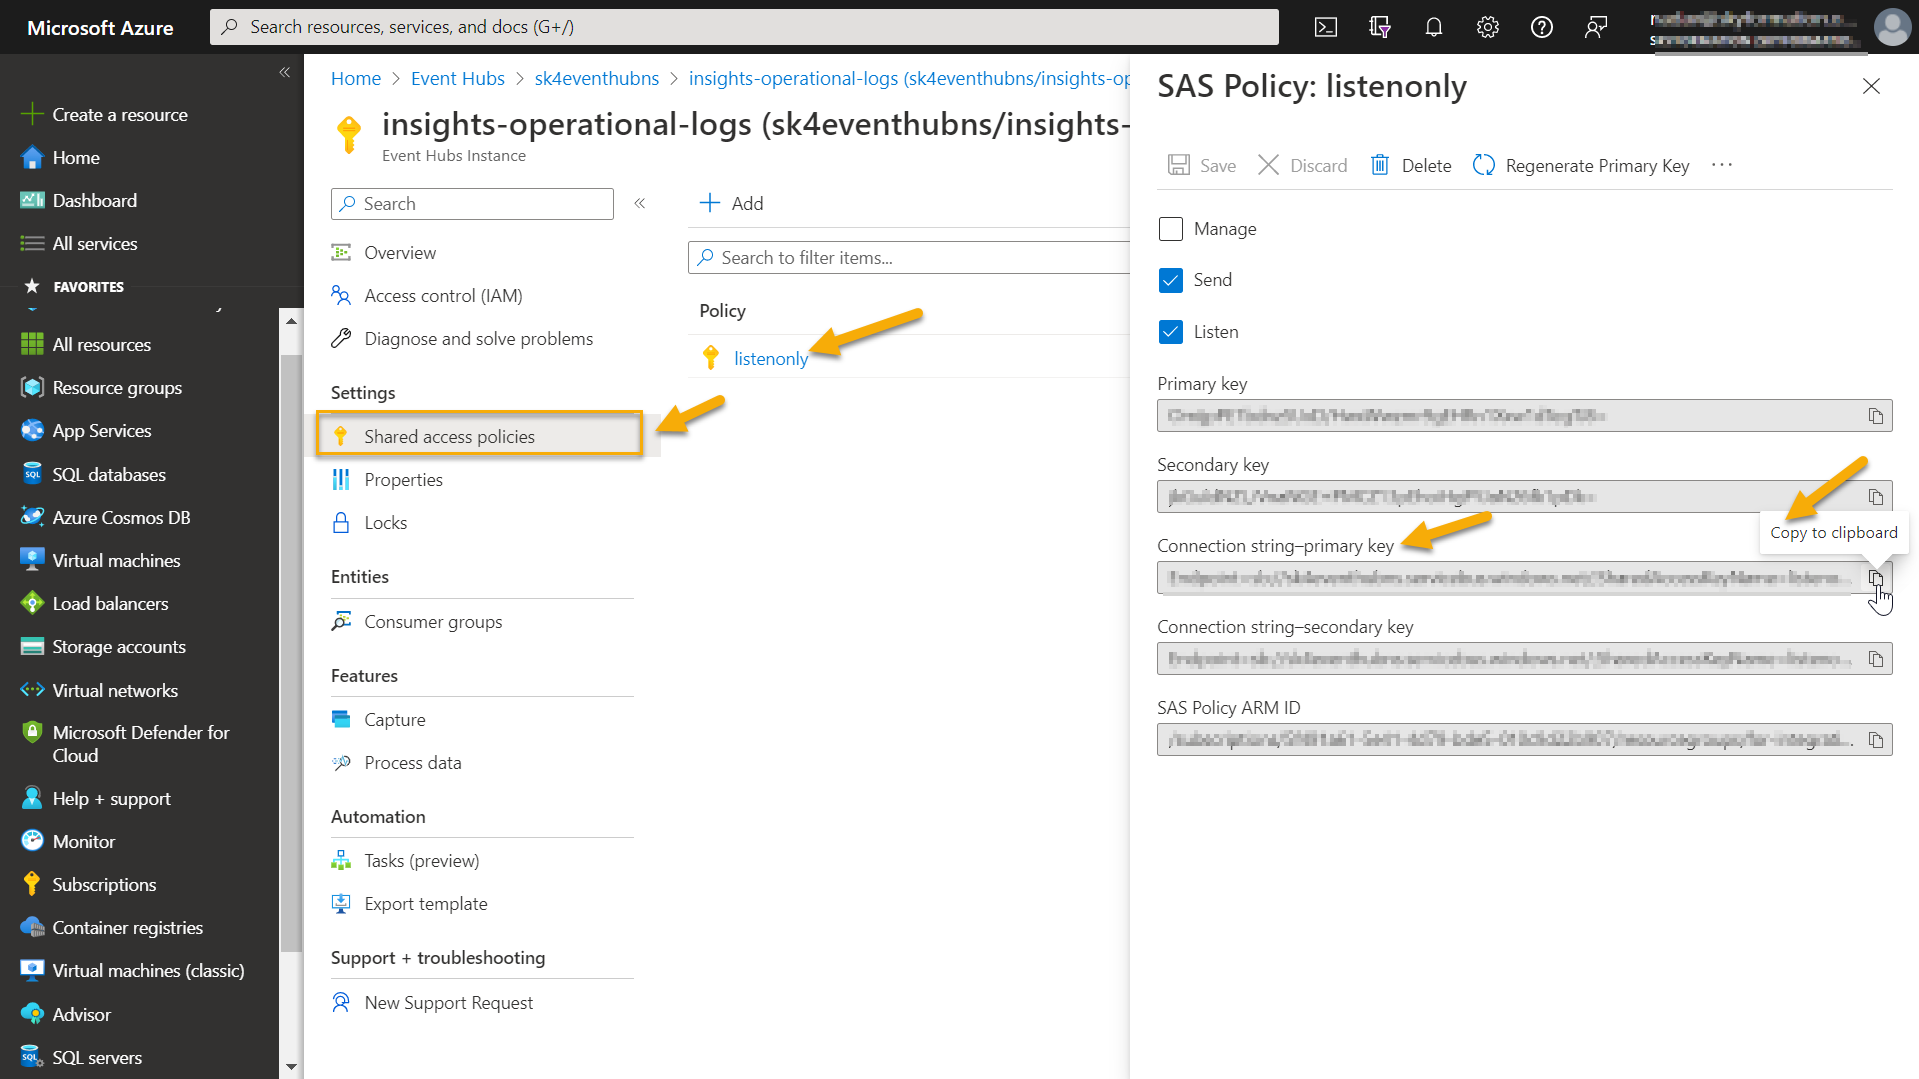
Proceed to configure the Azure Event Hub Cloud Collector.
Tip
To configure your Event Hub setup for enabling sufficient egress, refer to the following tips.
Examine the incoming number of bytes per second, by navigating to the Event Hub page on the Azure portal.
Set up the Event Hub with a good throughput capacity. The egress and ingress capacity of Event Hubs is measured by throughput units (TU). Ensure that your Event Hub provides 1 Throughput Unit (TU) per 2MB/sec egress and 1MB/sec ingress capacity.
Ensure that your Event Hub has 32 partitions and at least 1 TU per partition.
If you notice that your workload requirement exceeds the maximum value recommended for Event Hub Premium which is 32 partitions and 40 TU, you need to migrate to a Dedicated Event Hub Cluster.
Consider using the Auto-inflate throughput feature. You can enable Auto-inflate on the Event Hub namespace to automatically increase the number of TUs based on the load. For more information about throughput units, limits, and associated billing, see Event Hubs FAQs and Azure Event Hubs quotas and limits.
Create and Register a Microsoft Entra ID Application
Log into your Azure account by accessing the Azure portal.
From the available Azure Services, select Microsoft Entra ID (formerly called Azure Active Directory).

From the left navigation pane, select App Registrations, then click New Registration.
On the Register an application page, enter the following information:
Name – Specify a name for the new application. For example, Exabeam MS Entra ID App.
Supported account types – Select the account type Accounts in this organizational directory only.
Redirect URI – (Optional) Select the Web platform and specify a URI.
Click Register. When registration is complete, the Overview tab of the new application is displayed.

Copy and make a note of the values for both the Application (client) ID and the Directory (tenant) ID. You will need these values when configuring the cloud collector.
Generate Secrets
In your new Microsoft Entra ID application, click Certificates & secrets in the left navigation pane.
On the Client Secrets tab, click New client secret and use the following steps.
Enter a Description and an Expire term for the secret.
Click Add. The new client secret is displayed on the Client secrets tab.
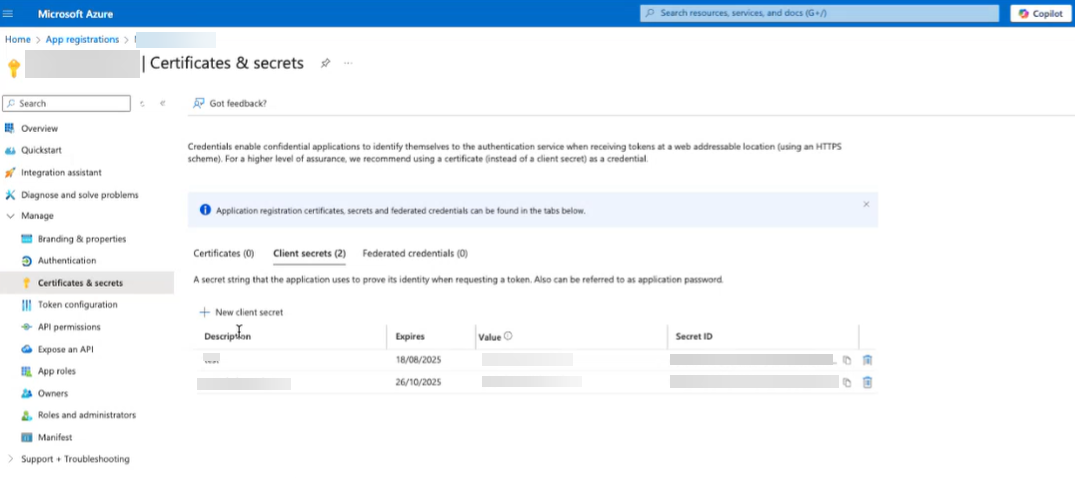
Copy and make a note of the Value and Secret ID. You will need this client secret value when you configure the cloud collector. You will not be able to recover this value later if you don't make a note of it.

Provide Access to EventHub
Use the following steps to obtain Namespace, EventHub name, and Consumer group.
On the Azure portal, navigate to the Event Hubs namespace and click Access control (IAM).
Add a role assignment and assign a role such as Azure Event Hubs Data Sender or Azure Event Hubs Data Owner by navigating to Add > Add role assignment. For more information, see Assign Azure roles using the Azure portal in the Microsoft documentation.
In the Members tab, in Assign access to, select User, group, or service principal.
Click Select Members and search for your Event Hub app by typing the name of the app and select the app name.
Define conditions and scope in the next steps and click Review+assign.
On the Azure portal, navigate to the Event Hubs namespace and note the values for Namespace, Event Hub name, and Consumer Group Name.
