- Cloud Collectors Overview
- Administration
- Administrative Access
- Shareable Service Accounts
- Add Accounts for AWS Cloud Collectors
- Add Accounts for Cisco Duo Cloud Collector
- Add Accounts for Google Cloud Collectors
- Add Accounts for Microsoft Cloud Collectors
- Add Accounts for Okta Cloud Collectors
- Add Accounts for Salesforce Cloud Collectors
- Add Accounts for Splunk Cloud Collectors
- Add Accounts for Trend Micro Cloud Collectors
- Add Accounts for Wiz
- Define a Unique Site Name
- Sign Up for the Early Access Program
- Onboard Cloud Collectors
- Abnormal Security Cloud Collector
- Anomali Cloud Collector
- AWS CloudTrail Cloud Collectors
- AWS CloudWatch Cloud Collector
- AWS CloudWatch Alarms Cloud Collector
- AWS GuardDuty Cloud Collector
- AWS S3 Cloud Collector
- AWS Security Lake Cloud Collector
- AWS SQS Cloud Collector
- Azure Activity Logs Cloud Collector
- Azure Blob Storage Cloud Collector
- Azure Log Analytics Cloud Collector
- Azure Event Hub Cloud Collector
- Azure Storage Analytics Cloud Collector
- Azure Virtual Network Flow Cloud Collector
- Box Cloud Collector
- Broadcom Carbon Black Cloud Collector
- Cato Networks Cloud Collector
- ChatGPT Enterprise Cloud Collector
- Cisco Duo Cloud Collector
- Cisco Meraki Cloud Collector
- Cisco Secure Endpoint Cloud Collector
- Cisco Umbrella Cloud Collector
- Cloudflare Cloud Collector
- Cribl Cloud Collector
- CrowdStrike Cloud Collectors
- Cylance Protect (now Arctic Wolf) Cloud Collector
- DataBahn Cloud Collector
- Dropbox Cloud Collector
- GCP Cloud Logging Cloud Collector
- GCP Pub/Sub Cloud Collector
- GCP Security Command Center Cloud Collector
- Gemini Enterprise Cloud Collector
- GitHub Cloud Collector
- Gmail BigQuery Cloud Collector
- Google Workspace Cloud Collector
- LastPass Cloud Collector
- Microsoft Defender XDR (via Azure Event Hub) Cloud Collector
- Microsoft Entra ID Context Cloud Collector
- Microsoft Entra ID Logs Cloud Collector
- Microsoft 365 Exchange Admin Reports Cloud Collector
- Supported Sources from Microsoft 365 Exchange Admin Reports
- Migrate to the Microsoft 365 Exchange Admin Reports Cloud Collector
- Prerequisites to Configure the Microsoft 365 Exchange Admin Reports Cloud Collector
- Configure the Microsoft 365 Exchange Admin Reports Cloud Collector
- Troubleshooting the Microsoft 365 Exchange Admin Reports Cloud Collector
- Microsoft 365 Management Activity Cloud Collector
- Microsoft Security Alerts Cloud Collector
- Microsoft Sentinel (via Event Hub) Cloud Collector
- Mimecast Cloud Collector
- Mimecast Incydr Cloud Collector
- Netskope Alerts Cloud Collector
- Netskope Events Cloud Collector
- Okta Cloud Collector
- Okta Context Cloud Collector
- Palo Alto Networks Cortex Data Lake Cloud Collector
- Palo Alto Networks XDR Cloud Collector
- Progress ShareFile Cloud Collector
- Proofpoint On-Demand Cloud Collector
- Proofpoint Targeted Attack Protection Cloud Collector
- Qualys Cloud Collector
- Recorded Future Cloud Collector
- Recorded Future Context Cloud Collector
- Rest API Cloud Collector
- S2W Threat Intelligence Cloud Collector
- Salesforce Cloud Collector
- Salesforce EventLog Cloud Collector
- SentinelOne Alerts Cloud Collector
- SentinelOne Cloud Funnel Cloud Collector
- SentinelOne Threats Cloud Collector
- SentinelOne Cloud Collector
- ServiceNow Cloud Collector
- Slack Cloud Collector
- Snowflake Cloud Collector
- Sophos Central Cloud Collector
- Splunk Cloud Collector
- STIX/TAXII Cloud Collector
- Symantec Endpoint Security Cloud Collector
- Tenable Cloud Collector
- Trend Vision One Cloud Collector
- Trellix Endpoint Security Cloud Collector
- Vectra Cloud Collector
- Zoom Cloud Collector
- Zscaler ZIA Cloud Collector
- Webhook Cloud Collectors
- Wiz Issues Cloud Collector
- Wiz API Cloud Collector
- Troubleshooting Cloud Collectors
Prerequisites to Configure the Broadcom Carbon Black Cloud Collector
Before you configure the Broadcom Carbon Black Cloud Collector you must complete the following prerequisites.
Create the S3 Bucket
Use the following steps to create the S3 bucket for storing your data.
Log in to the AWS console with your credentials.
Locate the region selector, and select the same region where your Broadcom Carbon Black Cloud instance is located. This corresponds to the product URL you use for accessing Carbon Black Cloud. For more information, see Create an S3 Bucket in the AWS Console in the Carbon Black Cloud Console Documentation.
Navigate to the S3 console and click Create bucket. For more information see Creating a Bucket in the AWS documentation. While creating a bucket, when you specify a name for your S3 bucket, ensure that the bucket name is unique and follows the Bucket naming rules mentioned by AWS. For example, mylogs.mycompanyname.
After creating a bucket, add Carbon Black to the list of accounts that can read and write objects in your S3 bucket. For more information see Configuring ACLs.
Access the AWS Console.
In the Buckets list, click the name of the bucket for which you want to set permissions.
Click Permissions.
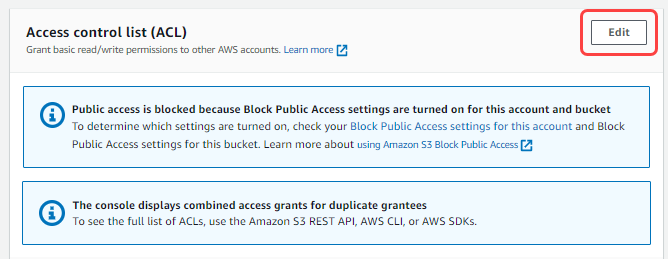
Scroll down to Access control list (ACL) section and click Edit.
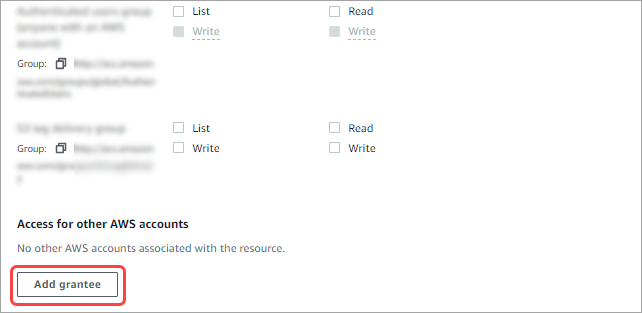
Click Add grantee.
Enter our [email protected] canonical ID: c768943f39940f1a079ee0948ab692883824dcb6049cdf3d7725691bf4f31cbb.
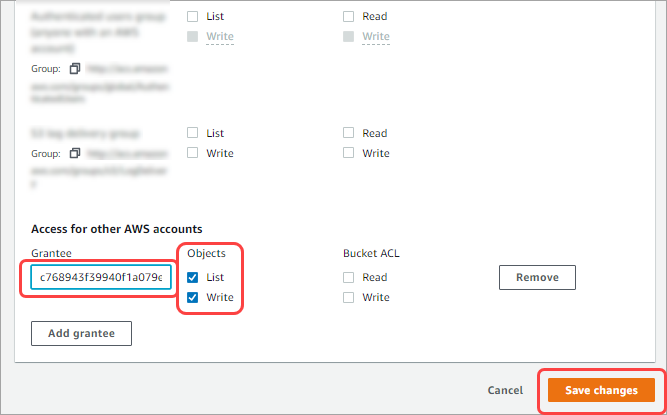
Enable both List and Write objects.
Click Save changes.
Configure S3/SQS Integration
Use the following steps to configure the SQS queue that receives a notification when new objects are added to the S3 Bucket.
In the AWS Web Console, navigate to the S3 bucket where the data is located.
Under Properties, enable event notification for the SQS queue in the S3 bucket on which you want to receive logs.
For more information, see Enable Event Notifications in the AWS documentation.
To filter event notifications by suffix, enter a suffix. You can add suffix as .gz in the suffix option.
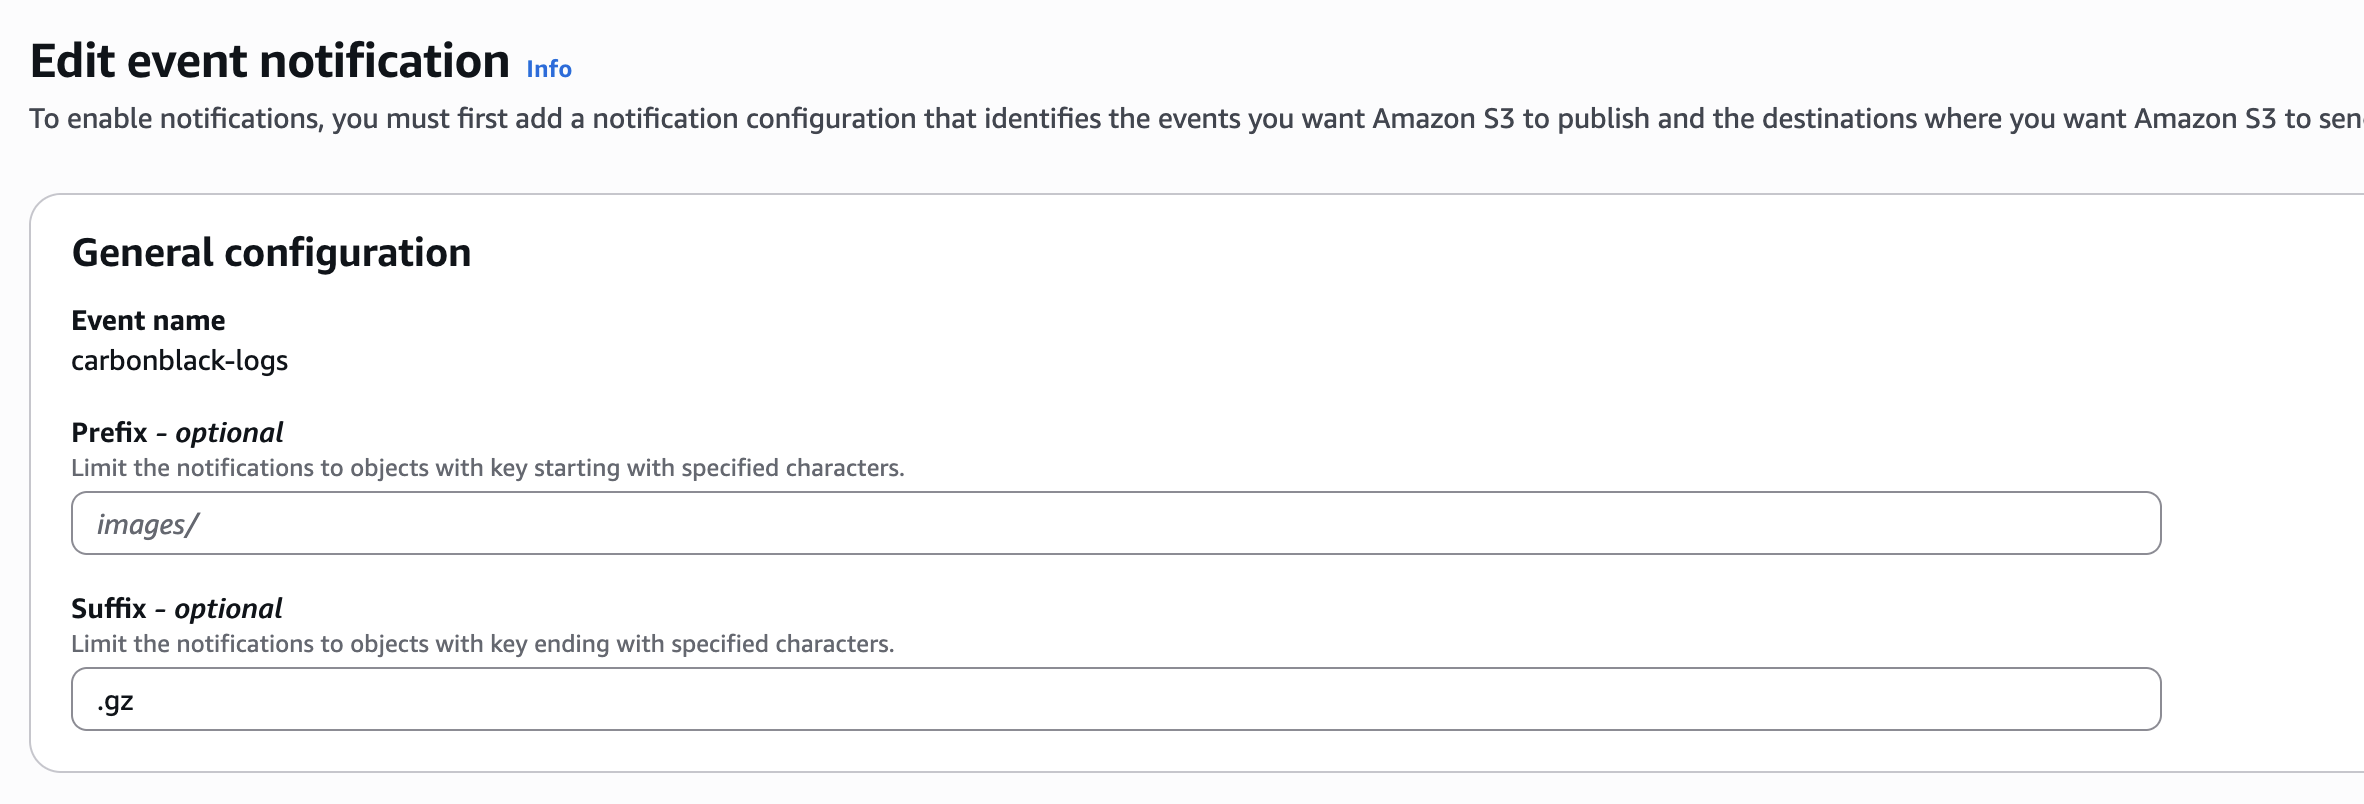
Select All object create events to get notifications for all events.
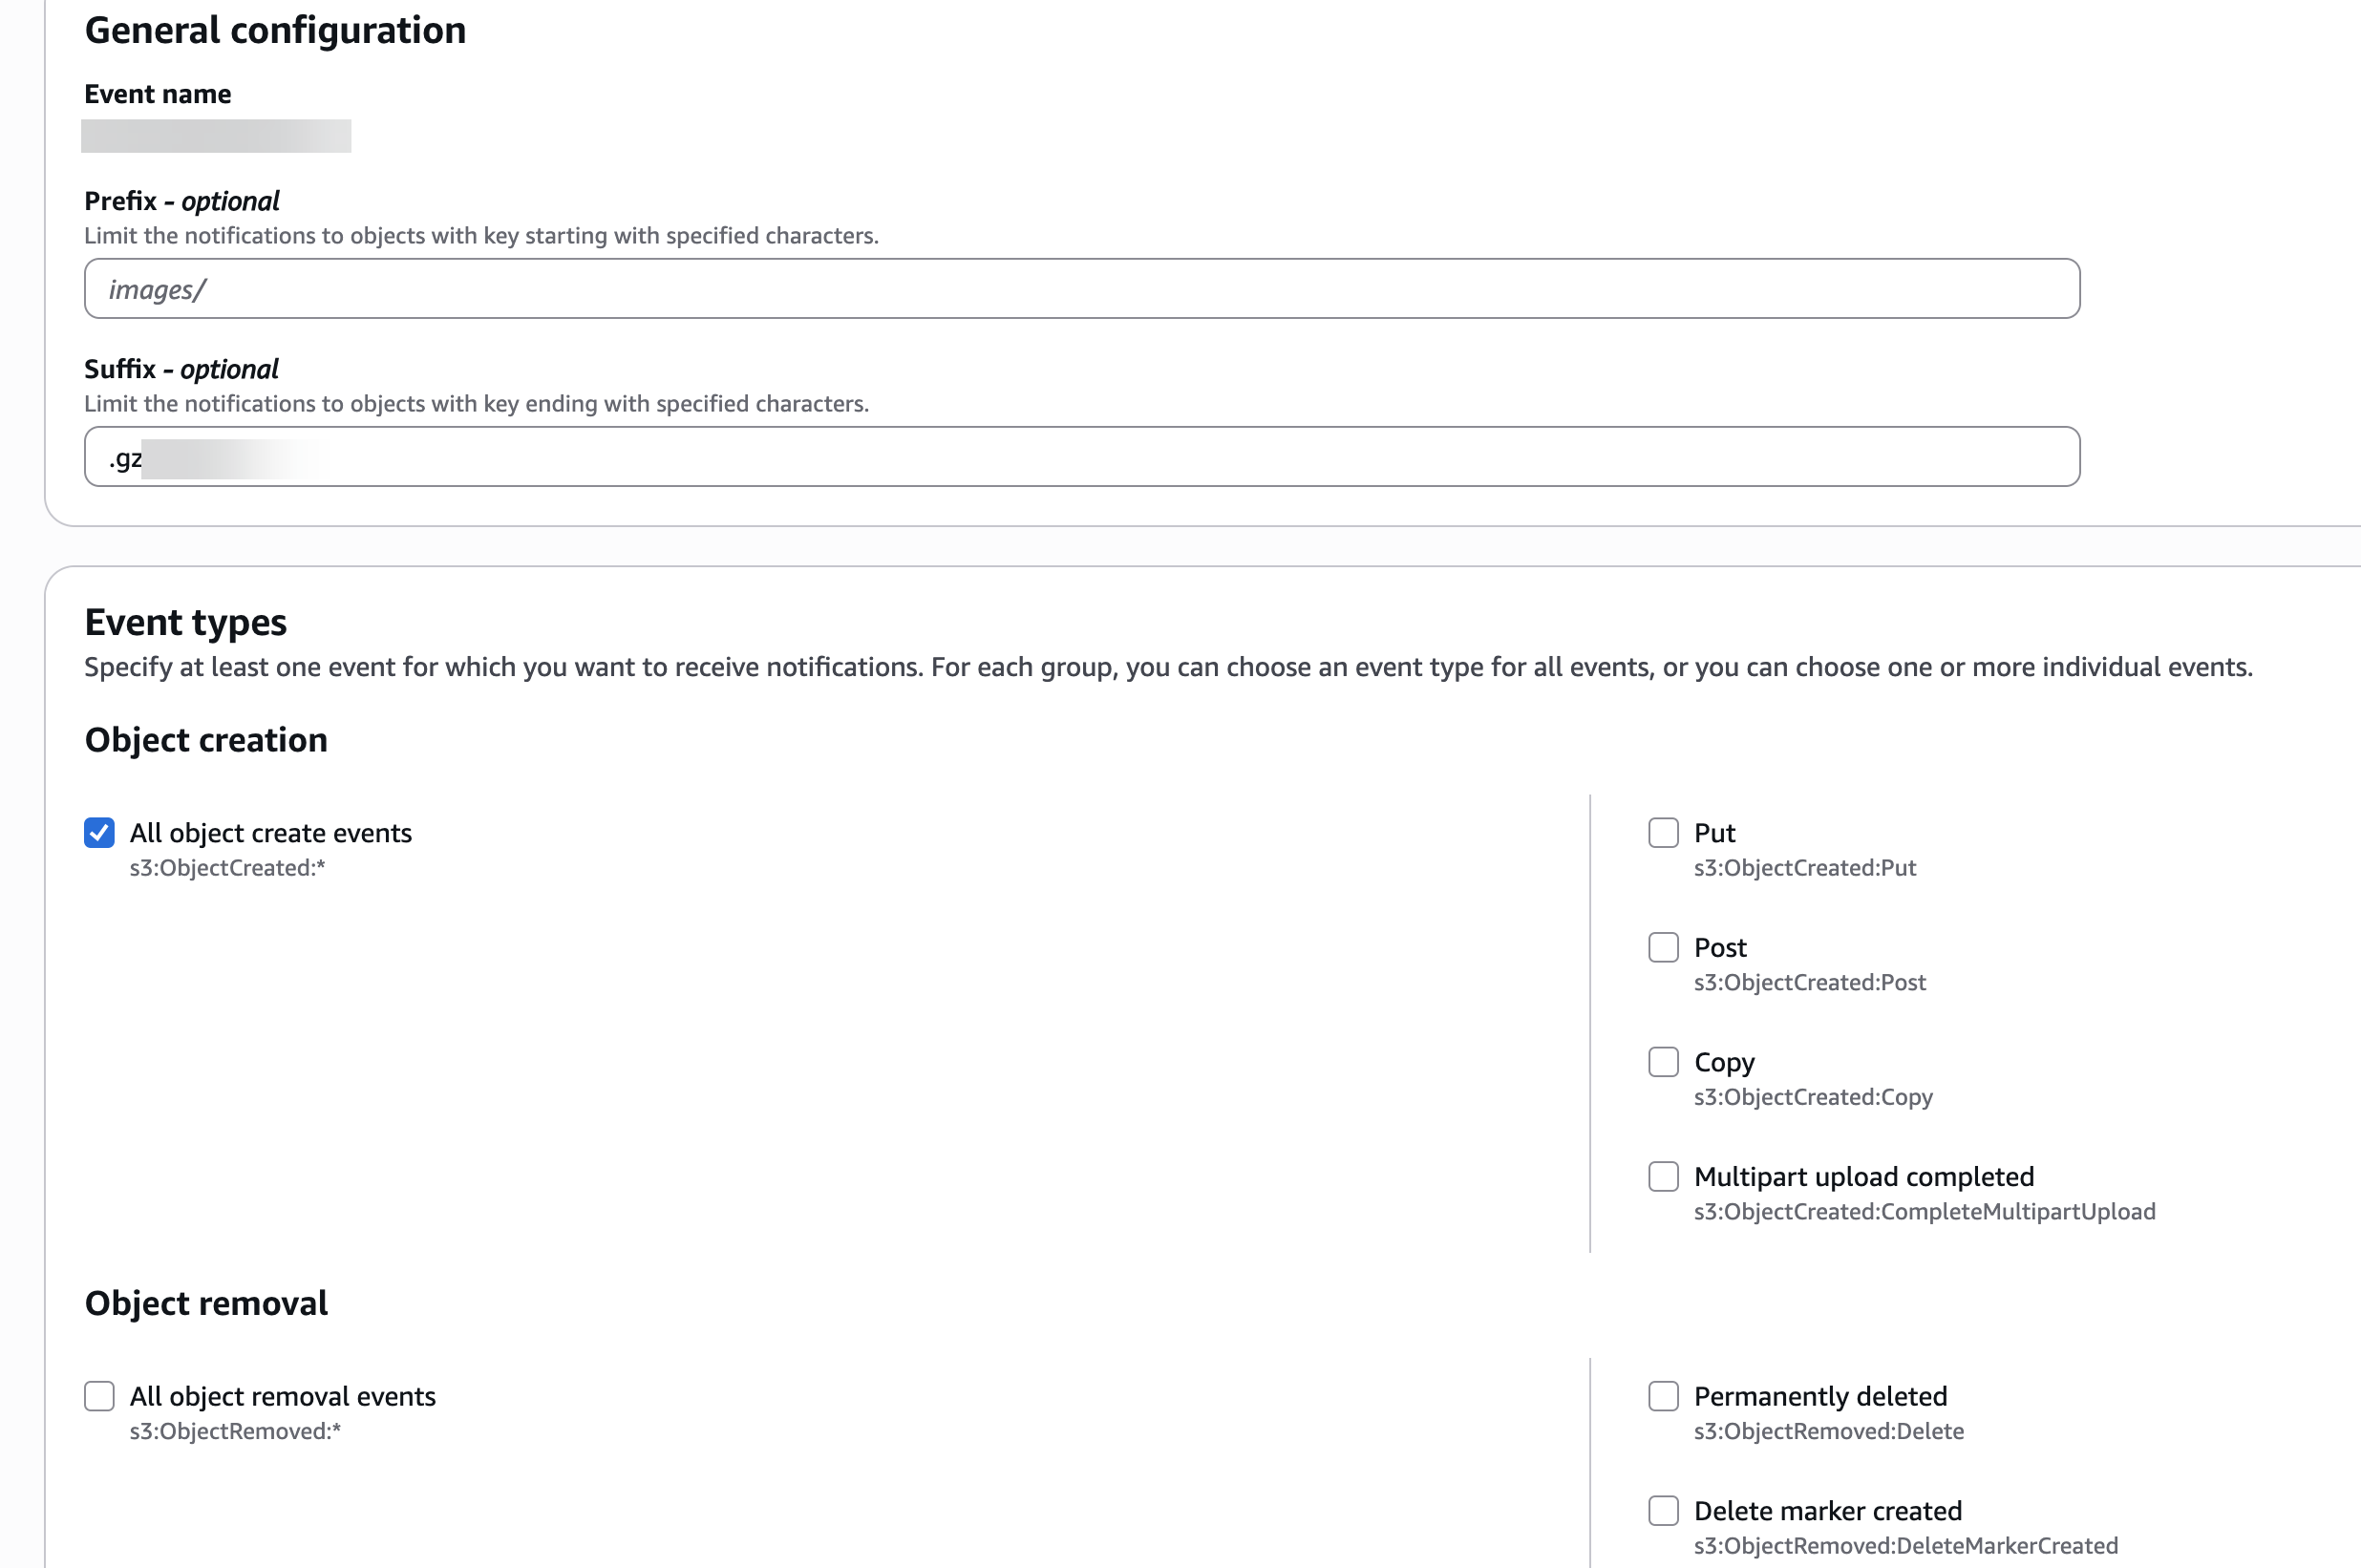
Allow the S3 Bucket to send events to the SQS Queue.
Replace the access policy attached to the queue with the following policy (in the SQS console, you select the queue, and in the Access policy tab, click Edit Access policy (Permissions).
{
   "Version":"2012-10-17",
   "Id":"example-ID",
   "Statement":[
      {
         "Sid":"example-statement-ID",
         "Effect":"Allow",
         "Principal":{
            "AWS":"*"
         },
         "Action":[
            "SQS:SendMessage"
         ],
         "Resource":"SQS-queue-ARN",
         "Condition":{
            "ArnLike":{
               "aws:SourceArn":"arn:aws:s3:*:*:bucket-name"
            }
         }
      }
   ]
}
Set up the Data Forwarder
Carbon Black Cloud Data Forwarders let you send large volumes of data such as alerts, authentication events, endpoint activity and watchlist hits to external storage like AWS S3, Azure Blob Storage, or Google Cloud Storage.
For AWS S3, the Data Forwarder requires a bucket with a resource-based policy that grants access to the AWS Principal it uses. Use the AWS Management Console to create the bucket and configure permissions. For more information, see Option 1: Use AWS S3 in the Broadcom Carbon Black Cloud documentation.
The Data Forwarder forwards the data from Carbon Black servers into a customer managed S3 bucket, from which the cloud collector collects the data for ingestion. To set up S3 bucket, see create an S3 Bucket in the AWS Console.
Use the following steps to create and configure the Data Forwarder in the Carbon Black Cloud console.
On the Carbon Black Cloud console, navigate to Settings > Data Forwarders.
Click Add Forwarder.
Specify a name for the Data Forwarder.
Select the data forwarder type and provider. Then, add supporting information.
Set the status to On or Off and save changes.
The data forwarder is created. After configuring the data forwarder, you can fetch data from the provider or connect the collector. For more information about setting up a data forwarder, see Data Forwarders and Add a Data Forwarder in the Broadcom Carbon Black Cloud documentation.
